
Overmixing vs. Undermixing Dough: Find the Perfect Balance

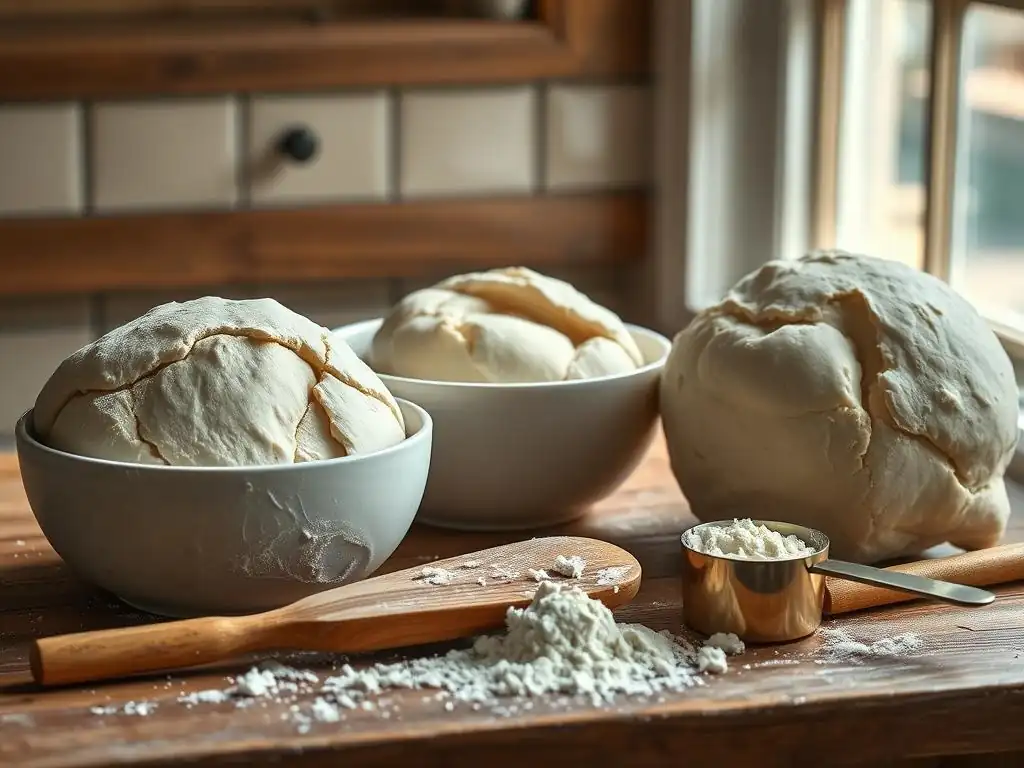
Welcome to BakeWithEase, your trusted guide to baking bliss! Ever wondered if you're overmixing or undermixing your dough? This article dives deep into achieving the perfect sourdough dough mixing balance, a crucial step in crafting that coveted crust and airy crumb. Unlock the secrets to mastering this technique, avoid common pitfalls, and elevate your baking game. Ready to knead your way to sourdough perfection? Let's get started!
- Overmixing vs. Undermixing Dough: Find the Perfect Balance for Baking Success
- Introduction: Achieving the Ideal Dough Consistency for Baking
- Understanding Undermixed Dough: Signs and Solutions
- The Dangers of Overmixing Dough: Recognizing the Signs
- Perfect Sourdough Dough Mixing: A Detailed Guide
- Common Baking Doughs: Mixing Guidelines for Each Type
- Troubleshooting Common Mixing Problems: A Practical Approach
- Tools and Techniques for Effective Dough Mixing
- Expert Tips for Perfect Dough Consistency
- Conclusion: Mastering the Art of Dough Mixing for Baking Excellence
-
Frequently Asked Questions
- What are the key signs of undermixing sourdough dough?
- What are the dangers of overmixing sourdough dough?
- How does hydration level affect the perfect mixing time for sourdough?
- What's the best way to determine if my sourdough dough is perfectly mixed?
- Can autolysing the flour and water help achieve perfect sourdough dough mixing?
- Final Reflection: The Art of Perfect Sourdough Dough Mixing
- Unlock Your Baking Potential: Master the Mix!
Overmixing vs. Undermixing Dough: Find the Perfect Balance for Baking Success
Introduction: Achieving the Ideal Dough Consistency for Baking
Baking is often described as a science, and getting the dough just right is a fundamental experiment. Whether you're aiming for a light, airy loaf of bread or tender, crumbly cookies, the consistency of your dough is paramount. This consistency is primarily determined by how you mix the ingredients – specifically, the degree of gluten development and the even distribution of components. Understanding the delicate balance between overmixing and undermixing is key to unlocking consistent, successful baking results every time you step into the kitchen. It's not just about combining ingredients; it's about transforming them.
Achieving the perfect dough consistency involves more than just following a recipe; it requires an understanding of how ingredients interact during the mixing process. Flour, particularly wheat flour, contains proteins like glutenin and gliadin. When these proteins are hydrated with liquid and agitated (mixed), they form a network called gluten.
This gluten network provides structure and elasticity to the dough, allowing it to trap gases produced by leavening agents (like yeast or baking powder) and create the desired texture in the final baked good. Too little mixing means a weak, underdeveloped gluten network, while too much mixing can lead to a tight, tough structure. Finding that sweet spot is the baker's art.
Why Proper Dough Mixing Matters for Baking Results
The way dough is mixed directly impacts the structure, texture, and overall quality of the final baked product. Consider a delicate cake batter: gentle mixing is required to incorporate ingredients without developing too much gluten, which would result in a tough cake. In contrast, a rustic bread dough needs significant mixing or kneading to build a strong gluten network capable of supporting a large rise and providing that characteristic chewy texture.
The difference in mixing techniques for these two items highlights why understanding the purpose of mixing for a specific bake is crucial. It's about tailoring the process to the desired outcome, ensuring ingredients like sugar, fat, and leavening are evenly distributed while developing the appropriate level of gluten.
Proper mixing also ensures that all ingredients are fully hydrated and integrated. Undermixed dough might have dry pockets of flour or uneven distribution of leavening, leading to unpredictable results – perhaps a loaf that doesn't rise evenly or cookies that spread too much on one side. Overmixing, on the other hand, can warm the dough excessively, potentially melting fats prematurely or negatively affecting leavening agents. For instance, overmixing muffin batter can lead to tunneling and a tough texture, a common issue even for experienced bakers. Mastering mixing techniques means controlling these variables for predictable and delicious results.
Overmixed and Undermixed Dough: Identifying the Issues
Spotting the difference between overmixed and undermixed dough can save a bake before it even hits the oven. While the signs vary slightly depending on the type of dough (bread vs. cake vs. cookie), there are general indicators to look for. Undermixed dough often appears shaggy, uneven, and may still have visible streaks of dry flour. It lacks cohesion and elasticity, tearing easily when stretched. Trying to shape undermixed bread dough, for example, would be frustratingly difficult as it wouldn't hold its form.
Conversely, overmixed dough typically looks very smooth and tight. It feels dense and might resist stretching, snapping back aggressively if you try to pull it. In some cases, particularly with lean bread doughs, overmixing can cause the dough to become sticky and slack as the gluten network starts to break down from excessive stress. For batters, overmixing often results in a shiny, almost gluey appearance. Learning to recognize these visual and textural cues is the first step in correcting mixing issues and moving towards perfect sourdough dough mixing or achieving ideal results with any dough type.
Understanding Undermixed Dough: Signs and Solutions
Undermixing is a common pitfall, especially for novice bakers or when trying a new recipe. It occurs when the ingredients haven't been sufficiently combined or when the necessary gluten structure hasn't adequately formed. The consequences can range from minor textural imperfections to complete baking failures. Recognizing the signs early is key to potentially rectifying the situation or, at the very least, understanding why your bake didn't turn out as expected.
The primary goal of mixing is to hydrate flour and other dry ingredients, distribute leavening agents and flavorings evenly, and develop gluten (in most cases). When this process is cut short, these crucial steps aren't completed. Imagine trying to make a loaf of challah, which relies heavily on a strong, elastic dough for its signature braid and fluffy texture. If undermixed, the dough would be weak, difficult to handle, and the final bread would be dense and crumbly rather than airy and chewy.
Recognizing Undermixed Dough: Key Indicators
Spotting undermixed dough is usually quite straightforward based on its appearance and feel.
- Shaggy Appearance: The dough looks rough and uneven, with dry patches of flour not fully incorporated.
- Lack of Cohesion: The dough doesn't come together into a smooth ball; it might crumble or fall apart easily.
- Low Elasticity: When you try to stretch a piece of the dough, it tears quickly without much resistance. It doesn't spring back when poked gently.
- Visible Ingredients: You might see streaks of unmixed flour, pockets of sugar, or unincorporated fat throughout the dough.
For example, cookie dough that is undermixed might look crumbly and fail to hold together when scooped or shaped. A bread dough, like one destined for a baguette, would feel stiff and lack pliability, making shaping nearly impossible. Recognizing these indicators allows you to adjust your mixing time or technique before proceeding to the next step in the recipe.
The Impact of Insufficient Mixing on Baked Goods
The effects of undermixing manifest clearly in the final baked product, often resulting in undesirable textures and structures.
- Dense Texture: Without a proper gluten network to trap gases, the baked good won't rise sufficiently, leading to a heavy, dense crumb.
- Uneven Texture: Pockets of unmixed ingredients can create inconsistencies, like tough spots from dry flour or areas with too much leavening.
- Crumbliness: Doughs that rely on gluten for structure (like bread) will lack the necessary scaffolding, resulting in a crumbly texture that falls apart easily.
- Poor Shape Retention: Cookies might spread excessively or irregularly, and bread loaves might collapse or bake flat because the dough lacks the strength to hold its shape during baking.
Consider a simple yeast bread recipe calling for 10 minutes of kneading. If you only mix for 3 minutes, the gluten won't develop. The yeast will still produce gas, but the weak dough structure won't be able to contain it, leading to a flat, heavy loaf with a tight crumb. This contrasts sharply with the desired light, open structure typical of well-mixed bread.
Techniques for Achieving Properly Mixed Dough: Avoiding Under-Mixing
Avoiding undermixing is primarily about ensuring sufficient time and proper technique.
- Follow Recipe Times: Pay close attention to the mixing times specified in the recipe, but also learn to judge the dough by feel and appearance, as mixer speeds and environmental factors can vary.
- Scrape Down the Bowl: Regularly stop your stand mixer or pause hand mixing to scrape down the sides and bottom of the bowl. This ensures all ingredients are fully incorporated and prevents dry pockets.
- Observe the Dough: Don't rely solely on a timer. Watch the dough as it mixes. Does it look smooth? Is it pulling away from the sides of the bowl? Does it pass the windowpane test (for bread doughs)?
- Adjust Hydration (Carefully): Sometimes, a dough seems undermixed because it's too dry. While it's best to stick to the recipe, a very small amount of additional liquid might be needed in dry environments or with certain flours, but add it judiciously.
For instance, when hand-kneading a basic white bread dough, you'll start with a shaggy mass. As you knead, the dough will become smoother, more elastic, and less sticky. This transformation takes time and effort – typically 8-12 minutes of active kneading for a standard loaf. Stopping too early will result in an undermixed dough. For cookie dough, mixing until just combined and no dry streaks remain is usually sufficient; overmixing is a greater risk here.
The Dangers of Overmixing Dough: Recognizing the Signs
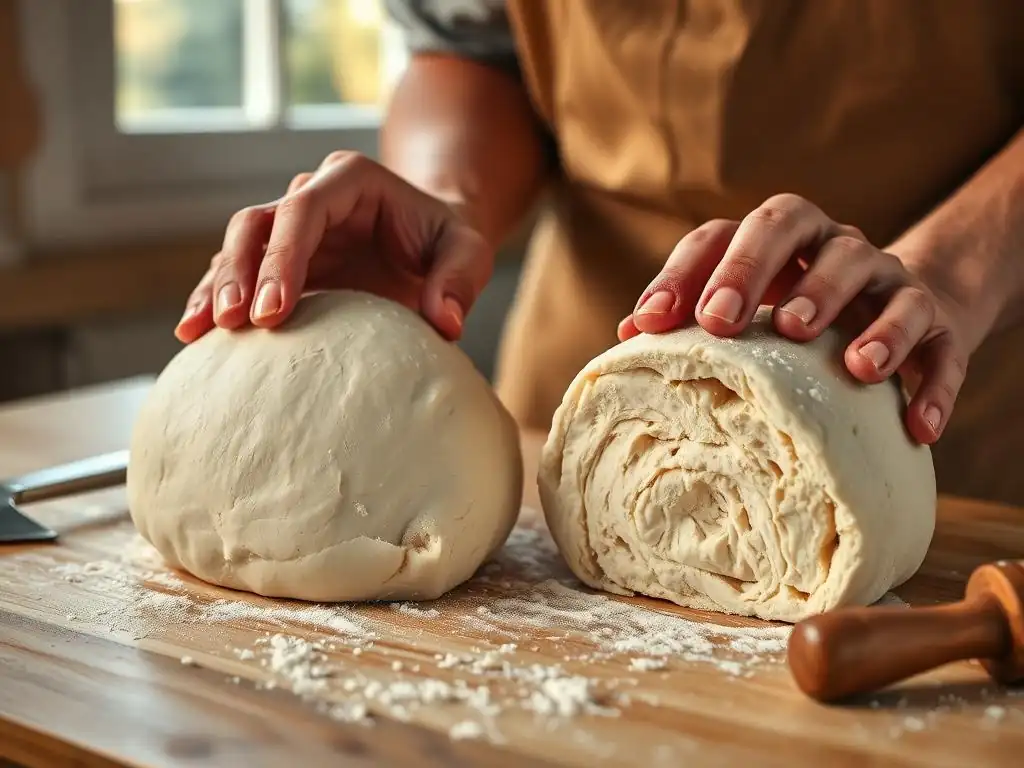
While undermixing leaves you with a weak structure, overmixing can lead to a structure that is too strong, too tight, or even broken down. This is particularly true for doughs where gluten development is either undesirable (like cakes or muffins) or needs careful control (like bread). Overmixing can quickly turn a potentially tender bake into something tough and unpleasant to eat.
The primary danger of overmixing, especially in doughs containing gluten, is the excessive development and tightening of the gluten network. Think of gluten strands like tiny elastic bands. Gentle mixing aligns and strengthens them. Overmixing stretches them too far, making them tense and resistant. In batters with less flour or different ratios (like cake), overmixing can create too much structure where softness is desired.
Identifying Overmixed Dough: Visual and Textural Cues
Overmixed dough often exhibits distinct characteristics that signal trouble:
- Smooth and Shiny Appearance: The dough surface looks unusually smooth, almost glassy or reflective.
- Very Tight and Stiff: The dough feels tough and resistant. It's hard to shape or flatten.
- Snaps Back Aggressively: When you try to stretch it, it resists and snaps back forcefully, much like an overstretched rubber band.
- Sticky and Slack (in extreme cases): Paradoxically, severely overmixed bread dough can become sticky and lose its structure as the overworked gluten network begins to break down.
Imagine trying to roll out sugar cookie dough for cutouts. If overmixed, the dough will be incredibly elastic and difficult to roll thinly; it will keep springing back. For bread dough, an overmixed batch might feel dense and heavy, resisting attempts to shape it into a boule or baguette, immediately shrinking back to a tight ball.
Gluten Development: Understanding the Overmixing Effect
Gluten develops when glutenin and gliadin proteins in flour combine with water and are agitated. This agitation aligns the proteins into a complex, elastic network. The more you mix or knead, the stronger and more extensive this network becomes.
- Proper Mixing: Develops a strong, elastic network capable of trapping gases and providing structure.
- Overmixing: Continues to work the gluten past its optimal point. The network becomes excessively tight and rigid. This rigidity prevents the dough from expanding properly during proofing and baking. In severe cases, the mechanical stress can actually start to break the gluten strands, leading to that sticky, slack texture mentioned earlier.
For instance, when making brioche, which is rich with butter and eggs, overmixing can be a risk even with the added fat. While fat inhibits gluten development to some extent, excessive mixing will still create a tougher crumb than desired for this tender bread. The goal is enough mixing to handle the dough and support the structure, but not so much that it becomes tough.
The Consequences of Overmixing: Tough and Dense Baked Goods
The results of overmixing are generally undesirable, particularly in items meant to be tender or light.
- Tough Texture: This is the most common outcome. Overdeveloped gluten creates a dense, chewy texture that is often described as rubbery or tough, especially in cakes, muffins, and cookies.
- Poor Volume: Overly tight gluten resists expansion, leading to baked goods that don't rise as high as they should.
- Tunneling (in batters): In batters like muffins or cakes, overmixing can create long, narrow holes (tunnels) in the crumb structure, another sign of excessive gluten development.
- Dryness: Overmixing can sometimes result in a perceived dryness, as the tight structure doesn't yield as readily to the bite.
Think about making chocolate chip cookies. If you cream the butter and sugar, add eggs and vanilla, and then vigorously beat in the flour for several minutes after it's incorporated, you'll likely end up with flat, tough cookies instead of soft, chewy ones. The extended mixing developed too much gluten from the small amount of flour present, fundamentally changing the cookie's intended texture.
Perfect Sourdough Dough Mixing: A Detailed Guide
Achieving perfect sourdough dough mixing is a specific skill that combines understanding general dough principles with the unique characteristics of sourdough. Sourdough relies on wild yeast and bacteria for leavening, which interact differently with the dough structure compared to commercial yeast. The hydration levels in sourdough are often higher (e.g., 75-85% hydration is common), which also affects mixing dynamics. Mastering this is crucial for that signature open crumb and tangy flavor.
The goal for perfect sourdough dough mixing is to develop a strong yet extensible gluten network capable of supporting the long fermentation periods typical of sourdough and trapping the gases produced by the starter. Unlike commercial yeast doughs where rapid, intense mixing might be used, sourdough often benefits from gentler, longer mixing or folding techniques. This approach allows the gluten to develop gradually, leading to a more relaxed and manageable dough.
Achieving Optimal Gluten Development in Sourdough
Optimal gluten development in sourdough isn't just about mechanical mixing; it often involves time. Many sourdough bakers use techniques like autolyse and stretch-and-folds to achieve the desired structure.
- Autolyse: This involves mixing just the flour and water from the recipe and letting it rest for 20-60 minutes (or even longer). This resting period allows the flour to fully hydrate and enzymes to start breaking down proteins, beginning gluten development without any mechanical work. For example, mixing 500g of bread flour with 375g of water (75% hydration) and letting it sit will start building gluten before the starter and salt are even added.
- Stretch and Folds: After the initial mixing (incorporating starter and salt), instead of continuous kneading, bakers perform a series of gentle stretch-and-folds over a period of 2-3 hours. Typically, 3-5 sets of folds are performed every 20-30 minutes. This technique aligns the gluten strands gradually and strengthens the dough without overworking it. A typical schedule might be: mix ingredients, rest 30 min, 1st fold, rest 30 min, 2nd fold, rest 30 min, 3rd fold, etc.
This gradual approach to gluten development is often favored for high-hydration sourdough as it's less messy than kneading and builds structure effectively while promoting dough extensibility, which is key for that open crumb.
Sourdough Specifics: Overmixing and Undermixing Considerations
The high hydration common in sourdough makes both overmixing and undermixing slightly different challenges compared to lower-hydration doughs.
- Undermixing: An undermixed high-hydration sourdough dough will feel like a sticky, shaggy mass with no structure. It won't hold any shape and will be impossible to handle effectively. The resulting bread will be dense and gummy. This often occurs if the autolyse step is skipped or insufficient stretch-and-folds are performed.
- Overmixing: While harder to do by hand with high-hydration dough, overmixing in a stand mixer is possible. It can lead to a dough that feels very tight and tears easily when stretched, rather than extending smoothly. It might also become excessively sticky as the gluten breaks down. The final loaf might be dense with a tight crumb, lacking the desired open structure. Achieving perfect sourdough dough mixing means avoiding these extremes.
For a dough with 80% hydration, the initial mix will look very wet. Undermixing would mean it stays that way, a puddle of shaggy batter. Proper mixing or folding will transform it into a cohesive mass that, while still wet, has tension and can hold some shape. Overmixing it in a machine would make it smooth but potentially tear-prone and difficult to handle without it becoming a sticky mess again.
Signs of Perfectly Mixed Sourdough Dough
Knowing when your sourdough dough is perfectly mixed (or developed through folding) is crucial for achieving that sought-after loaf.
- Smooth, but not overly tight, Surface: The dough should look relatively smooth and feel pliable, not stiff or resistant.
- Elasticity and Extensibility: When you stretch a piece, it should extend significantly without tearing. It should also have some resistance and slowly spring back when poked.
- Passes the Windowpane Test: This is a key indicator. Take a small piece of dough and gently stretch it between your fingers. If you can stretch it thin enough to see light through it without it tearing, the gluten is well-developed.
- Holds Shape (Relatively): While high-hydration dough won't hold a perfect sphere immediately, a well-developed dough will have enough surface tension to hold a rounded shape for a moment when placed on a surface.
For achieving perfect sourdough dough mixing, aim for a dough that is manageable, elastic, and passes the windowpane test. This ensures it has the strength to rise and hold its structure, leading to a beautiful open crumb in the final bake.
Common Baking Doughs: Mixing Guidelines for Each Type
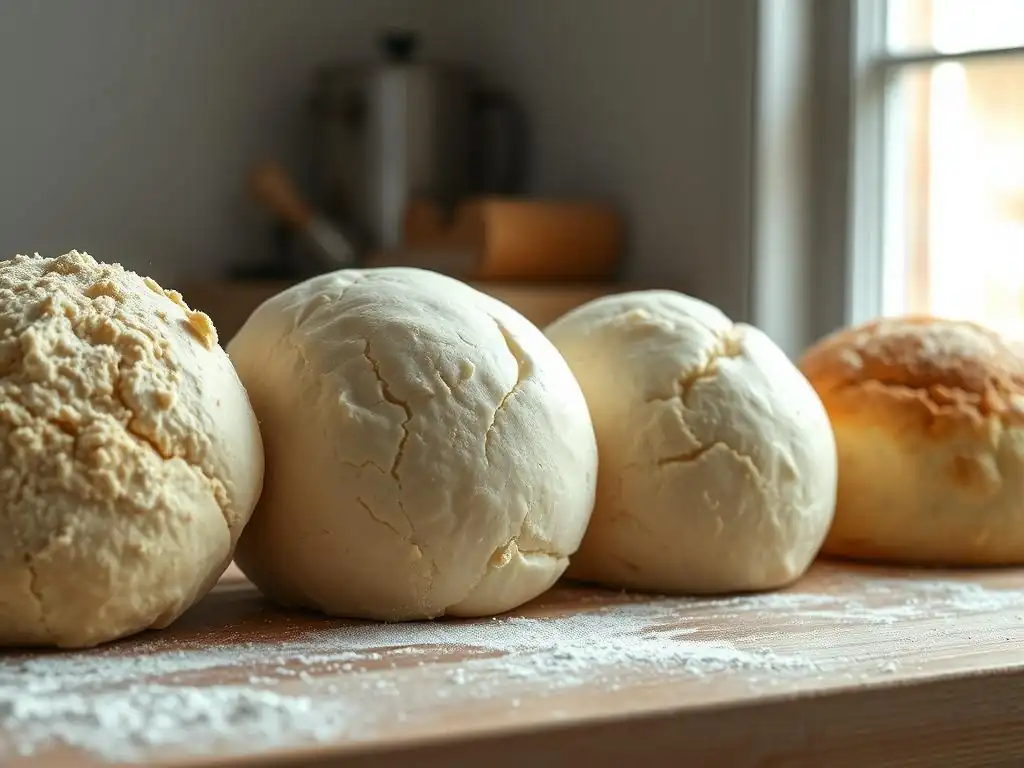
Different doughs require different mixing approaches. What works for a chewy bread will ruin a tender cake. Understanding the specific goals for mixing each type of dough is fundamental to successful baking. The amount of gluten development needed, the distribution of fat, and the incorporation of air all vary significantly.
Mixing is tailored to the desired outcome. For items where a tender, soft crumb is paramount, like cakes or muffins, minimal mixing after the dry ingredients are added is key to limit gluten development. For items requiring structure and chewiness, like most breads, significant mixing or kneading is necessary. Cookies fall somewhere in between, often requiring just enough mixing to combine ingredients.
Cookie dough typically requires less mixing than bread dough. The goal is to combine ingredients thoroughly without developing excessive gluten, which would lead to tough cookies.
- Creaming Method: Many cookie recipes start by creaming butter and sugar. This step incorporates air, which contributes to leavening and texture. This is mixed until light and fluffy, usually several minutes.
- Adding Eggs/Liquid: These are mixed until just incorporated.
- Adding Dry Ingredients: This is the critical step for avoiding overmixing. Once the flour (and other dry ingredients) are added, mix only until no dry streaks of flour are visible. This might take only 30 seconds to 1 minute on low speed in a mixer, or just a few turns with a spatula by hand.
Overmixing cookie dough after adding flour develops gluten, resulting in cookies that spread too much, are tough or rubbery, and lack that desired tender crumb. Undermixing can leave pockets of dry flour, leading to uneven texture and spread. The "sweet spot" for most cookie doughs is just past the point where dry ingredients disappear.
Cake Batter: Achieving the Right Texture Through Proper Mixing
Cake batter requires the most delicate mixing approach, especially after flour is added. Tenderness is key, and gluten development is the enemy of tender cake.
- Creaming Method: Similar to cookies, butter and sugar are often creamed for aeration.
- Alternating Wet and Dry: Many recipes call for adding dry and wet ingredients alternately, starting and ending with dry. This helps distribute ingredients evenly.
- Minimal Mixing After Flour: Once the flour is added, mix only until it is just combined. This is crucial. Overmixing cake batter activates gluten, leading to a tough, dry cake with potential tunneling.
For example, a standard yellow cake recipe might instruct you to mix on low speed for only 30-45 seconds after adding the last of the dry ingredients. Any longer dramatically increases the risk of overdeveloping gluten. The batter should look smooth but not elastic or shiny. Undermixing might leave small pockets of flour, but overmixing has more severe consequences for cake texture.
Bread Dough: Mastering the Art of Gluten Development
Bread dough, in contrast to cake and cookies, requires significant gluten development for structure, rise, and chewiness.
- Initial Mixing: Combine ingredients until a shaggy dough forms and no dry flour remains.
- Kneading/Developing: This is where the magic happens. Kneading (by hand or mixer) stretches and aligns the gluten proteins. This process can take 8-15 minutes in a stand mixer or 10-20 minutes by hand, depending on the recipe, hydration, and flour type. The goal is a smooth, elastic dough that passes the windowpane test.
- Sourdough and High Hydration: As discussed, techniques like autolyse and stretch-and-folds are often used for these doughs to develop gluten more gradually and manage stickiness, contributing to perfect sourdough dough mixing.
Undermixed bread dough will be dense and heavy, failing to rise properly. Overmixed bread dough can become tight, tough, or even sticky and slack if severely overworked, resulting in a dense loaf with a tight crumb, lacking the airy structure characteristic of good bread. Mastering bread mixing means understanding when the dough has just the right balance of strength and extensibility.
Troubleshooting Common Mixing Problems: A Practical Approach
Even with careful attention, mixing problems can occur. Understanding how to identify whether your dough is overmixed or undermixed is the first step in troubleshooting. While it's difficult to completely fix severely overmixed dough, there are often ways to salvage or adapt a problematic batch. Prevention, however, remains the best strategy.
Approaching mixing problems requires a bit of detective work. You need to assess the dough's look and feel and compare it to what the recipe or the desired outcome dictates. Did you follow the mixing times? Were your ingredients at the correct temperature? Was your flour fresh? These factors can all influence how the dough develops.
Identifying the Cause: Overmixing or Undermixing?
Use the signs discussed earlier to diagnose the problem:
- Undermixing: Dough is shaggy, crumbly, tears easily, visible dry spots. Feels weak and lacks elasticity.
- Overmixing: Dough is very smooth, tight, resists stretching, snaps back aggressively. May feel dense or, in extreme cases, sticky and slack.
For example, if you're making pizza dough and it feels stiff and hard to stretch into a round, snapping back repeatedly, it's likely overmixed. If it's falling apart and won't form a cohesive ball, it's undermixed. For a cake batter, if it's tough and elastic when you stir it, it's overmixed. If you see streaks of flour after the stated mixing time, it's undermixed.
Corrective Actions: Rescuing Problematic Dough
Rescuing dough depends on the issue:
- Undermixed Dough: Simply continue mixing! For doughs meant to be kneaded (like bread or pizza), keep kneading until it reaches the desired consistency (smooth, elastic, passes windowpane). For batters (cake, muffins) or cookie doughs, mix gently just until dry ingredients are incorporated. Be careful not to flip into overmixing.
- Overmixed Dough: This is harder to fix.
- Bread Dough: If slightly overmixed, resting the dough can help. Let it rest for 20-30 minutes. This allows the gluten to relax slightly. You might need to adjust subsequent steps, like proofing time, as the dough might behave differently. If severely overmixed and sticky/slack, it might be irrecoverable for a structured loaf, but could potentially be used for something like flatbreads or crackers.
- Batters/Cookie Dough: Unfortunately, severely overmixed batters or cookie doughs cannot be "unmixed." The gluten structure is already too developed. The best you can do is proceed with the recipe, understanding the texture will be compromised (tough cake, tough/flat cookies). Sometimes adding a tiny bit more liquid or fat might help slightly, but it's often a lost cause for achieving the intended texture.
A common example is slightly overmixed bread dough. Instead of forcing the shaping, let it rest for 30 minutes. You'll likely find it's much more pliable and easier to handle afterward. This rest allows some of the tension in the gluten network to dissipate.
Preventing Future Mixing Issues: Best Practices
Prevention is always better than cure in baking. Adopting good habits minimizes mixing problems:
- Read the Recipe Thoroughly: Understand the purpose of the mixing steps and the desired final dough consistency described.
- Measure Ingredients Accurately: Especially flour and liquid. Incorrect ratios significantly impact dough hydration and mixing requirements. Using a kitchen scale is highly recommended (e.g., 120g of flour per cup is a common approximation, but scales are more precise).
- Know Your Equipment: Stand mixers vary in power and speed. Start slow and learn how your mixer handles different doughs. Mixing times in recipes are often guidelines; observing the dough is key.
- Pay Attention to Dough Temperature: Ideal dough temperature (around 75-80°F or 24-27°C for many yeasted breads) affects mixing. Warm dough develops gluten faster.
- Mix Just Until Necessary: Especially when adding flour to batters or cookie doughs. Stop mixing as soon as the dry ingredients disappear. For bread, mix until the dough feels right and passes the windowpane test, not just until the timer goes off.
- Regularly Scrape the Bowl: Ensure all ingredients are incorporated evenly.
By implementing these practices, whether you're working on perfect sourdough dough mixing or a simple batch of brownies, you significantly increase your chances of achieving the ideal dough consistency every time.
Tools and Techniques for Effective Dough Mixing
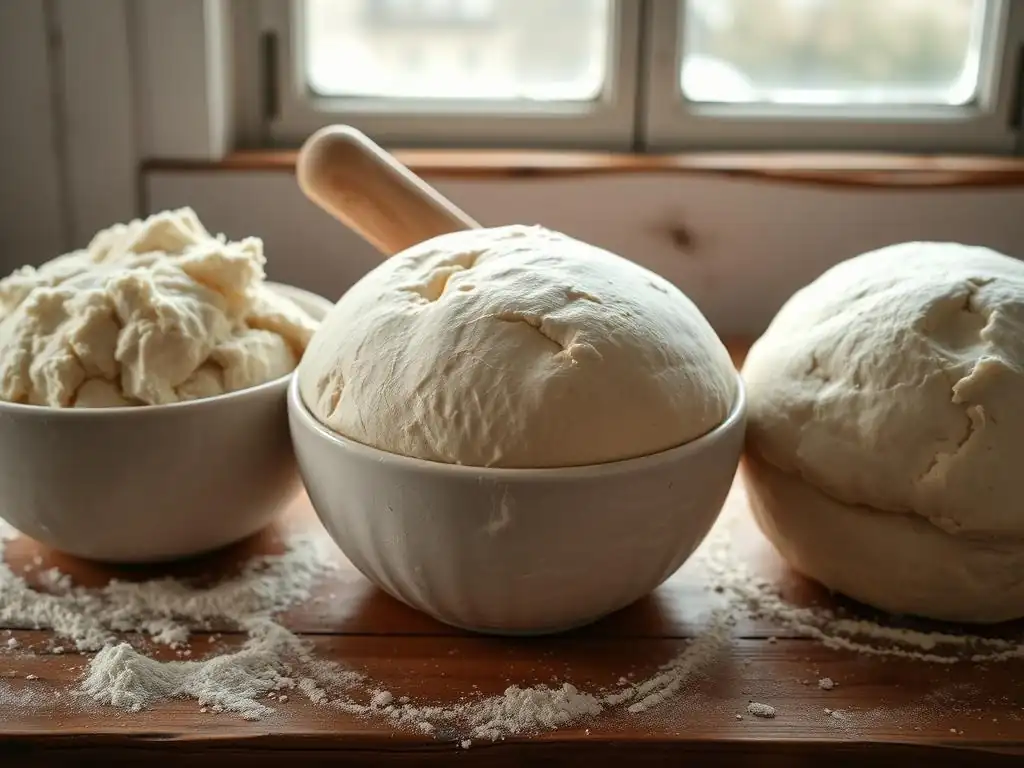
The tools you use and the techniques you employ play a significant role in achieving the right dough consistency. From powerful stand mixers to the simple strength of your hands, each method has its advantages and considerations. Understanding how to leverage your tools effectively is part of mastering the mixing process.
Choosing the right tool often depends on the type of dough and the quantity. For heavy, large batches of bread dough, a stand mixer is invaluable. For delicate batters or small quantities, hand mixing might be perfectly adequate and offers more control. The temperature of your ingredients and the hydration level of the dough also influence the mixing process, regardless of the tool.
Stand Mixers: Mastering the Art of Automated Mixing
Stand mixers are powerful allies for bakers, especially when dealing with stiff or large volume doughs that require significant kneading or mixing time.
- Dough Hook: Use the dough hook attachment for kneading bread doughs, pizza doughs, and other yeasted doughs. Start on a low speed (e.g., Speed 1 or 2) to bring ingredients together, then increase to a medium speed (e.g., Speed 3 or 4) for developing gluten. Mixing times can range from 5-15 minutes depending on the mixer and dough. For example, a typical artisan bread dough might require 8-10 minutes on medium speed.
- Paddle Attachment: Use the paddle attachment for mixing batters (cakes, muffins), cookie doughs, and creaming butter and sugar. Mix on low to medium speeds. Be extra cautious not to overmix when using the paddle for batters after adding flour – often 30-60 seconds is sufficient.
- Speed Control: Learning your mixer's speed settings is crucial. High speeds generate heat and can overwork dough quickly. Low speeds are often better for incorporating dry ingredients or starting kneading.
While stand mixers are convenient, they can lead to overmixing if not watched carefully. The dough can become very smooth and tight rapidly on higher speeds. Always observe the dough's appearance and feel, rather than relying solely on the timer.
Hand Mixing: Achieving Perfect Dough by Hand
Hand mixing and kneading offer a tactile connection to the dough and are perfectly capable of producing excellent results, including perfect sourdough dough mixing.
- Initial Mixing: Use a spoon, spatula, or your hands to bring the ingredients together into a shaggy mass.
- Kneading: For bread doughs, turn the shaggy mass onto a clean surface (lightly floured if necessary) and knead by folding, pressing, and stretching the dough. This process builds gluten. It typically takes longer than machine kneading (10-20 minutes or more) but gives you direct feedback on the dough's development. You'll feel it transform from sticky and shaggy to smooth, elastic, and less sticky.
- Folding (for High Hydration/Sourdough): As discussed, stretch-and-folds are a gentle hand technique ideal for wet or sourdough doughs. This builds strength and structure with minimal mess and less risk of overworking compared to vigorous kneading.
Hand mixing allows for more control and makes it easier to feel the dough's consistency. It's harder to accidentally overmix significantly when kneading by hand because it requires physical effort, and you'll naturally stop when the dough feels "right" – smooth, elastic, and easy to handle.
The Importance of Dough Temperature and Hydration
Two critical factors influencing mixing are dough temperature and hydration level.
- Temperature: Warmer dough develops gluten faster than cold dough. In a warm kitchen or with warm ingredients, mixing times might need to be slightly shorter. Conversely, cold dough takes longer. Recipes sometimes specify water temperature (e.g., 105-115°F for activating commercial yeast, or cooler water for a longer, slower fermentation like in perfect sourdough dough mixing). Maintaining a final dough temperature within a desired range (e.g., 75-80°F for many yeasted breads) is a sign of effective mixing and temperature control.
- Hydration: This refers to the ratio of water to flour (water weight / flour weight * 100%). Higher hydration doughs (like 75-85% hydration sourdough) are wetter, stickier, and require different mixing techniques (like folding) and longer development times compared to lower hydration doughs (like a 60% hydration bagel dough, which requires vigorous kneading). A higher hydration dough will feel much looser even when fully developed.
Understanding how temperature and hydration impact mixing helps you adjust your technique and expectations. A high-hydration dough will never feel as stiff as a low-hydration one, even when perfectly mixed.
Expert Tips for Perfect Dough Consistency
Beyond the basic techniques, a few expert tips can help you consistently achieve perfect dough consistency, avoiding the pitfalls of overmixing and undermixing. These involve relying on your senses and adapting to the specific conditions of your bake.
Becoming adept at judging dough by feel and appearance is one of the most valuable skills a baker can develop. While recipes provide guidance, no two batches of dough are exactly alike due to variations in flour, environment, and ingredients. Learning to read the dough itself is key.
The Windowpane Test: Determining Gluten Development
The windowpane test is a classic method, primarily for yeasted bread doughs, to assess gluten development.
- How to Perform: Pinch off a small piece of dough, about the size of a golf ball. Gently stretch it with your fingers, rotating and pulling from the center outwards.
- What to Look For: If the dough is properly developed, you should be able to stretch it thin enough to see light through the center, creating a translucent "window," without the dough tearing.
- Interpretation:
- Tears immediately: Undermixed. Continue mixing/kneading.
- Stretches a bit but tears before becoming translucent: Needs more mixing/kneading.
- Stretches thin and you can see light through it: Properly mixed.
- Becomes very thin but tears easily after reaching maximum stretch: Potentially slightly overmixed or needs rest.
This test provides a tangible way to know when your bread dough, including dough for perfect sourdough dough mixing, has developed sufficient structure.
Observing Dough Texture: Visual Clues for Mixing
Beyond the windowpane test, simply observing the dough's texture provides valuable clues:
- Smoothness: As dough is mixed, it becomes smoother. Undermixed dough is shaggy; properly mixed dough is relatively smooth; overmixed dough can be excessively smooth and shiny or, conversely, sticky and rough if the gluten has broken down.
- Elasticity vs. Extensibility: Elasticity is the dough's tendency to spring back; extensibility is its ability to stretch. Properly mixed dough has a good balance – it stretches without tearing easily but also has enough tension to hold its shape. Undermixed dough lacks both. Overmixed dough is highly elastic (snaps back) but may lack extensibility (tears easily when stretched).
- Pulling Away from the Bowl: In a stand mixer, properly kneaded dough will often pull cleanly away from the sides of the bowl, gathering around the dough hook. Undermixed dough will stick to the sides; overmixed dough might also stick if the gluten breaks down.
Paying close attention to these visual and tactile cues as you mix is often more reliable than strictly adhering to a timer.
Adapting Mixing Times: Adjusting for Different Recipes
Mixing times provided in recipes are guidelines, not strict rules. Several factors necessitate adaptation:
- Flour Type: Different flours (all-purpose, bread flour, whole wheat) have varying protein levels and absorbency, affecting mixing time. Higher protein flour needs more mixing to develop gluten.
- Hydration: Higher hydration doughs often require longer total development time (though less intensive initial mixing) compared to lower hydration doughs.
- Mixer Power/Speed: A powerful commercial mixer will develop dough much faster than a small home mixer or hand kneading.
- Ambient Temperature: Dough develops faster in a warm environment.
For example, if a recipe calls for 10 minutes of kneading in a stand mixer, but your kitchen is cold and you're using a less powerful mixer, you might need 12-15 minutes to reach the same stage of development. Conversely, on a hot day with a powerful mixer, you might only need 8 minutes. Always use the dough's look and feel (and the windowpane test for bread) as your ultimate guide, adapting the time as needed to achieve perfect sourdough dough mixing or any other dough goal.
Conclusion: Mastering the Art of Dough Mixing for Baking Excellence
Finding the perfect balance between overmixing and undermixing is a fundamental skill that elevates your baking from good to great. It's about understanding how ingredients interact, particularly the development of gluten, and how this impacts the final texture and structure of your baked goods. While the specific signs and techniques vary depending on whether you're making delicate cake batter, tender cookie dough, or robust bread, the core principle remains the same: mix just enough to achieve the desired consistency for that specific bake.
By learning to recognize the visual and textural cues of properly mixed dough, understanding the consequences of getting it wrong, and employing the right tools and techniques, you gain greater control over your baking outcomes. Whether you rely on a stand mixer or your own two hands, paying attention to the dough itself is the most important step. This careful approach is especially rewarding when aiming for perfect sourdough dough mixing, where patient development leads to truly spectacular loaves.
Finding Your Perfect Dough Mixing Balance
Mastering dough mixing is an ongoing journey of practice and observation. Don't be discouraged by batches that don't turn out perfectly; each one is a learning opportunity. Pay attention to how the dough feels at different stages, note how variations in mixing time affect the final product, and gradually build your intuition. Experiment with different recipes and techniques, always observing the dough's transformation.
Think of it as learning a language – the dough communicates its needs through its texture and appearance. The more you practice listening to it, the better you'll become at responding correctly. Soon, you'll instinctively know when your cookie dough is just combined, when your cake batter risks being overmixed, and when your bread dough has achieved that perfect balance of strength and elasticity needed for a beautiful rise.
Baking with Confidence: Achieving Consistent Results
With a solid understanding of overmixing vs. undermixing, you'll approach your baking projects with newfound confidence. You'll be better equipped to troubleshoot issues as they arise and, more importantly, prevent them from happening in the first place. Consistent mixing leads to consistent results, allowing you to reliably produce delicious, perfectly textured baked goods.
From rustic loaves born from perfect sourdough dough mixing to light-as-air cakes and melt-in-your-mouth cookies, your baking will benefit immensely from this foundational skill. So, the next time you measure out your flour, remember that the mixing process is where the transformation truly begins. Pay attention, feel the dough, and find your perfect balance for baking success.
Frequently Asked Questions
What are the key signs of undermixing sourdough dough?
Undermixed sourdough will appear shaggy and weak, lacking strength and elasticity. It won't hold its shape well and will be difficult to work with.
What are the dangers of overmixing sourdough dough?
Overmixing can damage the gluten structure, leading to a sticky, slack dough that is difficult to shape and may result in a flat, dense loaf.
How does hydration level affect the perfect mixing time for sourdough?
Higher hydration doughs often require less mixing time due to increased water content aiding gluten development. Conversely, drier doughs might need slightly longer mixing.
What's the best way to determine if my sourdough dough is perfectly mixed?
Look for a smooth, elastic dough that pulls away from the sides of the bowl. The windowpane test, where you can stretch a small piece thin enough to see light through without tearing, is also a good indicator.
Can autolysing the flour and water help achieve perfect sourdough dough mixing?
Yes, autolysing allows the flour to fully hydrate before mixing, promoting better gluten development and potentially reducing the overall mixing time required for the perfect sourdough dough.
Final Reflection: The Art of Perfect Sourdough Dough Mixing
In the world of baking, the delicate balance between overmixing and undermixing dough is crucial for achieving the perfect sourdough. As we explore the nuances of dough mixing, it becomes clear that this seemingly simple technique holds significant relevance in our culinary practices today. The mastery of mixing not only impacts the texture and flavor of our bread but also reflects our understanding of the science behind baking. Perfecting this balance can transform a good loaf into an extraordinary one.
Creating the ideal sourdough is more than just a recipe; it’s a cultural expression that connects us to our roots and to each other. The act of kneading and mixing dough has been a part of human history for centuries, symbolizing nourishment and community. As we embrace the art of sourdough baking, we also participate in a larger narrative of tradition and innovation. Baking is both an art and a science, where every ingredient and technique plays a vital role in the final masterpiece.
This ongoing journey encourages us to experiment, learn, and share our experiences, fostering a sense of belonging in the baking community.
As you reflect on the insights shared in this article, consider how you can apply the principles of perfect sourdough dough mixing in your own baking endeavors. Embrace the process, experiment with different techniques, and don’t shy away from making mistakes. Each loaf you create is an opportunity to connect with the age-old tradition of bread-making, and in doing so, you contribute to the rich tapestry of culinary heritage. So, roll up your sleeves, mix with intention, and let the magic of sourdough unfold in your kitchen!
Unlock Your Baking Potential: Master the Mix!
Thanks for taking the time to learn about the delicate art of mixing dough! We hope you now feel more confident in achieving perfectly textured baked goods. Ready to put your newfound knowledge into practice?
- Bake a test batch: Try out a new recipe, paying close attention to the mixing instructions. Notice the difference a little extra (or less!) mixing can make! This is the best way to cement your learnings.
- Share your results: Show off your perfectly mixed masterpiece (or your learning curve!) on social media – use #BakeWithEase to connect with our community!
- Challenge a friend: Ask a fellow baker to try a recipe with you and compare your results; it’s a fun way to learn together.
What’s your biggest mixing challenge, and what will you bake to conquer it?