
Uneven Holes: Troubleshooting Your Bread Crumb Structure

Welcome to BakeWithEase, your trusted companion on your baking journey! Ever wondered why your homemade bread has an uneven bread crumb structure? You're not alone! Discover the secrets behind those frustrating holes and learn how to achieve that perfect, consistent crumb you've always dreamed of. Let's unlock the mysteries behind baking and transform your bread from good to gorgeous – read on to find out how!
- Uneven Holes: Troubleshooting Your Bread Crumb Structure – BakeWithEase
- Understanding Sourdough Crumb Structure and Its Importance
- Identifying the Causes of Large Holes in Sourdough Bread
- Troubleshooting Large Holes: Step-by-Step Solutions
- Preventing Large Holes in Sourdough Bread in the Future
- Advanced Techniques for a More Uniform Crumb Structure
- Conclusion: Achieving the Perfect Sourdough Crumb at BakeWithEase
-
Frequently Asked Questions
- What causes an uneven bread crumb structure with large, irregular holes?
- How can I prevent large, irregular holes from forming in my bread?
- My bread dough rose too quickly. Could this be related to the uneven crumb?
- What role does hydration play in achieving an even bread crumb structure?
- Is there a specific type of flour that contributes to an uneven crumb structure?
- Final Reflection: The Crumb's Tale: A Baker's Journey to Perfection
- Unearth Your Baking Brilliance: Level Up Your Bread Crumb Game!
Uneven Holes: Troubleshooting Your Bread Crumb Structure – BakeWithEase
Understanding Sourdough Crumb Structure and Its Importance
What is Sourdough Crumb and Why Does It Matter?
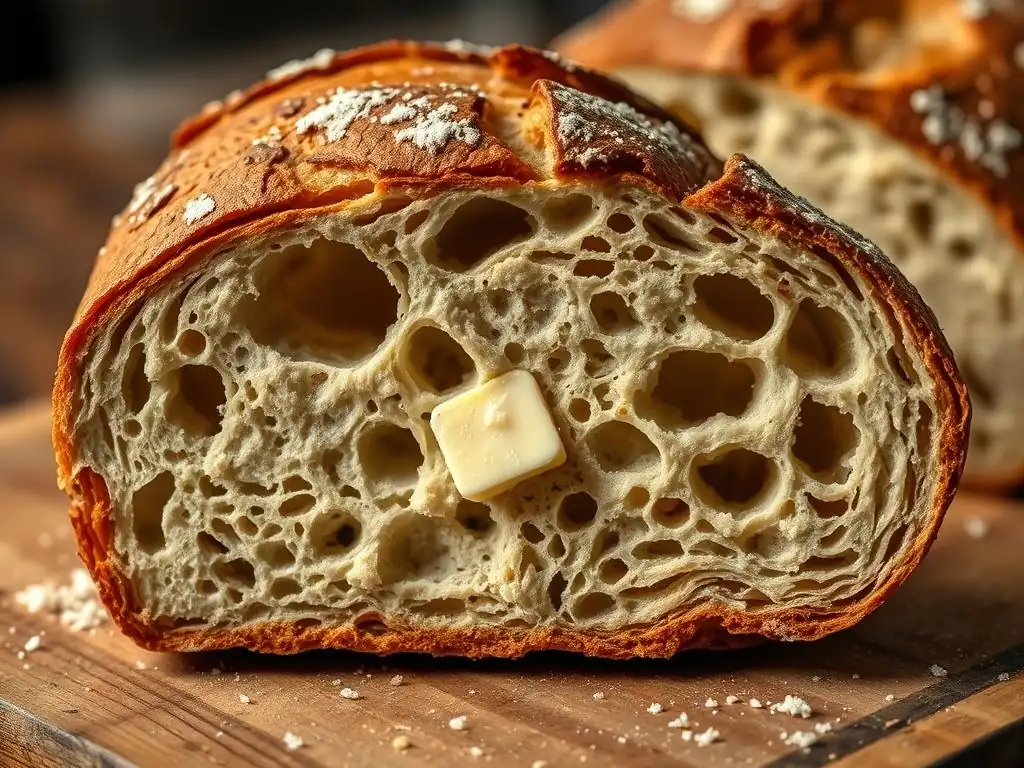
Sourdough crumb refers to the interior texture of your loaf, characterized by the distribution, size, and uniformity of air pockets. An even crumb delivers the perfect balance of chew and softness, making each slice enjoyable for sandwiches or toasting. Conversely, an uneven bread crumb structure with large, irregular holes can lead to slices that tear or collapse under toppings.
“A harmonious crumb is the mark of a well-tended starter and precise technique.”
— Artisan Baker at BakeWithEase
Beyond aesthetics, crumb structure influences moisture retention. A well-structured crumb keeps your loaf fresher for longer by trapping steam within a consistent network of gluten strands. When holes are too large or sporadic, moisture escapes rapidly, resulting in a loaf that stales faster.
The Ideal Sourdough Crumb: Achieving Openness and Evenness
The ideal crumb features a mix of small, medium, and occasional larger holes, creating that signature “open” feel without compromising sliceability. Openness ensures lightness, while evenness preserves structural integrity—especially important if you’re packing on avocado, cheese, or spreads.
At BakeWithEase, we recommend aiming for 50–60% hydration for balanced openness. This ratio encourages starch gelatinization and even gluten degradation, promoting a crumb that’s pillowy yet resilient. Remember, true mastery lies in adapting hydration to your flour’s absorption and ambient conditions rather than following a fixed number.
Identifying the Causes of Large Holes in Sourdough Bread
Common Baking Mistakes Leading to Large Holes
One frequent culprit is inadequate degassing during shaping. If too much gas remains after bulk fermentation, you’ll end up with large voids instead of a fine mesh of bubbles. Similarly, skipping bench rests can lead to erratic gas distribution, leaving some pockets overinflated.
Another misstep is inconsistent dough tension. When you fail to create a tight surface, the internal gas can pool and form oversized pockets. Proper shaping ensures the dough’s surface is taut, directing expansion evenly when it hits the oven’s heat.
Gluten Development Issues Affecting Crumb Texture
Weak or under-developed gluten strands cannot evenly trap CO₂, causing bubbles to merge into larger cavities. Signs of this include a tear-prone dough and poor elasticity. Performing adequate stretch-and-folds during bulk fermentation can strengthen the network.
On the flip side, over-kneading in a mixer can lead to an overly tight gluten matrix that collapses around gas bubbles. This collapse often bounces back into large holes during the oven spring, ruining your crumb structure.
Fermentation Problems: Over-Fermentation vs. Under-Fermentation and Their Impact
Over-fermented dough is often excessively gassy, with weakened cell walls that burst and create jagged, large holes. You might notice a sour tang that’s overpowering, signaling that fermentation time has passed its peak. Adjust bulk fermentation by 15–30 minutes next bake to regain control.
Under-fermented dough, by contrast, hasn’t produced enough CO₂. The dough remains dense, and when it finally bakes, the trapped gas expands too rapidly, forming isolated large pockets. Aim for a 25–30% rise during bulk fermentation as a visual cue.
Shaping Techniques: Creating Tension and Structure
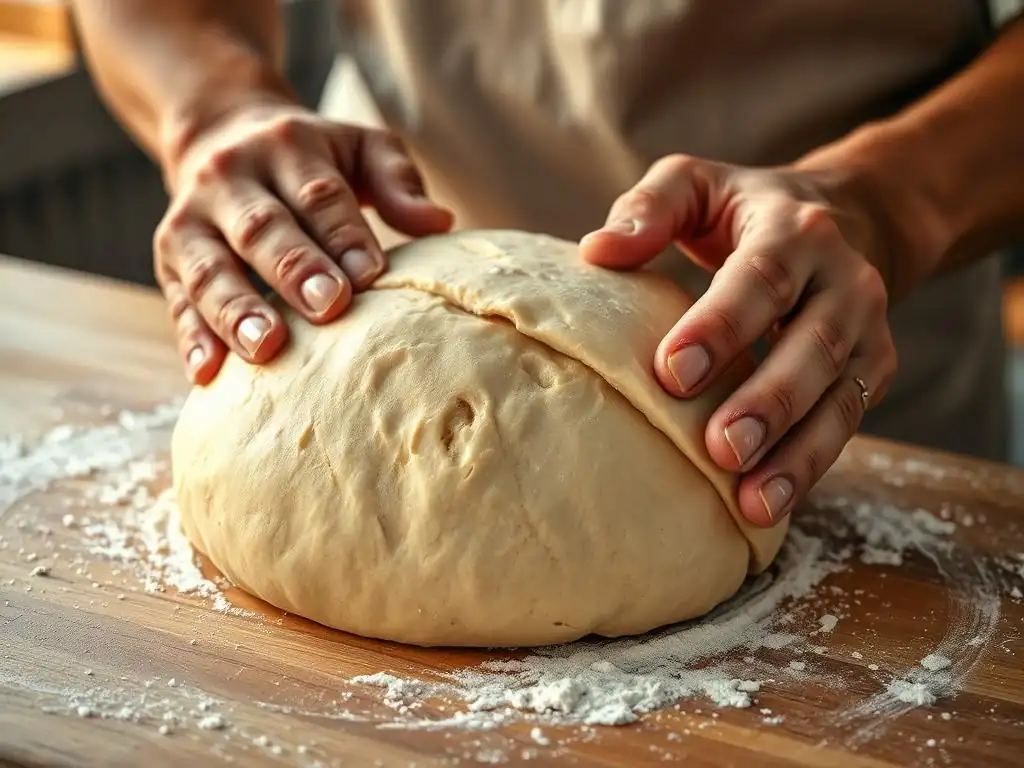
Proper shaping does two things: it aligns gluten strands and expels excessive gas. By building surface tension, you guide expansion in the oven for a uniform crumb. Use a series of gentle pulls, rotating the dough ball to tighten the outer layer without degassing entirely.
Neglecting shaping can lead to flabby dough, which flattens in the oven and produces large, irregular holes. Incorporate at least three shaping motions: pre-shape, bench rest, and final shape, each followed by a gentle coil or seam-fold to lock in tension.
Scoring and Oven Spring: Ensuring Even Expansion
Scoring controls where the bread will expand. A shallow cut (5–7 mm deep) at a 30° angle promotes a graceful ear and distributes steam release. Cuts that are too deep can funnel gas out too quickly, leaving uneven holes just beneath the crust.
Oven spring depends on initial steam and temperature. Introducing steam for the first 10 minutes keeps the crust supple, allowing internal gases to expand uniformly. Without steam, the crust hardens too soon, trapping oversized bubbles in localized areas.
Troubleshooting Large Holes: Step-by-Step Solutions
Adjusting Flour Type for Better Crumb
Choosing the right flour is crucial to mitigate uneven bread crumb structure. Flours differ in protein, ash content, and extraction rates—all of which affect water absorption and gluten formation.
Using Strong Bread Flour vs. Lower Protein Flour
Using strong bread flour (12–14% protein) encourages robust gluten strands that trap gas uniformly, reducing large voids. Lower protein flours (<10%) produce weaker dough, prone to irregular holes since the network collapses under pressure.
For hobbyists, a blend of 80% strong bread flour and 20% whole wheat balances structure and flavor. Adjust the ratio slightly if you notice persistent large holes.
Understanding Flour Ash Content
Higher ash content (whole grain/flour blends) increases enzymatic activity, speeding fermentation and potentially weakening dough if unmanaged. Opt for white or white high-extraction flours with ash content around 0.50–0.60% for more predictable crumb.
If you crave richer flavor from whole grains, gradually introduce 10–15% whole rye or spelt while monitoring fermentation times.
Optimizing Hydration Levels for a Balanced Crumb
Adjusting hydration is a direct lever on crumb openness. Too high, and gas pockets merge into oversized holes; too low, and crumb becomes tight and gummy.
The Role of Water in Starch Gelatinization
Water initiates starch gelatinization between 60–80 °C, locking moisture in the crumb. Proper hydration (65–75%) ensures gelatinization completes uniformly, producing a stable sponge of small and medium holes rather than isolated large chambers.
Calculating Baker's Percentage [Example Recipe]
Use this sample formula to dial in hydration:
# Standard Sourdough Formula (100% Flour Basis)
Bread Flour: 500 g (100%)
Water: 375 g (75%)
Levain (100% hydration): 100 g (20%)
Salt: 10 g (2%)
To calculate hydration:
hydration (%) = (water weight / total flour weight) * 100
Mastering Fermentation for Consistent Results
Consistent fermentation prevents sudden gas surges that create uneven holes. Keep bulk fermentation and final proof times within a 10–15% range of your baseline schedule.
Visual Cues for Perfect Bulk Fermentation
Look for a 25–30% volume increase and a network of small bubbles on the dough’s surface. The dough should feel airy but still hold shape when poked. Signs of under or over-fermentation include sticky, overly slack dough or extreme sourness.
Adjusting Fermentation Time Based on Starter Activity
Ambient temperature swings can accelerate or retard fermentation. If your levain peaks in 3 hours instead of 5, shorten bulk fermentation accordingly by 30–60 minutes to avoid over-fermentation. Conversely, cooler kitchens demand extra time.
Refining Shaping Techniques
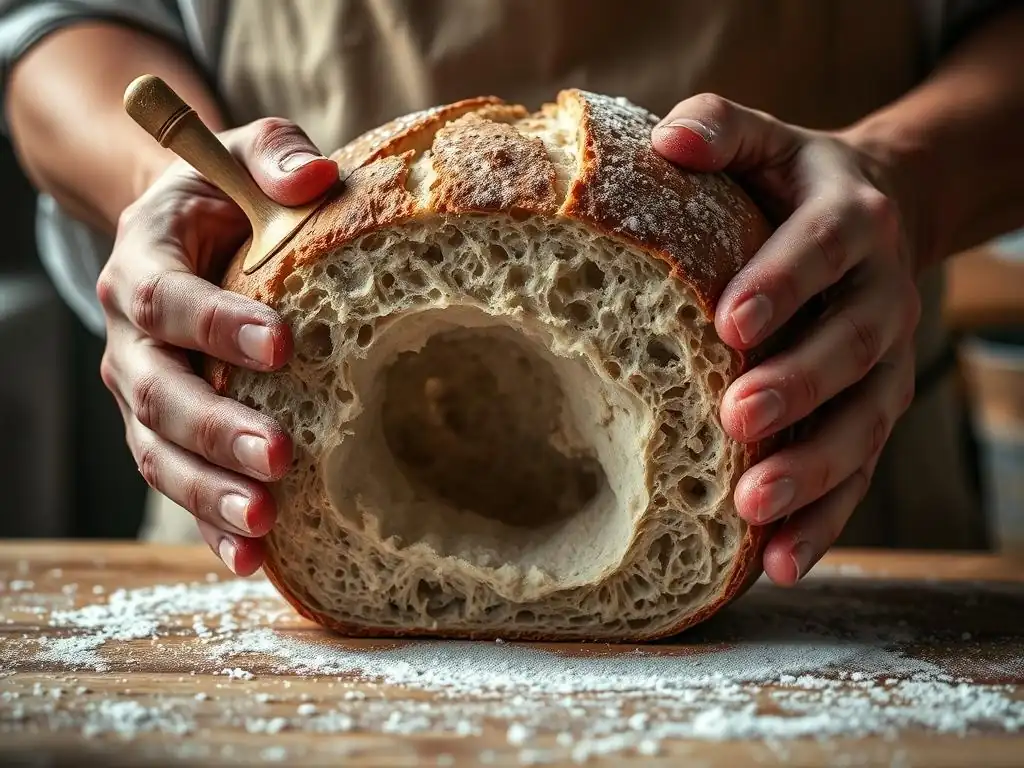
Well-shaped dough ensures even tension and gas distribution. Aim for a tight outer “skin” without obliterating all trapped gas.
Creating Surface Tension During Shaping
Drag the dough across a lightly floured surface in a circular motion, rotating it slowly to tighten the skin. This surface tension acts like a balloon’s membrane, guiding expansion uniformly in the oven.
Avoiding Degassing the Dough
While some degassing is necessary, avoid over-deflating. Retain enough CO₂ to fuel the oven spring but not so much that it forms large voids. Light folding motions preserve small bubble clusters.
Controlling Scoring and Oven Spring
Scoring is your release valve for controlled expansion. Perform a single slash or double slash aligned with your loaf’s long axis for balanced rise.
Scoring at the Correct Angle and Depth
Hold your lame at 30° to the surface, slicing about 5–7 mm deep. A shallow cut prevents blowouts that lead to uneven holes, while a consistent angle promotes predictable ear formation.
Using Steam for Optimal Oven Spring
Introduce steam via a preheated tray with boiling water or a baking cloche with moisture vents. Maintain humidity for the first 10 minutes at 230–250 °C, then vent or remove steam to let the crust set.
Preventing Large Holes in Sourdough Bread in the Future
Consistent Starter Maintenance and Feeding Schedule
A predictable starter yields steady fermentation and crumb development. Use this checklist to stay on track:
- [x] Feed 1:1:1 (starter:flour:water) every 12 hours
- [x] Store at 22–25 °C for peak activity
- [ ] Discard or bake-off excess starter weekly
By keeping your starter at consistent strength, you avoid fermentation spikes that cause uneven holes.
Maintaining Detailed Baking Notes
Record key variables each bake:
- Flour brand and protein
- Hydration percentage
- Ambient temperature
- Bulk fermentation time
- Shaping observations
These notes become your personalized recipe guide, helping you troubleshoot the next time you see strange holes.
Adapting Recipes to Environmental Conditions
Humidity and temperature swings can derail your crumb consistency. In summer, reduce hydration by 2–3%; in winter, allow an extra 15–30 minutes of proofing. Small adjustments prevent over- or under-fermentation that leads to large holes.
Advanced Techniques for a More Uniform Crumb Structure
Using a Levain for Enhanced Flavor and Texture
A mature levain contributes organic acids and enzymes that strengthen gluten over time. Benefits include:
- Increased oven spring
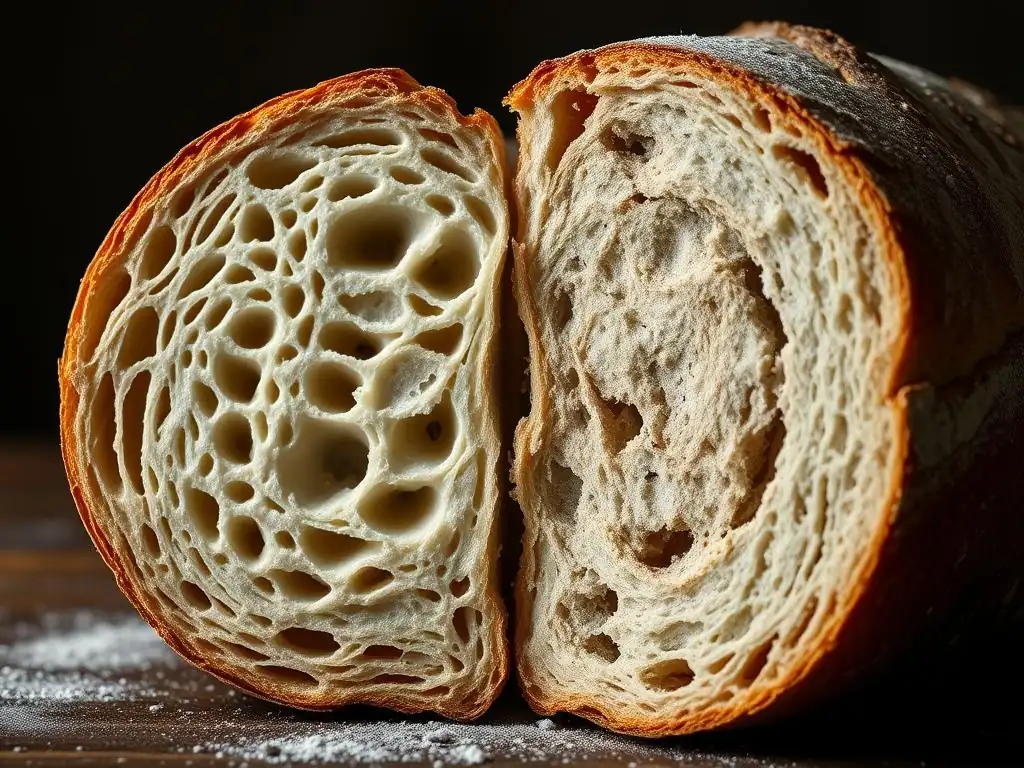
- Finer, more uniform crumb
- Richer, tangy flavor profile
Combine a young levain (6–8 hours post-feed) with a mature one (12–16 hours) in a 1:1 ratio to balance rise and flavor.
Autolyse: Improving Dough Hydration and Gluten Development
During autolyse, you mix flour and water and let them rest for 20–45 minutes. This process:
- Activates enzymes that degrade proteins lightly
- Improves water absorption
- Reduces kneading time
Enhanced gluten formation from autolyse means fewer large holes and a more even crumb.
Incorporating Whole Grains for Complex Flavors
Adding up to 20% whole grains (rye, spelt, whole wheat) introduces bran and oils that enrich taste. To maintain crumb uniformity:
- Increase hydration by 2–3% per additional 10% whole grain
- Extend autolyse by 10–15 minutes for better absorption
Conclusion: Achieving the Perfect Sourdough Crumb at BakeWithEase
By understanding and adjusting factors like flour type, hydration, fermentation, and shaping, you can conquer uneven bread crumb structure. Keep detailed notes, fine-tune your starter, and adopt advanced techniques such as levain blends and autolyse. With these strategies from BakeWithEase, every loaf you bake can boast a beautiful, even crumb—free of unwanted large holes.
Frequently Asked Questions
What causes an uneven bread crumb structure with large, irregular holes?
An uneven crumb structure, characterized by large holes, is often caused by uneven fermentation during the proofing stage or too much gluten development. This can lead to pockets of gas forming in the dough.
How can I prevent large, irregular holes from forming in my bread?
To prevent large holes, focus on proper kneading to develop gluten evenly, and ensure consistent fermentation temperatures. Gentle handling of the dough during shaping is also key.
Yes, a rapid rise can definitely contribute to an uneven crumb. It often means that pockets of gas formed too quickly, leading to those large, irregular holes. Consider using less yeast or proofing in a cooler environment.
What role does hydration play in achieving an even bread crumb structure?
High hydration levels can sometimes lead to a more open crumb, but if not handled properly, it can result in unevenness. Adjusting the water content and kneading technique can help.
Is there a specific type of flour that contributes to an uneven crumb structure?
While any flour can contribute if mishandled, stronger flours like bread flour with high protein content may be more prone to creating large, irregular holes if over-kneaded. Experiment with different flour blends for better results.
Final Reflection: The Crumb's Tale: A Baker's Journey to Perfection
The quest for the perfect loaf, with its even, airy crumb, remains a constant challenge for bakers of all levels. Achieving that consistent, desirable texture isn't just about aesthetics; it's a testament to understanding the intricate dance of ingredients, technique, and timing. This journey, as explored in this article, reveals that seemingly small inconsistencies can have a significant impact on the final product.
The pursuit of the ideal crumb structure is a microcosm of the larger creative process – a constant striving for mastery and an acceptance of the inevitable imperfections. It's a journey of learning, adaptation, and refinement. As the renowned baker, Paul Hollywood, once said, Baking is a science, but it's also an art. You need precision, but you also need passion.
This perfectly encapsulates the emotional investment and meticulous attention to detail required to overcome the challenges of uneven crumb structure. The frustrations, the experiments, the eventual triumphs – they all contribute to the rich tapestry of the baking experience.
Now, consider your own baking journey. What lessons have you learned from your own "uneven holes"? Perhaps you've discovered the importance of proper kneading, the subtle influence of hydration, or the critical role of proofing time. Take this knowledge, this newfound understanding, and apply it to your next loaf. Embrace the imperfections, learn from your mistakes, and continue to refine your craft. The perfect crumb, while elusive, is a worthy goal, and the journey itself is a rewarding one.
Unearth Your Baking Brilliance: Level Up Your Bread Crumb Game!
Thanks for taking the time to explore the world of perfect bread crumbs with us! We hope you gained valuable insights into identifying and fixing those pesky uneven crumb structures. Now it's time to put that knowledge to the test.
- Bake a test loaf today: Use what you've learned to perfect your technique. Pay close attention to the details, and see if you can achieve that even crumb you've been dreaming of. This is your chance to shine!
- Share your baking journey: Post a picture of your improved loaf on social media—we'd love to see your success! Use #BakeWithEaseCrumbs to connect with our community.
- Experiment with flour types: Try a different type of flour and observe how it affects the crumb structure. Record your observations!
So, what unique flour will you experiment with next to achieve bread-baking mastery?