
Achieving Flaky Pastries: High Altitude Secrets Revealed

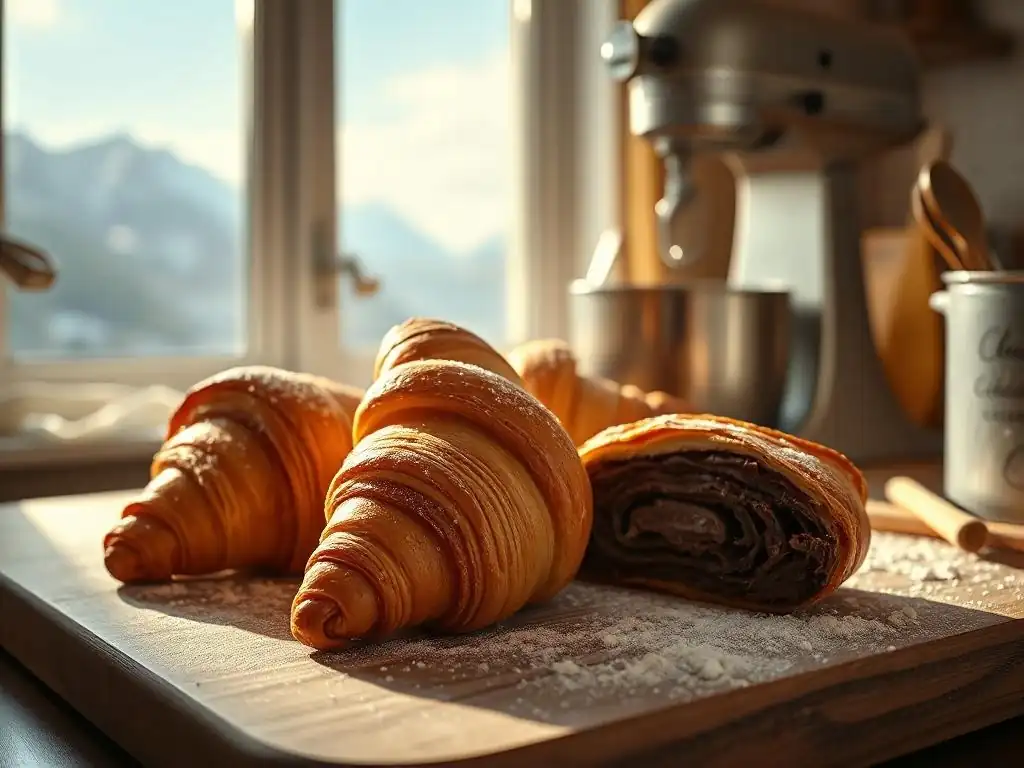
Welcome to BakeWithEase, your trusted companion in the baking world! Ever wondered why your pastries fall flat at higher altitudes? Achieving flaky perfection doesn't have to be a mountain of a challenge. Dive into our guide and unlock the secrets to crafting exquisite high altitude pastry recipes that will rise to the occasion, every time. Ready to bake above the ordinary? Let's get started!
- Introduction to High Altitude Pastry Baking
- Understanding Altitude's Impact on Pastry Dough
- Key Ingredients for Flaky High Altitude Pastries
- High Altitude Pastry Baking Techniques: The Secrets
- Step-by-Step Guide: High Altitude Pie Crust Recipe
- Troubleshooting Common High Altitude Pastry Problems
- Adapting Your Favorite Pastry Recipes for High Altitude
- High Altitude Pastry Recipe Examples
- Tips for Achieving Perfect Flaky Pastries at High Altitude
- Conclusion: Mastering High Altitude Pastry Baking with Ease
- Frequently Asked Questions
- Final Reflection: Mastering the Mountaintop Bake: Flaky Pastries at High Altitude
- Unlock Your High-Altitude Baking Success!
Introduction to High Altitude Pastry Baking
Baking pastries at high altitudes presents a unique set of challenges compared to baking at sea level. The reduced atmospheric pressure and lower boiling point of liquids significantly impact how ingredients behave, particularly in delicate doughs like those used for flaky pastries. Understanding these differences is the first step toward achieving perfect results, whether you're making a simple pie crust or an elaborate puff pastry. Many bakers moving to higher elevations, say above 3,000 feet (around 914 meters), often find their tried-and-true sea level pastry recipes yield tough, dry, or overly expanded results.
This guide will delve into the science behind high altitude baking and provide practical tips and adjustments specifically tailored for crafting flaky pastries. We'll explore how everything from flour type to mixing technique needs careful consideration when you're baking above sea level. Mastering these adjustments will unlock the secrets to light, airy, and beautifully flaky high altitude pastry recipes, allowing you to bake with confidence and ease no matter your elevation.
The Challenges of Baking Pastries at High Altitudes
The primary challenge when baking pastries at high altitudes stems from the decreased atmospheric pressure. This lower pressure allows leavening agents, like steam generated from butter or chemical leaveners in some pastry types, to expand more rapidly and intensely than at sea level.
For pastries, where controlled expansion is key to creating those desirable flaky layers, this can lead to issues like excessive puffing followed by collapse, or layers that separate too much and become brittle. For example, a typical puff pastry recipe baked at sea level might rise beautifully, but at 5,000 feet (about 1,524 meters), it could over-expand and then deflate, resulting in a dense or uneven texture.
Another significant factor is the lower boiling point of water at higher elevations. Water boils at 212°F (100°C) at sea level, but at 7,500 feet (about 2,286 meters), it boils at roughly 198°F (92°C). This means that steam, which is crucial for creating lift and separation in flaky pastry layers (like in puff pastry or even a very flaky pie crust), forms at a lower temperature and less intensely. The dough also dries out faster due to increased evaporation rates. These combined effects require careful adjustments to ingredient ratios, particularly liquids, and precise temperature and timing control during baking.
Why High Altitude Requires Pastry Recipe Adjustments
Adjusting high altitude pastry recipes is essential because the standard ratios and techniques developed for sea level conditions simply don't translate directly. The altered atmospheric pressure and moisture dynamics fundamentally change how the gluten develops, how fats interact with the flour, and how steam is generated and trapped within the dough layers. Without adjustments, pastries can become tough (due to excessive gluten development from needing more liquid initially), dry (due to faster evaporation), or lack the desired flaky texture (due to improper expansion or steam generation).
Consider a simple pie crust: a standard sea level recipe might call for a specific amount of water to bring the dough together. At high altitude, the flour might absorb less moisture initially due to lower humidity, but the dough will dry out faster during resting and baking. Therefore, slightly increasing the liquid might be necessary, but too much can lead to toughness.
Similarly, baking temperatures and times need fine-tuning. A pie baked at 375°F (190°C) for 45 minutes at sea level might bake faster and brown more quickly at 6,000 feet (about 1,828 meters), potentially resulting in an overcooked crust before the filling is ready. Precise high altitude pastry recipes account for these variables to ensure reliable, delicious results.
Understanding Altitude's Impact on Pastry Dough
Lower Air Pressure and its Effect on Pastry Dough Expansion
Lower air pressure at high altitudes directly impacts how gases behave within pastry dough. When pastries bake, trapped air and steam from melting fat and evaporating liquid expand, pushing apart layers of dough to create flakiness. At reduced atmospheric pressure, this expansion happens with less resistance. In rich doughs like puff pastry or croissants, where significant lift is expected from steam and yeast (in croissants), this can lead to over-expansion. The structure of the dough may not be strong enough to support this rapid rise, causing it to collapse or become fragile once cooled.
For example, a laminated dough like puff pastry relies on hundreds of thin layers of dough separated by butter. As the butter melts in a hot oven, it releases steam, which is trapped by the gluten network in the dough layers, forcing them apart. At 7,000 feet (approximately 2,134 meters), the external pressure resisting this expansion is significantly lower than at sea level.
This means the steam can expand more violently. If the dough hasn't been properly rested and chilled to strengthen the gluten network, the layers might blow out or collapse instead of rising evenly and separating into distinct, flaky sheets. Adjustments in mixing, resting times, and sometimes even fat ratios are crucial for successful high altitude pastry recipes.
The Role of Evaporation in High Altitude Pastry Making
Increased evaporation rates are another critical factor influencing high altitude pastry making. At higher altitudes, the air is typically drier, and the lower boiling point of water means that moisture within the pastry dough evaporates more quickly, both during preparation and baking. This rapid moisture loss can lead to doughs that are too dry, crumbly, and difficult to work with. It can also result in baked pastries that are dry and lack tenderness.
Consider making a batch of pie dough. At sea level, you might use just enough ice water to bring the dough together into a cohesive mass. At 5,000 feet (about 1,524 meters), that same amount of water might not be sufficient initially, or the dough might dry out noticeably while it rests in the refrigerator.
During baking, the surface of the pastry can dry out and brown faster, potentially before the interior is fully cooked or the layers have properly set. High altitude pastry recipes often compensate for this by slightly increasing the liquid content, sometimes by as much as 1-2 tablespoons per cup of liquid called for at sea level, depending on the specific altitude and recipe type.
Key Ingredients for Flaky High Altitude Pastries
Flour Selection for High Altitude Pastry Success
The type of flour used is paramount when crafting flaky high altitude pastries. All-purpose flour is commonly used for many pastry recipes, but its protein content can vary significantly between brands and regions. At higher altitudes, the lower pressure and increased evaporation can affect gluten development.
Using a flour with a moderate protein content, typically between 10-12%, is often ideal for pastry. Too low a protein content (like cake flour) might result in a pastry that lacks structure and collapses, while too high a protein content (like bread flour) can lead to excessive gluten development, resulting in a tough crust, especially with the necessary liquid adjustments for altitude.
Some bakers at very high altitudes, say above 7,000 feet (about 2,134 meters), find that using a slightly lower protein all-purpose flour or even substituting a small portion of the all-purpose flour with cake flour (perhaps replacing 2 tablespoons per cup) can help create a more tender crumb while still providing enough structure for flakiness. It's often a process of experimentation to find the flour that works best in your specific high altitude kitchen, as humidity levels also play a role. Look for flours specified as "unbleached all-purpose" for consistent results in your high altitude pastry recipes.
The Importance of Fat Content in High Altitude Pastries
Fat is a critical component in flaky pastries, and its role is even more pronounced at high altitudes. Fat, whether it's butter, shortening, or lard, creates the separation between gluten layers when it melts during baking, releasing steam and forming air pockets. The amount and type of fat significantly impact the texture. For high altitude pastry recipes, maintaining sufficient fat content is essential to counteract the drying effects of the altitude and ensure proper layer separation. A typical pie crust recipe might use a 1:1 ratio of flour to fat by weight, or slightly less fat.
Using cold, solid fat cut into the flour is key. As the fat melts slowly in the oven, it steams and prevents the gluten strands from bonding too tightly, resulting in tenderness and flakiness. Some high altitude bakers find that slightly increasing the fat content (e.g., adding an extra tablespoon or two of butter per cup of flour in a pie crust) can help improve flakiness and tenderness, especially if the dough tends to dry out quickly.
However, too much fat can make the pastry greasy and crumbly. Experimentation is key to finding the perfect balance for your specific high altitude pastry recipes.
Liquid Adjustments for Optimal Pastry Texture
Adjusting the liquid is one of the most common and crucial modifications for high altitude pastry recipes. Due to increased evaporation and potentially drier flour at altitude, more liquid is often needed to properly hydrate the dough and bring it together. However, adding too much liquid can lead to excessive gluten development, resulting in a tough pastry. It's a delicate balance. A general rule of thumb is to increase the liquid by 1-2 tablespoons per cup specified in the sea level recipe, especially for doughs like pie crust or biscuit dough.
For instance, if a standard pie crust recipe calls for 1/2 cup (120ml) of ice water, you might start by adding 1/2 cup plus 1 tablespoon (about 135ml) at 5,000 feet (approx. 1,524 meters). The exact amount will depend on your altitude, the humidity, and the specific flour you use. It's best to add the liquid gradually, mixing until the dough just comes together.
The dough should feel moist but not sticky. For laminated doughs like puff pastry, where precise hydration is critical for lamination, adjustments might be more subtle, perhaps just ensuring the initial dough is slightly softer than it would be at sea level. Always use ice-cold liquid for flaky high altitude pastry recipes.
High Altitude Pastry Baking Techniques: The Secrets
Mastering the Cold Dough Technique at Altitude
The cold dough technique is paramount for achieving flaky pastries at any altitude, but it becomes even more critical at high elevations. Keeping the dough, fat, and even your tools cold helps prevent the fat from melting prematurely into the flour. When cold pieces of fat melt in a hot oven, they create steam pockets, which push the dough layers apart, resulting in flakiness. If the fat melts before baking, it gets absorbed by the flour, leading to a tough, dense, or greasy texture rather than distinct layers.
At high altitudes, where ingredients can warm up faster due to lower ambient pressure affecting temperature perception and potentially warmer kitchen environments, maintaining cold temperatures requires extra vigilance. Ensure your butter or other fat is straight from the refrigerator (or even freezer for a few minutes). Use ice water for mixing. Chill your flour and mixing bowl beforehand, especially in warm kitchens.
After mixing, thorough chilling is non-negotiable. This allows the gluten to relax and the fat to firm up again, making the dough easier to roll and promoting better layer separation during baking. Properly executed, the cold dough technique is a secret weapon for perfect high altitude pastry recipes.
Precise Mixing for Tender High Altitude Pastry
Precise mixing is crucial for developing just the right amount of gluten in high altitude pastry dough. Gluten provides structure, but too much gluten development leads to toughness, which is exacerbated at altitude by potential liquid adjustments. For flaky pastries like pie crust, the goal is minimal gluten development. The fat is cut into the flour until it resembles coarse meal with some pea-sized pieces remaining. This method coats some of the flour particles with fat, inhibiting gluten formation.
When adding liquid, mix only until the dough just comes together. Overmixing is a common pitfall. At high altitude, where you might be adding slightly more liquid, the risk of overdeveloping gluten increases. Mix gently, using a fork, pastry blender, or pulse in a food processor. Stop mixing the moment the dough forms a shaggy mass that holds together when squeezed. For laminated doughs, mixing is done until a smooth but not overly elastic dough forms before the lamination process begins. Understanding the role of mixing in gluten development is vital for successful high altitude pastry recipes.
Proper Resting and Chilling of High Altitude Pastry Dough
Resting and chilling pastry dough is a non-negotiable step, particularly for high altitude pastry recipes. After mixing, the gluten needs time to relax, which makes the dough easier to roll without shrinking back. Chilling also solidifies the fat pieces within the dough. This is critical for creating those distinct, flaky layers during baking. The longer the dough chills (within reason), the better the fat sets and the gluten relaxes.
A minimum chilling time of 30 minutes is usually recommended for pie dough, but 1-2 hours is even better. For laminated doughs like puff pastry, multiple chilling periods are required between folds to keep the butter solid and the dough relaxed. At high altitudes, chilling might need to be slightly longer or in a colder part of the refrigerator to ensure the fat is sufficiently firm before rolling. Properly rested and chilled dough is less likely to shrink during baking and will produce significantly flakier results, making this technique a cornerstone of successful high altitude pastry recipes.
Step-by-Step Guide: High Altitude Pie Crust Recipe
Creating a flaky pie crust at high altitude can seem daunting, but with the right adjustments and techniques, it's entirely achievable. This step-by-step guide provides a reliable foundation for a single 9-inch high altitude pie crust, adaptable to your specific elevation. Remember to keep all ingredients and equipment cold throughout the process. This recipe is a perfect starting point for mastering high altitude pastry recipes.
Follow these steps precisely, paying close attention to temperature and dough consistency. Success lies in preventing the fat from melting prematurely and developing minimal gluten. This high altitude pie crust recipe is designed for flakiness and ease of handling, even in challenging conditions.
Ingredients for the High Altitude Pie Crust
For a single 9-inch high altitude pie crust, you will need the following ingredients. Ensure they are all well-chilled before you begin. Using cold ingredients is absolutely essential for achieving flakiness in high altitude pastry recipes.
- 1 1/4 cups (156g) All-Purpose Flour (preferably unbleached, moderate protein)
- 1/2 teaspoon Salt
- 1/2 cup (113g) unsalted butter, very cold, cut into 1/2-inch cubes
- 3-5 tablespoons Ice Water (start with 3, add more as needed)
Note: At higher elevations (above 5,000 ft or 1,524m), you might need slightly more flour or slightly less liquid depending on humidity. Conversely, in very dry high altitude climates, you might need slightly more water than the initial 3 tablespoons. Always err on the side of adding liquid gradually.
Mixing the Dough: A Detailed Walkthrough
- Combine the cold flour and salt in a large bowl or the bowl of a food processor. If using a bowl, whisk briefly to combine.
- Add the very cold butter cubes to the flour mixture.
- Using a food processor: Pulse in 1-second bursts until the mixture resembles coarse meal with some pea-sized pieces of butter remaining. This usually takes 10-15 pulses. Avoid processing until the mixture is uniform.
- Using a pastry blender or forks: Cut the butter into the flour until it resembles coarse meal with some pea-sized pieces of butter remaining. Work quickly to keep the butter cold.
- Gradually add the ice water, one tablespoon at a time, pulsing or mixing gently with a fork until the dough just begins to come together. It should look shaggy but hold together when you squeeze a small amount in your hand. Do not add more water than necessary.
- Turn the dough out onto a clean, lightly floured surface. Gently gather it into a disk. Do not knead. Minimal handling is key for tender high altitude pastry recipes.
Chilling and Rolling the Dough at High Altitude
- Wrap the dough disk tightly in plastic wrap. Flatten it slightly into a disk about 1 inch thick. This shape makes it easier to roll later.
- Refrigerate for at least 1 hour, and preferably 2 hours, or up to 2 days. This chilling period is crucial for the fat to firm up and the gluten to relax, preventing shrinkage and promoting flakiness. At high altitudes, longer chilling might be beneficial.
- When ready to roll, remove the dough from the refrigerator and let it sit at room temperature for 5-10 minutes if it's too hard to roll immediately.
- On a lightly floured surface, roll the dough from the center outwards, rotating and lifting it frequently to prevent sticking. Roll into a circle about 12 inches in diameter for a standard 9-inch pie plate. Aim for an even thickness, about 1/8 inch.
- Carefully transfer the rolled dough to your pie plate. Gently press it into the bottom and sides. Trim and crimp the edges as desired. Prick the bottom crust thoroughly with a fork (this is called docking) to prevent bubbling during baking, especially important in high altitude pastry recipes where expansion is increased.
- Chill the prepared pie crust in the freezer for at least 15-30 minutes before baking. This final chill helps set the shape and ensures maximum flakiness.
Blind Baking for Flaky Pie Crusts at High Altitudes
Blind baking, or pre-baking the pie crust before adding the filling, is often essential for achieving a crisp, flaky bottom crust, particularly for custard or fruit pies with wet fillings. At high altitude, where baking times might be slightly adjusted, blind baking helps ensure the crust is fully cooked through.
- Preheat your oven to the temperature specified in your recipe, often around 375°F to 400°F (190°C to 200°C). Consider the general high altitude adjustment of increasing temperature slightly (25°F or 15°C) or maintaining standard temp but baking for less time – experimentation is needed.
- Remove the chilled, docked pie crust from the freezer. Line the crust with parchment paper or foil, pressing it gently against the sides. Fill with pie weights, dried beans, or rice, ensuring they fill into the edges to support the crust sides and prevent shrinkage.
- Bake for 15-20 minutes, or until the edges are lightly golden and the bottom appears set.
- Carefully remove the parchment/foil and weights.
- Continue baking for another 10-15 minutes, or until the bottom crust is golden brown and appears dry. This ensures the bottom is fully cooked and flaky.
- Cool the blind-baked crust completely on a wire rack before filling. This technique significantly improves the texture of high altitude pastry recipes used for pies.
Troubleshooting Common High Altitude Pastry Problems

Even with adjustments, baking at high altitude can sometimes present challenges. Understanding common issues and how to address them is key to consistent success with high altitude pastry recipes.
- Dry, Crumbly Dough
- Tough or Leathery Pastry
- Shrinkage During Baking
- Over-Browning
- Lack of Flakiness
These issues often stem from incorrect ingredient ratios, temperature control problems, or improper technique related to the altitude conditions.
Preventing Dry and Crumbly Pastry
Dry and crumbly pastry dough is a frequent problem at high altitudes, often caused by increased evaporation and potentially drier flour. The solution lies in careful hydration. Ensure you are adding enough liquid initially, using ice water. Start with the adjusted amount (e.g., an extra tablespoon per cup of liquid) and add more, just a teaspoon at a time, only if the dough isn't coming together. The dough should feel moist but not sticky.
Another preventative measure is proper chilling. While it seems counterintuitive, chilling allows the moisture to distribute evenly throughout the dough. If your kitchen is very dry, you might even cover the dough loosely with a damp cloth before wrapping it in plastic wrap for chilling. Handling the dough minimally also helps retain moisture; overworking can dry it out. If your finished pastry is dry, it could also indicate over-baking, so monitor baking times closely.
Avoiding Shrinkage During Baking at High Altitude
Shrinkage in pastry crusts during baking is often a result of the gluten network being too tight or the fat melting too quickly. At high altitude, the lower pressure can exacerbate shrinkage if the dough isn't properly relaxed. The most effective way to prevent shrinkage is thorough chilling and resting of the dough after it's formed or placed in the pie plate. Chilling allows the gluten to relax completely.
Ensure the dough is adequately chilled (at least 30 minutes, preferably longer) before rolling. Roll the dough evenly and don't stretch it into the pie plate; gently ease it in. For blind baking, using pie weights all the way to the edges is crucial to support the sides. Finally, a final chill (15-30 minutes in the freezer) of the formed, unbaked crust before it hits the hot oven helps set the shape and minimize shrinkage, a vital step for successful high altitude pastry recipes.
Dealing with Over-Browning in High Altitude Pastries
Pastries tend to brown faster at high altitudes due to lower humidity and potentially higher effective oven temperatures caused by faster air circulation or different heat distribution. This can lead to over-browning of the crust before the filling is cooked or the interior pastry layers are properly set. Lowering the oven temperature slightly (by about 15-25°F or 10-15°C) is a common high altitude adjustment that helps.
If the crust edges are browning too quickly while the rest of the pastry bakes, loosely cover the edges with strips of aluminum foil. For pies, you can use a pie crust shield. If the entire top is browning too fast, you can loosely tent the entire pastry with foil for the remainder of the baking time. Monitoring your pastry closely and being ready to shield it is key to preventing over-browning in high altitude pastry recipes.
Adapting Your Favorite Pastry Recipes for High Altitude
You don't need entirely new recipes to bake delicious pastries at high altitude. Many of your favorite sea level recipes can be successfully adapted with a few key adjustments. The process involves understanding the impact of altitude on the original recipe and making calculated modifications.
- Start with a reliable sea level recipe.
- Assess where altitude is likely to cause issues (liquid, leavening, baking time/temp).
- Make small adjustments initially.
- Keep detailed notes of your trials.
Adapting high altitude pastry recipes is an ongoing process of learning your specific kitchen environment.
Converting Sea Level Pastry Recipes for Altitude
Converting a sea level pastry recipe for high altitude involves making educated guesses based on general high altitude baking principles. For pastry doughs like pie crust, the primary adjustments concern liquid and potentially fat. As mentioned, increasing liquid by 1-2 tablespoons per cup is a starting point. For richer doughs like puff pastry, the dough consistency might need to be slightly softer initially.
For recipes containing chemical leaveners (like baking powder in some scone or biscuit recipes often considered pastries), the leavener amount might need to be reduced slightly (e.g., by 1/8 to 1/4 teaspoon per teaspoon called for) to prevent over-expansion and collapse. However, for traditional flaky pastries relying primarily on steam, leavener adjustments are less common. Focus first on liquid, fat (potentially slightly more), and technique (chilling!). These are the most impactful changes for high altitude pastry recipes.
Adjusting Baking Times and Temperatures
Adjusting baking times and temperatures is crucial for high altitude pastry recipes. Due to lower air pressure and faster moisture evaporation, baked goods often cook faster and brown more quickly. A common adjustment is to increase the oven temperature by 15-25°F (10-15°C) and decrease the baking time by 5-10 minutes initially. This hotter, shorter bake can help set the structure before gases over-expand.
However, for delicate pastries, sometimes maintaining the standard temperature but reducing the time is better to prevent over-browning. It truly depends on the recipe and your oven. Monitor your pastry closely – look for visual cues like golden brown color and bubbling fillings (for pies) rather than relying solely on the clock. Use a thermometer to check internal temperature if applicable. Note-taking is invaluable here to fine-tune baking for your specific high altitude pastry recipes.
Experimenting with Hydration Levels in Pastries
Experimenting with hydration levels is perhaps the most critical part of adapting high altitude pastry recipes. The amount of water or liquid needed can vary significantly based on altitude, humidity, and the specific flour used. Start with the general recommendation of adding 1-2 tablespoons of liquid per cup of liquid in the original recipe, but be prepared to adjust up or down in future attempts.
The goal is to achieve a dough consistency that is moist enough to just come together but not sticky. The dough should feel slightly softer than it might at sea level. Too little liquid results in dry, crumbly dough that's hard to roll and bakes up tough. Too much liquid leads to excessive gluten development and a tough, potentially greasy crust. Don't be afraid to try slightly different amounts of liquid in small batches and note which hydration level yields the flakiest, most tender result for your high altitude pastry recipes.
High Altitude Pastry Recipe Examples
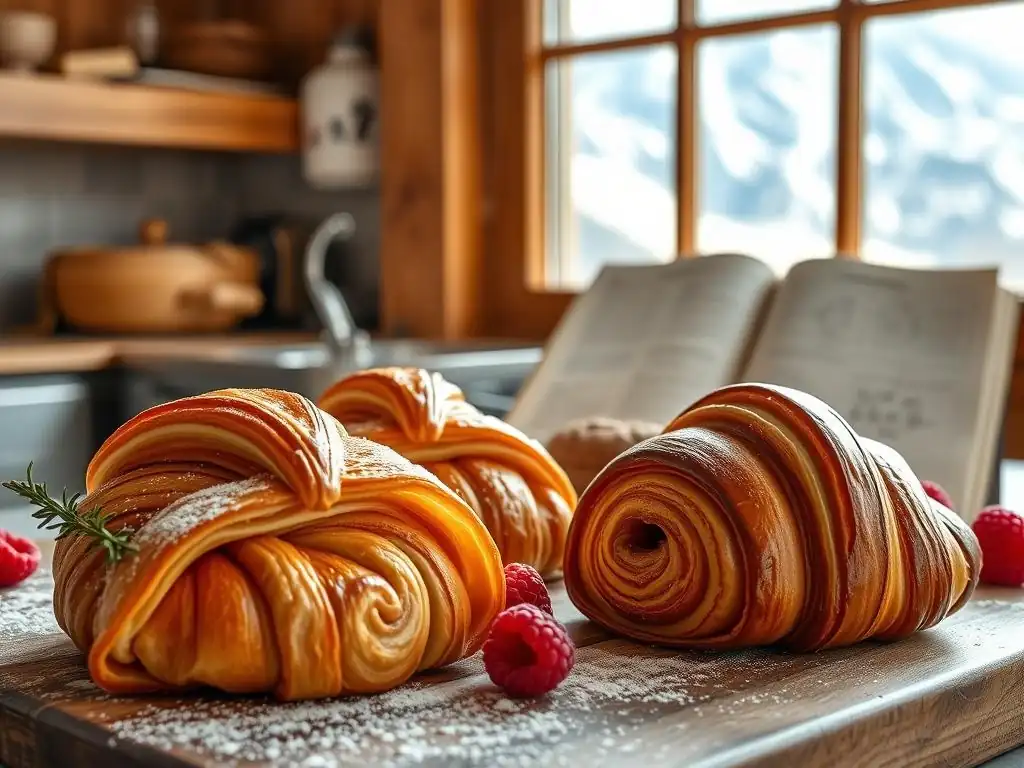
Putting theory into practice is the best way to master high altitude pastry recipes. Here are a few examples of how common pastry types can be approached at higher elevations. These examples highlight the key adjustments discussed.
High Altitude Apple Pie Recipe for Beginners
A classic apple pie is a great starting point for high altitude pastry recipes. You'll use the high altitude pie crust recipe discussed earlier. For the filling, you might need to make minor adjustments. Fruits can release more juice at altitude, potentially making the bottom crust soggy. Increase the amount of thickener (like flour, cornstarch, or tapioca) slightly, perhaps by 1-2 tablespoons.
Bake the pie at an adjusted temperature, maybe 400°F (200°C) for the first 15-20 minutes to set the crust, then reduce to 375°F (190°C) to finish baking the filling. Total baking time might be similar or slightly less than at sea level, perhaps 45-60 minutes total. Blind baking the bottom crust is highly recommended for a flaky base. Monitor the crust color and tent with foil if needed to prevent over-browning. This high altitude apple pie recipe will test your crust-making and baking time adjustments.
High Altitude Quiche Recipe with a Flaky Crust
Quiche is another excellent application for a high altitude pie crust. Use the high altitude pie crust recipe, ensuring it's well-chilled and potentially blind-baked, especially if your filling is particularly wet (e.g., contains lots of cream or vegetables). For the custard filling itself, the primary altitude challenge is often preventing it from puffing up excessively and then cracking or collapsing.
Reducing the liquid slightly (e.g., 1-2 tablespoons per cup of milk/cream) and potentially increasing the number of eggs (by one yolk or a whole egg per 2 cups of liquid) can help stabilize the custard. Baking temperature might be slightly lower than sea level (e.g., 325-350°F or 160-175°C) to allow the custard to set gently. Bake until the center is just set. This high altitude quiche recipe requires careful crust preparation and custard handling.
High Altitude Scones: The Perfect Afternoon Treat
While technically a quick bread, scones share many techniques with pastries (cold fat, minimal mixing) and are affected by altitude. For high altitude scones, you might need to increase the liquid (milk/cream) slightly, perhaps by a tablespoon or two per cup. If using baking powder, consider reducing it by about 1/8 to 1/4 teaspoon per teaspoon called for to prevent excessive, unstable rise.
Bake at a slightly higher temperature, perhaps 400-425°F (200-220°C), for a shorter time to ensure they rise quickly and brown nicely before drying out. Monitor closely; they might be done in 15-20 minutes. The goal is a tender, flaky interior and a golden exterior. These high altitude scones demonstrate how altitude affects leavening and moisture in pastry-like doughs.
Tips for Achieving Perfect Flaky Pastries at High Altitude
Beyond specific recipe adjustments, several general tips can significantly improve your success with high altitude pastry recipes. These are best practices that become even more important when baking above sea level.
- Measure ingredients accurately, preferably by weight, especially flour.
- Keep ingredients and equipment cold.
- Handle dough minimally.
- Trust your senses – look and feel the dough rather than strictly following sea level timing cues.
- Experiment and take notes!
The Importance of Preheating Your Oven
Properly preheating your oven is absolutely critical for all baking, but especially for high altitude pastry recipes. Pastry relies on a burst of initial heat to quickly melt the fat and create steam, which causes the layers to separate and puff. If the oven isn't fully preheated to the correct temperature, the fat will melt too slowly, absorbing into the flour and resulting in a greasy, tough, or dense pastry instead of a flaky one.
At high altitude, ovens can sometimes behave differently – they might heat up faster or have hot spots due to lower air density. Use an oven thermometer to verify your oven's true temperature. Preheat for at least 15-20 minutes after the oven indicates it has reached the set temperature. This ensures the oven walls and racks are fully heated, providing consistent radiant heat crucial for the proper lift and flaking of high altitude pastry recipes.
Using a Baking Stone for Even Heat Distribution
Using a baking stone or steel can be particularly beneficial for baking high altitude pastry recipes, especially pie crusts and laminated doughs. A preheated baking stone provides a consistent, intense heat source from below. This helps the bottom crust cook thoroughly and become flaky before the top over-bakes, which can be a challenge at altitude. It also helps regulate oven temperature fluctuations, providing a more stable environment for the pastry to rise and set.
Place the baking stone on the bottom rack of your oven while it preheats. Ensure it's fully heated before placing the pastry on it. This technique promotes a crisp bottom crust and even baking, addressing some of the heat distribution challenges that can occur at higher elevations. It's a simple tool that can make a noticeable difference in the texture of your high altitude pastry recipes.
Monitoring Pastry Color and Texture During Baking
Relying solely on the timer in high altitude baking can be misleading, as baked goods often cook and brown faster. For high altitude pastry recipes, it's essential to monitor the color and texture of the pastry throughout the baking process. Look for a consistent golden brown color across the surface, including the edges and bottom (if visible).
For pies, watch for the filling to be bubbling, especially in the center, as this indicates it's reaching a safe temperature and setting. For blind-baked crusts, ensure the bottom is dry and golden, not just the edges. If parts are browning too quickly, cover them with foil. Learn to recognize the visual cues of a perfectly baked pastry in your oven at your altitude. Your eyes and a little experience are often the best tools for successful high altitude pastry recipes.
Conclusion: Mastering High Altitude Pastry Baking with Ease
Baking flaky pastries at high altitude requires a thoughtful approach, but it's far from impossible. By understanding the unique environmental factors – lower air pressure, increased evaporation, and altered boiling points – you can make targeted adjustments to your ingredients and techniques. Focusing on key areas like increasing liquid slightly, maintaining cold temperatures, minimal mixing, proper chilling, and adjusting baking times and temperatures are the secrets to success.
While there's no single universal formula that works for every high altitude kitchen, the principles outlined here provide a strong foundation. Don't be discouraged by initial attempts that aren't perfect. Embrace the process of experimentation, keep detailed notes, and learn how ingredients behave at your specific elevation. With practice and patience, you'll be creating beautiful, tender, and wonderfully flaky high altitude pastry recipes with confidence and ease, proving that altitude is just another ingredient to master in the art of baking.
Frequently Asked Questions
How does altitude affect pastry baking?
Higher altitude means lower air pressure, which causes liquids to evaporate faster and leavening agents to rise more quickly. This can result in dry and overly risen pastries.
What adjustments should I make to my pastry recipe at high altitude?
Generally, you'll need to reduce the leavening agent (baking powder/soda) and increase the liquid in your pastry recipe to compensate for the faster evaporation.
Why are my high altitude pastries turning out dry and crumbly?
Dryness is a common issue at high altitude. This is often due to excessive evaporation of liquids during baking. Consider adding more liquid or reducing baking time.
What types of flour work best for high altitude pastry recipes?
Using a flour with slightly lower protein content, like pastry flour or all-purpose flour, can help prevent a tough, dry pastry. Avoid high-gluten flours like bread flour.
How can I prevent my pastries from collapsing at high altitude?
Collapsing can happen if the pastry rises too quickly and then deflates. Try slightly lowering the oven temperature and ensuring you've reduced the leavening agent appropriately to control the rise.
Final Reflection: Mastering the Mountaintop Bake: Flaky Pastries at High Altitude
The quest for perfectly flaky pastries at high altitude is more than just a culinary challenge; it's a testament to the power of adaptation and precision. Baking at higher elevations presents unique obstacles, demanding a deeper understanding of how altitude affects ingredients and baking processes. This article has explored those challenges, offering solutions and techniques to conquer the thin air and achieve consistently delicious results.
The journey to mastering high-altitude baking is a deeply rewarding one. It's about embracing the unique environment and learning to work with it, rather than against it. The subtle shifts in air pressure and moisture content demand a nuanced approach, forcing bakers to hone their skills and understand the fundamental principles of pastry making. The most beautiful things are the most fragile,
a sentiment that rings true for delicate pastries, especially at high altitude. This journey of adaptation mirrors our own lives, where navigating challenges often leads to greater appreciation and understanding.
Now, armed with the knowledge and techniques shared in this article, I invite you to embark on your own high-altitude baking adventures. Don't be intimidated by the challenges; embrace them as opportunities to refine your skills and create truly exceptional pastries. Experiment with the recipes, adjust them to your specific altitude, and most importantly, enjoy the process of transforming simple ingredients into something exquisite. The flaky, buttery reward awaits!
Unlock Your High-Altitude Baking Success!
Thanks for taking the time to explore the secrets of flaky pastries at high altitude! We hope you gained valuable insights and are ready to conquer those challenging baking conditions. Now it's time to put your newfound knowledge into practice.
- Bake your masterpiece: Try our recommended recipe adjustments and experience the joy of perfectly flaky pastries, even at altitude. Don't forget to take notes and tweak the recipe to your own liking!
- Share your success: Show off your incredible creations on social media using #BakeWithEaseHighAltitude. Let's inspire other high-altitude bakers!
- Join our community: Head over to our forums to connect with fellow bakers and share your tips and challenges. We're all in this together!
What unique high-altitude baking tip are you most excited to try first?