
Mastering Sharp Edges on Buttercream Cakes: Pro Techniques

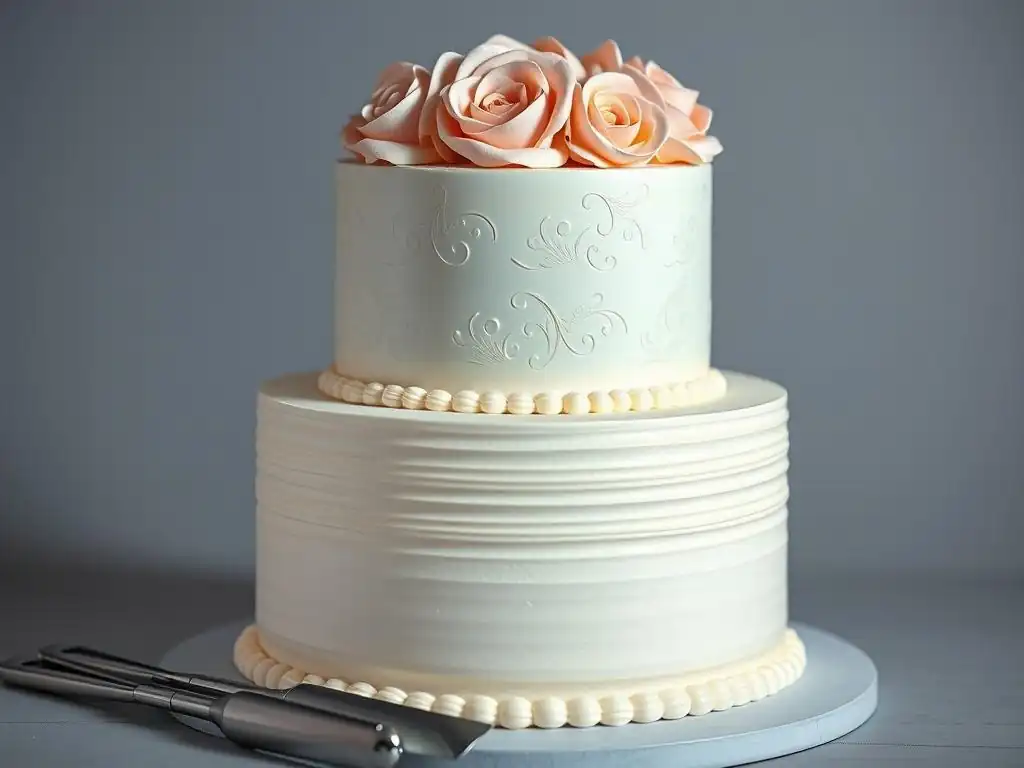
Welcome to BakeWithEase, where even the most ambitious baking dreams become deliciously achievable! Ready to elevate your cake decorating game? This week, we're diving deep into the secrets of achieving those coveted sharp buttercream edges that define a truly professional finish. Discover the pro techniques that will transform your cakes from homemade to haute couture. But how do you get that perfectly smooth, crisp edge? Read on to unlock the insider tips and tricks that will have everyone asking, "Where did you learn to do that?"
- Mastering Sharp Edges on Buttercream Cakes: Pro Techniques | BakeWithEase
- Introduction to Achieving Sharp Buttercream Edges
- Essential Tools for Sharp Buttercream Cake Edges
- Preparing Your Buttercream for Sharp Edges
- The Crumb Coat: Your Foundation for Sharp Buttercream Edges
- Applying the Final Buttercream Layer for Sharp Edges
- The Hot Water Method: Achieving Ultra-Smooth Buttercream
- Creating Sharp Buttercream Edges: The Step-by-Step Guide
- Troubleshooting Common Buttercream Edge Problems
- Advanced Techniques for Sharp Buttercream Cake Design
- Maintaining Your Sharp Buttercream Edges
- Conclusion: Elevating Your Buttercream Cake Skills with Sharp Edges
-
Frequently Asked Questions
- How important is the consistency of the buttercream for achieving sharp edges?
- What tools are recommended for creating sharp buttercream edges?
- What is the "chill method" and why is it helpful for achieving sharp edges?
- How many layers of buttercream are typically needed for sharp edge definition?
- What's the best way to avoid air bubbles in the buttercream when aiming for sharp edges?
- Final Reflection: The Enduring Allure of Perfectly Sharp Edges
- Unleash Your Inner Cake Artist: Sharpen Your Skills!
Mastering Sharp Edges on Buttercream Cakes: Pro Techniques | BakeWithEase
Achieving perfectly sharp edges on a buttercream cake is a hallmark of professional cake decorating. It transforms a simple cake into a stunning masterpiece, adding a touch of elegance and precision that impresses everyone. Whether you're aiming for a sleek, modern look or preparing a tiered cake for a special occasion like a wedding or significant birthday, mastering the techniques for sharp buttercream edges is an invaluable skill that elevates your baking game significantly.
Introduction to Achieving Sharp Buttercream Edges
Creating smooth, clean lines and razor-sharp corners on a buttercream-frosted cake can seem daunting at first, but it's absolutely achievable with the right approach and practice. It's a skill that many home bakers aspire to, as it instantly gives a cake a polished, professional appearance, making it look like it came straight from a high-end bakery. The pursuit of these crisp lines is a common goal for anyone looking to refine their cake decorating abilities.
Why Sharp Edges Matter for Buttercream Cake Design
Sharp buttercream edges contribute significantly to the overall aesthetic appeal of a cake. They provide a clean, defined boundary that makes the design pop and look intentional and sophisticated. For instance, a cake with crisp edges appears more structured and finished, which is particularly important for formal events or designs that rely on geometric patterns or clean lines. It's the difference between a lovely homemade cake and one that looks like it was crafted by a professional artist.
Furthermore, sharp edges are essential for specific decorating techniques, such as applying ganache drips, creating clean lines with stencils, or stacking multiple tiers securely. A cake with a flat, level top and sharp sides provides a stable and beautiful canvas for further decoration. Many popular cake trends, including minimalist designs and textured finishes, are enhanced by the foundational precision provided by sharp buttercream edges techniques.
Common Challenges in Creating Sharp Edges on Buttercream
Several hurdles can make achieving sharp buttercream edges frustrating for bakers. One of the most frequent issues is dealing with air bubbles trapped in the buttercream, which create unsightly pockmarks and prevent a smooth surface. Another common challenge is inconsistent buttercream consistency – if it's too soft, it won't hold its shape; if it's too stiff, it can be difficult to spread smoothly and can tear.
Temperature also plays a critical role; a warm environment can cause the buttercream to soften too quickly, making it hard to scrape cleanly and achieve a crisp edge. Additionally, not applying enough buttercream initially can lead to thin spots, while applying too much can be messy and harder to control. Mastering the techniques for sharp buttercream edges involves understanding how to overcome these variables through preparation and proper application methods.
Essential Tools for Sharp Buttercream Cake Edges
Having the right tools is fundamental when learning how to get sharp buttercream edges. While skill and technique are paramount, certain pieces of equipment are designed specifically to make the process smoother and more efficient. Think of it like painting – you need the right brushes and canvas to create your vision effectively.
The Importance of a Cake Turntable for Smooth Buttercream
A smooth-spinning cake turntable is perhaps the single most important tool for achieving even, smooth buttercream application and, consequently, sharp edges. It allows you to rotate the cake effortlessly and consistently while holding your scraper or spatula steady against the side. This consistent rotation is key to getting a uniform thickness of buttercream around the cake and a perfectly straight vertical surface.
Using a high-quality, stable turntable, preferably one with a non-slip base, ensures that the cake doesn't wobble as you work. This stability is crucial when you are making fine adjustments to smooth the surface or define the top edge. Many professional sharp buttercream edges techniques rely heavily on the smooth, continuous motion provided by a good turntable to achieve that flawless finish.
Offset Spatulas: Your Key to Precision
Offset spatulas, with their angled blades, are indispensable for applying and spreading buttercream evenly across the cake surface. They allow you to keep your hand clear of the cake while working, preventing accidental bumps or smears. You'll likely need a couple of sizes: a larger one (perhaps 8-10 inches) for applying the bulk of the buttercream and a smaller one (4-6 inches) for filling in gaps and making precise adjustments, especially around the top edge.
The flexibility and shape of an offset spatula make it ideal for pushing buttercream into place and creating that slight overhang needed on the top edge before you begin defining it. It's a versatile tool used throughout the frosting process, from applying the initial crumb coat to the final layer and the initial steps of achieving those coveted sharp buttercream edges.
Bench Scrapers: Achieving a Flawless Surface
Bench scrapers, also known as side scrapers or cake scrapers, are your best friend for getting perfectly straight sides on your cake. These tools typically have a straight, rigid edge, often made of metal or sturdy plastic, and come in various heights (a 6-inch or 8-inch scraper is common). By holding the scraper perpendicular to the turntable and against the side of the cake as it rotates, you can easily remove excess buttercream and smooth the surface to a near-perfect cylinder.
Using a bench scraper effectively is a core element of sharp buttercream edges techniques. It creates the flat, vertical plane on the side of the cake that serves as the foundation for forming the sharp top edge. Practice holding the scraper at a consistent angle and pressure as you turn the cake to achieve a smooth, even finish free from bumps and ridges.
Other Helpful Tools: Palette Knives, Hot Water, Piping Bags
Beyond the essentials, a few other tools can significantly aid in achieving sharp buttercream edges. Small palette knives are useful for intricate touch-ups and filling in small air pockets. A tall container of hot water (not boiling, but warm enough to heat metal) is crucial for the 'hot water method,' which involves briefly dipping your metal scraper or spatula to smooth the final buttercream surface.
Piping bags are excellent for applying a thick, even layer of buttercream around the sides and top of the cake, which can make the initial smoothing process much easier and help ensure you have enough material to create sharp edges. Applying buttercream this way, often using a large round tip or simply cutting the end off the bag, provides a more uniform layer than just spreading with a spatula, reducing the likelihood of thin spots.
Preparing Your Buttercream for Sharp Edges
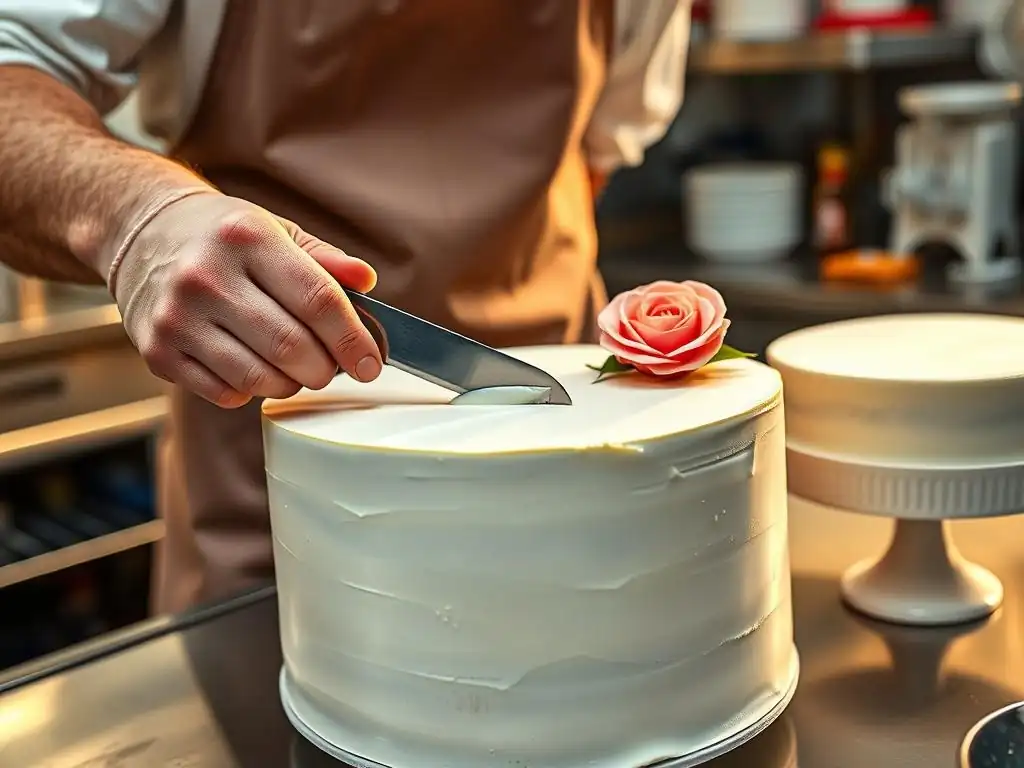
The quality and consistency of your buttercream are paramount when aiming for sharp edges. Even with the best tools and techniques, poor buttercream will make the process difficult, if not impossible. Proper preparation ensures your frosting is smooth, stable, and easy to work with, setting you up for success in achieving those clean lines.
Choosing the Right Buttercream Consistency: American vs. Swiss Meringue
Different types of buttercream have varying consistencies, which impact how easily you can achieve sharp edges. American buttercream, made from butter, powdered sugar, and liquid, is typically softer and sweeter. While it can be used, its high sugar content can sometimes make it prone to tearing or being less stable at room temperature, potentially making sharp buttercream edges techniques slightly more challenging for beginners.
Swiss meringue buttercream, Italian meringue buttercream, or even French buttercream, which are made using egg whites and cooked sugar syrup or simply egg yolks, are generally more stable, less sweet, and smoother due to the lack of powdered sugar granules. These types of buttercreams tend to hold their shape better and provide a firmer, smoother surface that is often preferred by professionals for creating razor-sharp edges. Aim for a consistency that is firm enough to hold its shape but soft enough to spread smoothly without tearing.
Achieving a Smooth Buttercream: Eliminating Air Bubbles
Air bubbles are the enemy of smooth buttercream and sharp edges. They create imperfections on the surface that are difficult to hide. To minimize air bubbles, ensure your butter is at the correct temperature (room temperature, but not melted) before creaming. After making your buttercream, switch to a paddle attachment on your mixer and beat the buttercream on the lowest speed for several minutes. This process, often called "burping" the buttercream, helps force trapped air to the surface.
Another effective technique to achieve a smooth buttercream is to press it through a sieve or fine-mesh strainer. While time-consuming, this method guarantees a very smooth texture. Alternatively, cover the bowl of buttercream with plastic wrap pressed directly onto the surface and let it rest at room temperature for an hour or two; the air bubbles will often rise and dissipate, leaving you with a denser, smoother frosting ready for your sharp buttercream edges techniques.
Coloring Your Buttercream Evenly for a Professional Finish
If you plan to color your buttercream, add the gel food coloring after the buttercream is made but before the final low-speed mixing step. Gel colors are concentrated and won't add excess liquid that could change the consistency. Add a little color at a time, mixing thoroughly to achieve a uniform shade.
Ensure the color is fully developed and consistent throughout the batch before frosting the cake. Uneven coloring will be noticeable on a smooth, sharp-edged surface and can detract from the professional look you are trying to achieve. Mix the color in well during the low-speed beating phase, which helps de-aerate the buttercream at the same time, contributing to both smooth color and smooth texture for your sharp buttercream edges.
The Crumb Coat: Your Foundation for Sharp Buttercream Edges
The crumb coat is a thin layer of buttercream applied directly to the cake layers before the final, thicker coat. It's a non-negotiable step when aiming for sharp edges, as it serves several crucial purposes that lay the groundwork for a flawless finish. Skipping this step will make it significantly harder to achieve a smooth, crumb-free surface.
Applying a Thin and Even Crumb Coat
The primary purpose of the crumb coat is to trap any loose crumbs from the cake layers, preventing them from getting into your final layer of buttercream. Apply a very thin layer of buttercream using an offset spatula, spreading it thinly but completely over the top and sides of the cake. Don't worry about getting it perfectly smooth at this stage; the goal is just to cover the cake and seal in the crumbs.
Use a minimal amount of buttercream for the crumb coat – just enough to create a sticky surface that catches crumbs. Applying too much can make the final layer thicker than desired. Ensure the entire surface is covered, including the very top edge, as this provides a base for the final layer of buttercream that will form your sharp edges.
Chilling the Crumb Coated Cake: A Crucial Step
Once the crumb coat is applied, the cake must be chilled until the buttercream is firm to the touch. This usually takes about 15 to 30 minutes in the refrigerator, depending on the type of buttercream and the temperature of your fridge. Chilling hardens the crumb coat, effectively locking all the crumbs in place and providing a stable, firm surface to apply the final layer of buttercream.
A properly chilled crumb coat makes applying the final layer much easier because the buttercream you are working with won't pick up crumbs or displace the base layer. This firm foundation is essential for using your bench scraper and achieving the smooth, straight sides necessary for effective sharp buttercream edges techniques.
Smoothing the Crumb Coat: Addressing Imperfections
While the crumb coat doesn't need to be perfectly smooth, taking a moment to lightly smooth it after it has chilled can be beneficial. If there are any large bumps or uneven areas, you can gently scrape them away with your bench scraper or a spatula once the crumb coat is firm.
This step helps ensure that the final layer of buttercream goes on evenly and that you don't have underlying bumps that will show through. It's a quick check and refinement that contributes to the overall success of your sharp buttercream edges, ensuring your foundation is as solid as possible.
Applying the Final Buttercream Layer for Sharp Edges
With a firm crumb coat in place, you're ready to apply the final, thicker layer of buttercream. This is where you build up the frosting to a sufficient thickness to allow you to scrape it smooth and create those distinct, sharp lines. Generosity is key in this step; you need enough buttercream to work with.
Applying a Generous Layer of Buttercream
Using a piping bag is highly recommended for applying the final layer. Pipe an even, thick layer of buttercream around the sides of the cake, starting from the bottom and working your way up, overlapping slightly. Then, pipe a generous mound of buttercream on top of the cake. Aim for a layer that is thicker than your desired final thickness, perhaps about 1/4 to 1/2 inch (approx. 0.6 to 1.2 cm) thick.
Applying a generous amount ensures you have enough buttercream to scrape away and achieve a perfectly smooth surface without exposing the crumb coat or cake underneath. Having excess buttercream also makes it easier to create the necessary overhang on the top edge, a critical step in sharp buttercream edges techniques.
Using the Cake Turntable and Bench Scraper for Initial Smoothing
Once the buttercream is applied, use your offset spatula to gently smooth the top and sides and remove any major excess. Then, it's time to use your bench scraper and turntable. Hold the bench scraper firmly against the side of the cake at a 90-degree angle to the turntable. While applying gentle, consistent pressure, slowly rotate the turntable. The scraper will remove excess buttercream, leaving a relatively smooth, straight side.
Repeat this process, cleaning your scraper frequently, until the sides are as straight and smooth as possible. Don't worry about the top edge at this stage – focus solely on getting the sides perfectly straight and the surface smooth. This initial smoothing with the bench scraper is fundamental to achieving the flat surface required for sharp buttercream edges.
Refining the Surface: Eliminating Imperfections and Blemishes
After the initial scrape, you'll likely notice some small imperfections, such as air pockets, lines from the scraper, or slightly uneven areas. Use your small offset spatula or a palette knife to fill in any holes or thin spots with a little more buttercream. Then, go over the sides again with your bench scraper and turntable to smooth out these patches.
You may need to repeat the scraping and filling process a few times to achieve a perfectly smooth surface. Patience is key here. The smoother and straighter your sides are at this stage, the easier it will be to create impeccable sharp buttercream edges later on. Ensure the top surface is also relatively flat and covered with a good amount of buttercream.
The Hot Water Method: Achieving Ultra-Smooth Buttercream
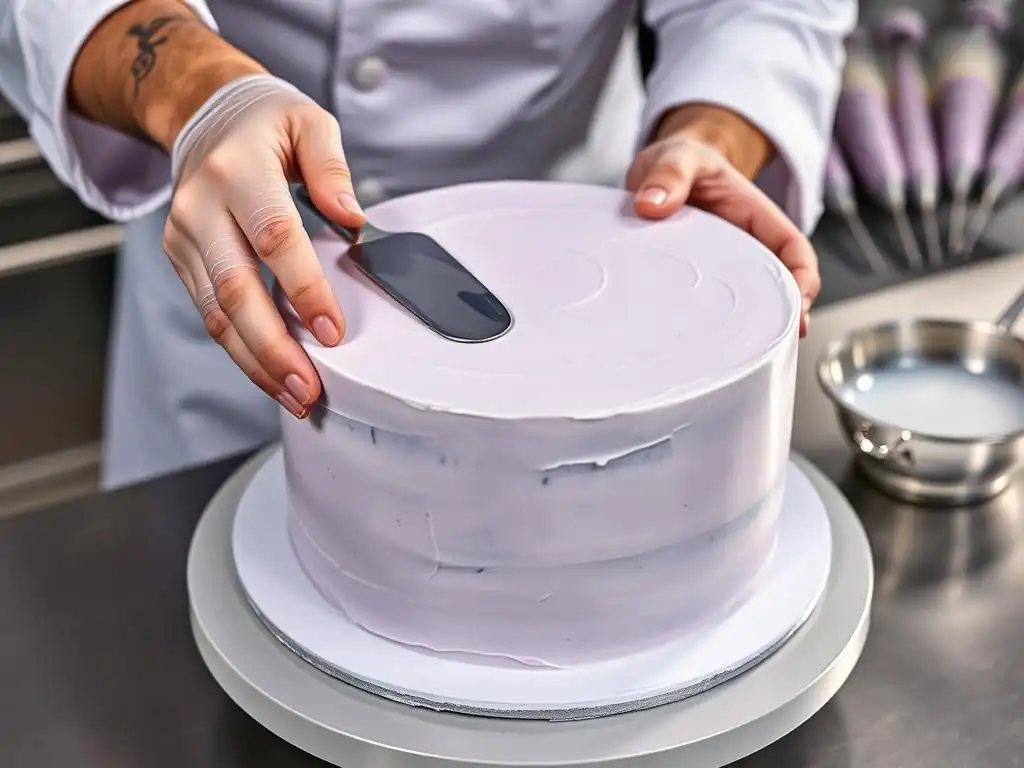
The hot water method is a popular technique among professional bakers for achieving an exceptionally smooth buttercream finish, which is a perfect precursor to creating sharp edges. It involves using the heat from warm water to slightly melt the surface of the buttercream as you scrape, resulting in a glass-like smoothness.
How Hot Water Helps Create Smooth Buttercream
Dipping a metal bench scraper or offset spatula into hot water and then wiping it dry causes the metal to heat up. When this warm metal comes into contact with the cold or room-temperature buttercream, it slightly melts the very surface layer of the frosting. As you scrape, this melted layer fills in tiny imperfections and leaves behind a remarkably smooth finish, almost like polishing the buttercream.
This technique works best with buttercreams that firm up well, such as Swiss or Italian meringue buttercream. It's less effective with very soft American buttercream. The warmth allows the scraper to glide more easily over the surface, reducing drag and the likelihood of tearing the buttercream, which are common issues when trying to achieve smooth and sharp buttercream edges techniques.
Dipping and Smoothing Techniques with Hot Water
To use the hot water method, have a tall container filled with hot water ready. Dip your metal bench scraper or offset spatula into the water for a few seconds, then immediately wipe it completely dry with a clean towel. The scraper should be warm, not scalding hot.
Hold the warm, dry scraper against the side of the cake (or on the top for the top surface) and rotate the turntable smoothly. The warm scraper will effortlessly smooth the buttercream. After each pass, dip the scraper back into the hot water and wipe it dry before the next pass. This ensures consistent warmth and prevents dragging cold buttercream onto your smoothed surface. This repeated dipping and scraping is a core part of achieving ultra-smoothness before tackling the sharp buttercream edges themselves.
Maintaining the Right Temperature for Optimal Results
The water temperature is important – it should be hot enough to warm the metal sufficiently but not so hot that it melts the buttercream too deeply or causes it to slide off the cake. Aim for water that is comfortably hot to the touch, perhaps around 100-120°F (40-50°C). If the water cools down, replace it with fresh hot water.
If your scraper is too hot, it can melt too much buttercream and create grooves or thin spots. If it's not warm enough, it won't effectively smooth the surface. Finding the right temperature and wiping the scraper completely dry each time are crucial for successful application of this sharp buttercream edges technique.
Creating Sharp Buttercream Edges: The Step-by-Step Guide
Once your cake has smooth, straight sides and a relatively flat top with a generous amount of buttercream, you are ready for the final steps to create those signature sharp edges. This process focuses on defining the transition between the top and the sides of the cake.
Step 1: Overhanging the Top Edge with Buttercream
Ensure you have a slight overhang of buttercream extending beyond the top edge of the cake. This is achieved naturally if you applied a generous amount of buttercream to the top and sides and then scraped the sides straight. The top buttercream should slightly bulge over the edge, forming a soft, rounded lip.
This overhang provides the material you will pull inwards to create the sharp, flat top surface and crisp edge. Without sufficient overhang, it's impossible to form a truly sharp edge. If necessary, use a small offset spatula to gently push a little more buttercream towards the edge to create this lip.
Step 2: Using the Offset Spatula to Pull Excess Buttercream Inward
Hold a clean, dry offset spatula (a smaller one, around 4-6 inches, works well for precision) parallel to the top surface of the cake. Start with the spatula blade just outside the overhanging buttercream edge. With the blade flat against the top surface, gently and smoothly pull the excess buttercream from the edge inwards towards the center of the cake.
Work your way around the entire circumference of the cake, pulling the buttercream in small sections. Each pull should remove a little bit of the overhang, gradually flattening the top surface and defining the edge. This is a key technique in achieving sharp buttercream edges – it's about shaping the existing frosting, not adding more.
Step 3: Cleaning the Spatula and Refining the Edge
After each pull, wipe your offset spatula clean on a paper towel or the side of your buttercream bowl. Using a clean spatula prevents dragging excess buttercream back onto the smoothed surface. Continue working around the cake, pulling the edge inwards, cleaning the spatula after each section.
As you go, you will see the top surface becoming flatter and the edge becoming crisper. You may need to make multiple passes, refining the edge until it is as sharp and defined as you desire. Use a gentle touch and consistent angle with the spatula. This refining process is iterative and requires patience to get those perfect sharp buttercream edges.
Step 4: Freezing the Cake for Ultra-Sharp Edges (Optional)
For the absolute sharpest possible edges, particularly useful for tiered cakes or very detailed work, you can briefly chill or freeze the cake after you have initially defined the edges. Place the cake in the freezer for about 15-20 minutes, or in the refrigerator for 30-60 minutes, until the buttercream is very firm.
Once the buttercream is firm, you can go back with a hot, dry metal scraper or spatula and make one final, very gentle pass over the top edge and sides. The firm buttercream allows you to scrape away any tiny imperfections or remaining soft spots, resulting in an incredibly crisp, almost glass-like edge. This freezing step is an advanced technique for achieving truly professional sharp buttercream edges.
Troubleshooting Common Buttercream Edge Problems
Even with the best techniques, you might encounter issues when trying to achieve sharp buttercream edges. Knowing how to identify and fix common problems is crucial for success. Don't get discouraged; troubleshooting is part of the learning process.
Dealing with Air Pockets and Bubbles
Air pockets are frustrating but fixable. If you see a bubble on the surface, gently pop it with a pin or the tip of a small spatula. Then, use a tiny amount of buttercream on your spatula to fill the resulting hole. Smooth the area carefully with your bench scraper or offset spatula.
If you have numerous small bubbles, it might indicate that your buttercream wasn't properly de-aerated. In this case, you might need to gently re-mix the buttercream on low speed or let it rest again. For minor surface bubbles on an almost-finished cake, the hot water method can sometimes help smooth them out during the final scrape, as the warm scraper can help fill in the tiny indents.
Fixing Uneven or Wavy Edges
Uneven or wavy edges usually result from inconsistent pressure or angle while scraping the sides or pulling in the top edge. If your side edge is wavy, apply a little more buttercream to the low spots and re-scrape the side with your bench scraper, focusing on holding it perfectly straight and at a consistent angle against the turntable.
For a wavy top edge, it means you weren't pulling the buttercream in evenly or consistently. Add a little more buttercream to the top edge if needed and repeat the process of pulling the excess inwards with your offset spatula, focusing on making smooth, even strokes and cleaning your spatula after each pull. Practice is key to developing the muscle memory for consistent pressure and movement when applying sharp buttercream edges techniques.
Preventing Buttercream from Tearing or Cracking
Buttercream can tear or crack if it's too cold or if you're applying too much pressure with your scraper or spatula. Ensure your buttercream is at the correct working temperature – firm enough to hold shape but soft enough to spread smoothly. If it feels too stiff, let it warm up slightly at room temperature.
When using a bench scraper or spatula, use gentle, consistent pressure rather than pressing too hard. If using the hot water method, ensure your tool isn't too hot, which can cause the surface to melt too quickly and tear. If the buttercream is tearing, it might be a sign to let the cake warm up slightly or adjust your technique to be gentler. Proper consistency and gentle handling are vital for smooth, tear-free sharp buttercream edges.
Advanced Techniques for Sharp Buttercream Cake Design
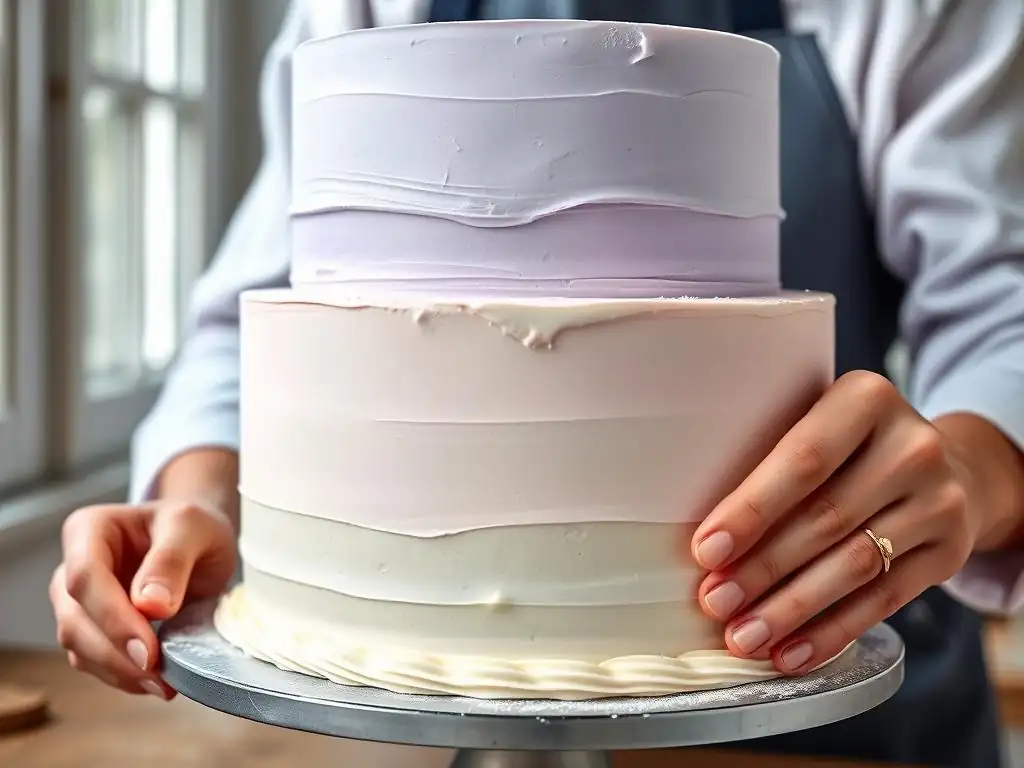
Once you've mastered the basic sharp buttercream edges techniques, you can explore more advanced ways to incorporate this skill into intricate cake designs. Sharp edges provide a perfect starting point for a variety of decorative finishes.
Creating Textured Buttercream Edges
Instead of a perfectly smooth edge, you can use the sharp edge as a base for texture. After defining the sharp edge, you can use various tools like combs, palette knives, or even brushes to create patterns or textures on the sides of the cake, extending right up to that crisp boundary.
For example, you can create vertical stripes, waves, or abstract textures that terminate precisely at the sharp top edge. This contrast between the clean edge and the textured side creates visual interest and highlights the precision of the sharp edge. These sharp buttercream edges techniques, combined with texture, offer endless creative possibilities.
Incorporating Gold Leaf or Sprinkles into the Edge Design
Sharp edges are ideal for applying decorative elements like gold leaf, silver leaf, or sprinkles precisely along the top boundary. The crisp edge provides a defined line to adhere these elements to, creating a stunning, luxurious effect.
To apply gold leaf, gently press small pieces onto the sharp edge using a dry brush or tweezers. For sprinkles, you can carefully press them onto the edge while the buttercream is still slightly soft, or apply them with a thin layer of edible glue or piping gel. The clean line of the sharp edge makes this precise application much easier and more impactful.
Using Stencils for Intricate Edge Patterns
Stencils can be used to create intricate patterns on the sides of the cake, extending up to the sharp edge. Apply a thin layer of buttercream over a stencil placed against the chilled, sharp-edged cake side. Scrape away the excess, and when you remove the stencil, a raised pattern is left behind.
The sharp edge ensures that the pattern stops cleanly at the top, providing a professional and polished look. This technique allows for complex designs, from geometric shapes to floral motifs, that are perfectly framed by the crisp sharp buttercream edges.
Maintaining Your Sharp Buttercream Edges
Once you've put in the effort to create beautiful sharp buttercream edges, you'll want to ensure they stay pristine until the cake is served. Proper storage and careful handling during transport are key.
Proper Storage for Buttercream Cakes
Buttercream cakes, especially those with delicate sharp edges, should be stored properly to maintain their appearance and freshness. Generally, buttercream cakes can be kept at cool room temperature for a day or two, provided the room isn't too warm. For longer storage, or if the buttercream is soft, refrigerate the cake.
Store the cake in an airtight cake carrier or box to prevent it from drying out or absorbing odors from the refrigerator. When refrigerating, the buttercream will firm up, which actually helps preserve the sharp edges. Allow the cake to sit at room temperature for 30-60 minutes before serving to ensure the buttercream softens to a pleasant eating consistency.
Transporting Cakes with Sharp Edges Safely
Transporting a cake with sharp buttercream edges requires extra care to prevent accidental bumps or damage. Use a sturdy, flat cake box or carrier that is larger than the cake itself. Place a non-slip mat or a few dots of buttercream on the bottom of the box to prevent the cake board from sliding.
Drive carefully, avoiding sudden stops or turns. If possible, place the cake box on a flat surface in your car, like the floorboard or a secured seat, rather than on someone's lap. For long distances or hot weather, consider using a cooler or insulated bag to keep the cake chilled during transport, further protecting those hard-earned sharp buttercream edges from softening or getting damaged.
Conclusion: Elevating Your Buttercream Cake Skills with Sharp Edges
Mastering the sharp buttercream edges techniques is a significant step in elevating your cake decorating skills. It requires attention to detail, the right tools, properly prepared buttercream, and a methodical approach to application and smoothing. The result is a cake that looks professional, elegant, and ready for any special occasion.
The Importance of Practice and Patience.
Achieving perfect sharp buttercream edges takes practice. Your first attempt might not be flawless, and that's okay! Each cake you decorate is an opportunity to refine your technique. Pay attention to what works and what doesn't, adjust your buttercream consistency, and practice using your tools.
Patience is your greatest ally. Take your time during each step – preparing the buttercream, applying the crumb coat, smoothing the final layer, and defining the edges. Don't rush the chilling steps. With consistent practice and a patient approach, you will undoubtedly improve your sharp buttercream edges techniques and be able to create stunningly polished cakes that impress everyone. Keep baking, keep practicing, and enjoy the process of mastering this beautiful skill!
Frequently Asked Questions
How important is the consistency of the buttercream for achieving sharp edges?
Buttercream consistency is crucial! It should be firm enough to hold its shape but smooth enough to spread easily. Avoid over-whipping, which can incorporate too much air.
What tools are recommended for creating sharp buttercream edges?
Essential tools include an offset spatula, a bench scraper, and a turntable. Consider using a hot water bath to warm your tools for a smoother finish.
What is the "chill method" and why is it helpful for achieving sharp edges?
The chill method involves chilling the cake after each coat of buttercream. This hardens the buttercream, making it easier to create clean, crisp edges.
How many layers of buttercream are typically needed for sharp edge definition?
Generally, two to three layers of buttercream are recommended. This allows for imperfections to be smoothed out and a sturdy base for the final sharp edge.
What's the best way to avoid air bubbles in the buttercream when aiming for sharp edges?
To minimize air bubbles, gently tap your bowl after mixing and use a slow, controlled spreading technique. Avoid over-mixing the buttercream, as this introduces air.
Final Reflection: The Enduring Allure of Perfectly Sharp Edges
The pursuit of flawlessly sharp edges on buttercream cakes isn't just a fleeting trend; it's a testament to the enduring power of precision and artistry in baking. The techniques explored in this article—from chilling the cake to using the right tools and mastering the crumb coat—represent a dedication to detail that elevates a simple cake into a breathtaking masterpiece. This commitment to excellence resonates deeply within the baking community and beyond, reflecting a broader cultural appreciation for craftsmanship and visual perfection.
The impact of sharp edges extends beyond mere aesthetics. It speaks to a deeper connection with the process of creation, a mindful approach to each step, and the satisfaction of achieving a technically challenging goal. The details are not the details. They make the design.
- Charles Eames. This quote perfectly encapsulates the importance of mastering these seemingly small techniques; they are the foundation upon which truly exceptional cakes are built. The pursuit of sharp edges encourages patience, precision, and a deeper understanding of the properties of buttercream itself, enriching the entire baking experience.
Now, I invite you to consider your own baking journey. What techniques have you mastered? What challenges still lie ahead? Don't be afraid to experiment, to push your boundaries, and to strive for that perfect, crisp edge. Remember, the journey of mastering sharp edges is as rewarding as the final result. Embrace the process, celebrate your successes, and continue to hone your skills. The world awaits your perfectly sharp, exquisitely crafted cakes.
Unleash Your Inner Cake Artist: Sharpen Your Skills!
Thanks for joining us on this buttercream journey! You've just unlocked some seriously impressive techniques for achieving those flawlessly sharp edges. Now it's time to put your new skills into practice.
- Master the art of the crumb coat: Practice makes perfect! Try making a simple cake this week and focus solely on perfecting your crumb coat technique. Note the subtle differences between your first and second attempts!
- Share your masterpiece: Show off your beautifully edged cake on social media! Use #BakeWithEase to connect with other passionate bakers and inspire others.
- Challenge yourself: Experiment with different frosting techniques and piping tips to create even more intricate designs. What new flavor combinations will you try?
Ready to transform your cake decorating game? What's your next cake challenge?