
Mastering GlutenFree Flour Blends for Perfect Bakes

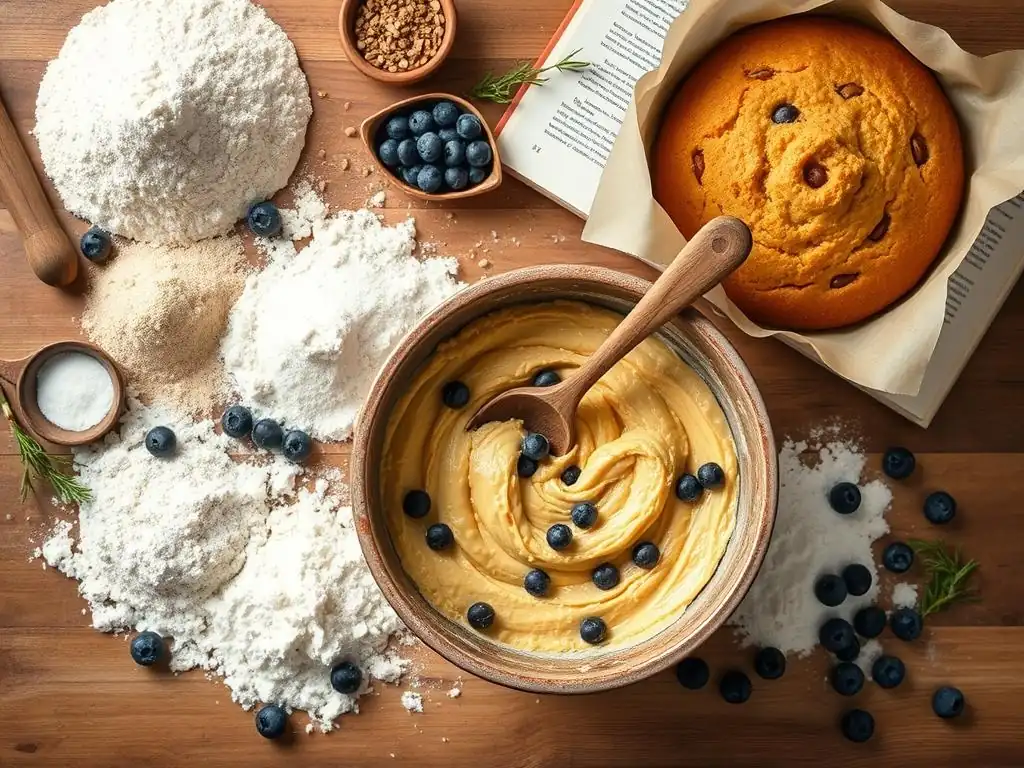
Welcome to BakeWithEase, your trusted guide to the delightful world of baking! Are you ready to unlock the secrets to creating exquisite gluten-free treats? In this article, we delve into the art of crafting the perfect gluten-free flour blend recipes, demystifying the process and empowering you to bake with confidence. Discover how to achieve exceptional textures and flavors, even without traditional wheat flour. Intrigued? Let's get started!
- Introduction to Gluten-Free Baking with Flour Blends
- Understanding the Components of a Gluten-Free Flour Blend
- Creating Your Own Gluten-Free Flour Blend Recipes
- Troubleshooting Common Gluten-Free Baking Issues
- Gluten-Free Flour Blend Recipes
- Tips and Tricks for Successful Gluten-Free Baking with Flour Blends
- Advanced Gluten-Free Flour Blend Techniques
- Conclusion: Embrace the World of Gluten-Free Baking with Flour Blends
-
Frequently Asked Questions
- What is a gluten-free flour blend, and why is it important?
- What are some common ingredients found in gluten-free flour blends?
- Can I substitute a gluten-free flour blend directly for wheat flour in any recipe?
- What are some tips for achieving the best results with gluten-free flour blends?
- Where can I find reliable gluten-free flour blend recipes?
- Final Reflection: Embracing the Art of Gluten-Free Baking
- Unlock Your Gluten-Free Baking Potential!
Introduction to Gluten-Free Baking with Flour Blends
Why Gluten-Free Flour Blends are Essential for Baking Success
Gluten-free baking can feel like a completely different world compared to traditional baking, primarily because you're working without gluten, the protein network that provides structure, elasticity, and chewiness. Relying on single gluten-free flours like almond flour or coconut flour often leads to unpredictable results, as each has unique absorption rates and structural properties. This is where gluten-free flour blends become indispensable.
They are carefully formulated combinations of different flours and starches designed to mimic the properties of wheat flour, offering a more consistent and reliable foundation for your baked goods. Using a well-balanced gluten-free flour blend recipe significantly increases your chances of achieving textures that are light, tender, and moist, instead of dense or crumbly.
Creating or using a good gluten-free flour blend recipe takes the guesswork out of substituting ingredients. Instead of needing to know the specific quirks of brown rice flour, tapioca starch, and sorghum flour individually for every recipe, you can often use a pre-mixed or homemade blend as a direct substitute for wheat flour (sometimes with minor liquid adjustments).
This not only simplifies the baking process but also makes it more accessible for beginners. Many successful gluten-free flour blend recipes are the result of extensive testing to find the optimal ratios of flours, starches, and binders, ensuring that your cookies spread correctly, your cakes rise beautifully, and your bread has a satisfying crumb.
Understanding Gluten's Role in Traditional Baking
In traditional baking, gluten is formed when two proteins, glutenin and gliadin, found in wheat and some other grains like barley and rye, come into contact with liquid and are agitated through mixing or kneading. Glutenin provides elasticity, allowing dough to stretch without breaking, while gliadin provides extensibility, allowing it to spread. Together, they form a strong, flexible network that traps gases produced by leavening agents like yeast or baking powder. This network is what gives wheat-based bread its characteristic chewy texture and enables cakes and pastries to hold their shape and rise.
Without gluten, baked goods can be dense, flat, and crumbly because there's no protein network to provide structure and trap air bubbles. Imagine trying to build a house with only sand – it won't hold its shape. Gluten acts like the cement and framework.
Gluten-free baking, therefore, requires alternative ingredients and techniques to replicate these functions. This often involves using a combination of different gluten-free flours, starches, and hydrocolloids (like gums) to provide structure, binding, and moisture retention, compensating for the absence of the gluten network. Developing effective gluten-free flour blend recipes is all about finding the right synergy between these components to achieve desirable textures.
A Guide to Gluten-Free Flour Blend Recipes
Navigating the world of gluten-free flour blend recipes can seem daunting at first, given the sheer variety of flours available. However, understanding the basic principles behind these blends makes it much easier. Most effective gluten-free flour blend recipes aim for a balance of different components: whole grain flours (like brown rice or sorghum) for structure and nutrients, starches (like tapioca or potato) for lightness and binding, and often a binder like xanthan gum or psyllium husk to mimic gluten's elasticity.
This guide will walk you through the essential components of gluten-free flour blends, explain how different flours function, and provide simple gluten-free flour blend recipes you can make at home. We'll cover how to tailor blends for specific types of baked goods, offering tips for cakes, cookies, breads, and pastries. By the end, you'll have a solid understanding of why certain ingredients are used and how to troubleshoot common issues, empowering you to confidently tackle any gluten-free baking project using reliable gluten-free flour blend recipes.
Understanding the Components of a Gluten-Free Flour Blend
Key Gluten-Free Flours and Their Properties
Effective gluten-free flour blend recipes are built upon a foundation of understanding the individual characteristics of various gluten-free flours. Each flour brings unique properties to the mix regarding flavor, texture, absorption, and nutritional content. Combining them strategically allows bakers to compensate for the lack of gluten and achieve results that closely resemble their wheat-based counterparts. For instance, some flours provide structure, while others contribute tenderness or help with browning.
A typical gluten-free flour blend recipe will include a mix of starchy flours (like rice) and perhaps some higher-protein or fiber flours (like sorghum or millet). The goal is to create a blend that is versatile enough for many applications but can also be tweaked for specific baked goods. Knowing the role of each flour helps you understand why certain ratios are used in gluten-free flour blend recipes and empowers you to make informed substitutions if needed, although sticking to tested recipes is recommended initially.
Rice Flour: White, Brown, and Sweet Rice Flour
Rice flour is a staple in many gluten-free flour blend recipes due to its neutral flavor and relatively low cost. White rice flour is made from polished rice kernels and is very fine, providing tenderness but little structure on its own. It's often used as a base in all-purpose gluten-free blends. Brown rice flour is made from the whole grain, including the bran, giving it a slightly nutty flavor, more fiber, and a coarser texture. While more nutritious, it can sometimes result in a gritty texture if not finely ground.
Sweet rice flour (also known as glutinous rice flour, though it contains no gluten) is made from short-grain rice that is high in amylopectin starch. This makes it very sticky and binding when heated, similar to tapioca starch. It's excellent for adding chewiness to baked goods and is often included in gluten-free flour blend recipes for mochi, certain pastries, or to improve the texture of cakes and cookies, acting as a binder.
Tapioca Starch/Flour: Binding and Texturizing
Tapioca starch, also often labeled as tapioca flour, is extracted from the cassava root. It is a very fine, white starch that is highly effective as a thickener and binder in gluten-free baking. When heated, it becomes somewhat gelatinous and chewy, contributing to the structure and elasticity that is missing without gluten. Many gluten-free flour blend recipes include a significant proportion of tapioca starch because it helps improve the texture of baked goods, preventing them from being too dry or crumbly.
While it provides excellent binding and a pleasant chewiness, using too much tapioca starch can result in a gummy texture, especially in recipes that require a delicate crumb. It's typically used in conjunction with other flours and starches in gluten-free flour blend recipes to achieve the desired balance. Its neutral flavor makes it versatile for both sweet and savory applications.
Potato Starch vs. Potato Flour: Understanding the Difference
It's crucial to understand the distinction between potato starch and potato flour, as they function very differently in gluten-free flour blend recipes. Potato starch is a fine, white powder extracted from potatoes that is primarily starch. Like tapioca starch, it is an excellent thickener and binder, contributing to a light, tender crumb and helping baked goods hold their shape. It's a common component in many commercial and homemade gluten-free flour blend recipes.
Potato flour, on the other hand, is made from ground whole potatoes (often cooked and dried first). It is much heavier and has a distinct potato flavor. It absorbs a lot of liquid and can make baked goods dense and heavy if used in large quantities. Potato flour is rarely used in general gluten-free flour blend recipes and is more commonly found in specific recipes like potato bread or as a minor addition for moisture. Always double-check which one a recipe calls for!
Cornstarch: A Common Gluten-Free Thickener
Cornstarch is a widely available and inexpensive starch extracted from corn kernels. It is a very fine powder primarily used as a thickening agent in sauces and gravies. In gluten-free baking, cornstarch is often used in conjunction with other flours and starches to improve the texture of cakes, cookies, and pastries. It contributes to tenderness and a crisp exterior in cookies and can help lighten the crumb of cakes.
While useful, cornstarch doesn't offer the same level of binding as tapioca or potato starch. It's frequently included in gluten-free flour blend recipes but usually in smaller proportions compared to rice flour or tapioca. Using too much can result in a dry or chalky texture. It's a valuable tool for adjusting the final texture of gluten-free baked goods.
Sorghum Flour: Adding Nutty Flavors
Sorghum flour is a whole grain flour made from the sorghum grain. It has a mild, slightly sweet, and nutty flavor and a relatively soft texture compared to some other whole grain gluten-free flours. Sorghum flour adds structure and nutritional value (fiber and protein) to gluten-free flour blend recipes. It's often used in combination with rice flour and starches.
Because it's a whole grain, sorghum flour can sometimes make baked goods a little denser than those made purely with white rice flour and starches. However, its pleasant flavor and nutritional profile make it a popular choice in many modern gluten-free flour blend recipes, particularly for breads, muffins, and cookies. It pairs well with both sweet and savory flavors.
Other Flours: Millet, Teff, Amaranth, Buckwheat
Beyond the most common flours, many other gluten-free options can be incorporated into gluten-free flour blend recipes to add flavor, nutrition, and unique textures. Millet flour is a pale yellow flour with a slightly sweet, mild flavor. It's a good source of protein and fiber and works well in muffins, breads, and flatbreads. Teff flour, available in brown and ivory varieties, is an ancient grain with a distinctive earthy or molasses-like flavor. It's highly nutritious and adds structure and moisture, often used in bread and injera (Ethiopian flatbread).
Amaranth flour, from the amaranth seed, has a slightly nutty, earthy flavor and is high in protein and minerals. It can be a bit dense and is best used in combination with lighter flours in gluten-free flour blend recipes. Buckwheat flour, despite its name, is not related to wheat; it's a pseudocereal. It has a strong, earthy flavor that works well in pancakes, crepes, and some rustic breads. Experimenting with these flours in your gluten-free flour blend recipes can open up new flavor possibilities.
The Importance of Starches in Gluten-Free Flour Mixes
Starches are absolutely critical components in successful gluten-free flour blend recipes. While flours like rice, sorghum, or millet provide some structure and substance, they lack the binding and gelling properties that gluten provides in wheat flour. Starches like tapioca, potato, and cornstarch fill this gap. When heated in the presence of liquid, starches undergo gelatinization, forming a network that helps bind ingredients together, trap moisture, and provide structure.
A typical gluten-free flour blend recipe often contains between 20% and 40% starch. This ratio is essential for achieving a light, tender crumb that isn't dry or crumbly. Starches also contribute to the crispness of cookies and the delicate texture of pastries. Without sufficient starch, baked goods made with only gluten-free flours would likely be dense, heavy, and fall apart easily. Balancing the different types of starches can also fine-tune the texture, with tapioca adding chewiness and potato starch contributing tenderness.
Gums: Xanthan Gum and Guar Gum for Gluten-Free Baking
Xanthan gum and guar gum are hydrocolloids commonly used in gluten-free baking as substitutes for gluten's binding and elastic properties. These gums are polysaccharides that create viscosity and elasticity when hydrated, helping to hold baked goods together and prevent crumbling. They act like a binder, mimicking the network that gluten would normally form. Many gluten-free flour blend recipes, especially commercial ones, include a small amount of gum already mixed in.
However, some gluten-free flour blend recipes are sold without gum, allowing the baker to add the precise amount needed for a specific recipe. Generally, xanthan gum is preferred for yeast-leavened breads and provides more elasticity, while guar gum is often used in cakes, muffins, and quick breads. Using too much gum can result in a gummy or slimy texture, so it's important to follow recipe recommendations carefully. Typical usage ranges from 1/4 teaspoon per cup of flour blend for cakes to 1 teaspoon per cup for bread.
Creating Your Own Gluten-Free Flour Blend Recipes
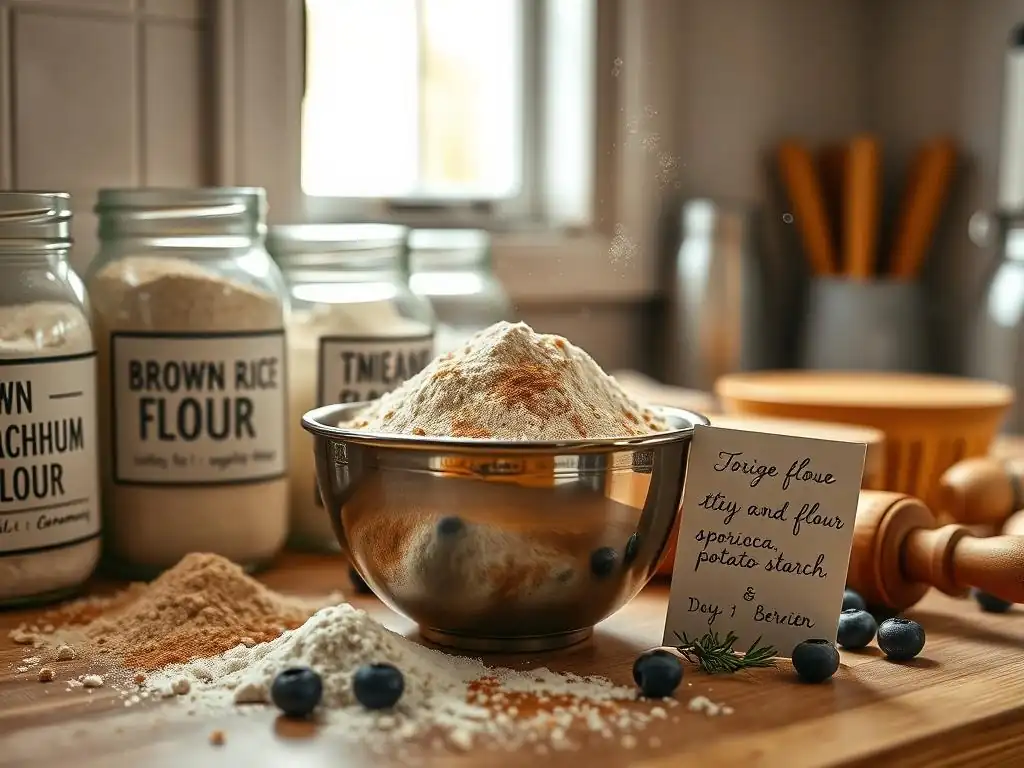
Basic Gluten-Free Flour Blend Recipe for All-Purpose Use
Creating your own gluten-free flour blend recipe offers control over ingredients and can be more cost-effective than buying pre-made blends. A good basic all-purpose blend aims to be versatile enough for a wide range of recipes, from muffins and cookies to quick breads. The key is balancing different flours and starches to achieve properties similar to wheat flour. This typically involves a base of rice flours combined with one or more starches and often a whole grain flour for added flavor and nutrition.
Developing your go-to gluten-free flour blend recipe takes some experimentation, but starting with a reliable ratio is key. Many popular blends follow a pattern of roughly 40-50% whole-grain flour (like brown rice or sorghum), 30-40% white rice flour, and 20-30% starch (like tapioca or potato). Remember that you'll likely need to add a binder like xanthan or guar gum to individual recipes, as adding it directly to the blend can sometimes lead to inconsistent results depending on the application.
Ingredients and Ratios for a Versatile Blend
A common and effective gluten-free flour blend recipe for general use might look something like this:
- 40% Brown Rice Flour (or Sorghum Flour)
- 40% White Rice Flour
- 20% Tapioca Starch (or Potato Starch)
For example, to make a batch of this gluten-free flour blend recipe, you could use:
2 cups Brown Rice Flour
2 cups White Rice Flour
1 cup Tapioca Starch
This 1:1:0.5 ratio (or 2:2:1) by volume is a good starting point for many gluten-free flour blend recipes. You can adjust the whole grain component based on preference or nutritional goals. Some bakers prefer a blend with slightly more starch for a lighter texture, perhaps using a 1:1:1 ratio of brown rice, white rice, and starch. Keep notes on which ratios work best for different types of baking you do.
Mixing and Storing Your Homemade Gluten-Free Flour Blend
Once you've decided on your gluten-free flour blend recipe ratios, the next step is mixing and storing it properly. Sift all the individual flours and starches together into a large bowl or container. Sifting helps to combine them evenly and removes any clumps. Whisk thoroughly to ensure uniform distribution of each component throughout the blend. Uneven distribution can lead to inconsistent baking results.
Store your homemade gluten-free flour blend recipe in an airtight container in a cool, dark place, like your pantry. For longer storage, especially if you live in a warm or humid climate, or if your blend contains whole grain flours which can turn rancid faster, consider storing it in the refrigerator or freezer. Properly stored, a homemade gluten-free flour blend can last several months in the pantry and even longer in the fridge or freezer. Always check for any off smells before using.
Tailoring Gluten-Free Flour Blends for Specific Baked Goods
While an all-purpose gluten-free flour blend recipe is convenient, tailoring your blend slightly for specific types of baked goods can significantly improve results. The ideal balance of protein, starch, and fiber needed for a light cake differs from what's needed for a chewy cookie or a structured loaf of bread. Understanding these differences allows you to modify a basic blend or create specific gluten-free flour blend recipes for your favorite treats.
Tweaking the proportions of flours and starches, and adjusting the type and amount of gum used, are key strategies. For instance, recipes requiring a lot of structure might benefit from a slightly higher proportion of whole-grain flour, while those needing tenderness might use more white rice flour and starch. Specific gluten-free flour blend recipes are often developed through trial and error, testing different ratios until the desired texture is achieved.
Gluten-Free Flour Blend for Cakes: Achieving a Light and Fluffy Texture
For cakes, the goal is typically a light, tender, and moist crumb. A gluten-free flour blend recipe for cakes often uses a higher proportion of starches compared to an all-purpose blend. This helps create that delicate texture that melts in your mouth. A typical cake blend might reduce the whole grain flour slightly and increase the proportion of white rice flour and starches like tapioca and potato starch.
A possible ratio for a cake-specific gluten-free flour blend recipe could be:
40% White Rice Flour
30% Sorghum Flour (or other mild whole grain)
30% Starch (Tapioca Starch, Potato Starch, or a mix)
When using this blend in a cake recipe, you would typically add a small amount of xanthan or guar gum, perhaps around 1/4 to 1/2 teaspoon per cup of blend, depending on the recipe's other ingredients (like eggs and fat, which also contribute binding). The higher starch content helps prevent the cake from becoming dense or heavy.
Gluten-Free Flour Blend for Cookies: Creating Chewy and Crisp Cookies
Cookies offer a wide range of desired textures, from crisp and snappy to soft and chewy. A versatile gluten-free flour blend recipe for cookies needs to accommodate these variations. Generally, a blend for cookies benefits from a good balance of structure and spread. Using a mix of flours and starches helps achieve the desired outcome, whether it's a cookie that holds its shape or one that spreads into a thin, crisp disc.
A common ratio for a cookie-focused gluten-free flour blend recipe might be similar to an all-purpose blend but with potential tweaks based on the desired outcome. For chewier cookies, incorporating sweet rice flour or slightly more tapioca starch can be beneficial. For crispier cookies, ensuring a good amount of white rice flour and potato starch can help.
Consider this ratio for a blend aimed at slightly chewier cookies:
35% Brown Rice Flour
35% White Rice Flour
20% Tapioca Starch
10% Sweet Rice Flour
Using about 1/4 to 1/2 teaspoon of xanthan gum per cup of this gluten-free flour blend recipe in your cookie dough will also help with structure and chewiness. Remember that factors like butter temperature and baking time also play significant roles in cookie texture.
Gluten-Free Flour Blend for Breads: Achieving Structure and Rise
Baking gluten-free bread is arguably one of the most challenging tasks, as it requires replicating the strong, elastic network that gluten provides to trap gases and allow the loaf to rise significantly. A gluten-free flour blend recipe for bread needs a robust structure. This often means a higher proportion of whole grain flours and a careful balance of starches and binders.
A typical gluten-free flour blend recipe for yeast bread might emphasize flours that contribute more structure, such as brown rice, sorghum, or millet. It will also require a binder like xanthan gum or psyllium husk powder, often in higher amounts than for cakes or cookies.
A possible ratio for a bread-specific gluten-free flour blend recipe:
50% Whole Grain Flour (Brown Rice, Sorghum, Millet)
30% White Rice Flour
20% Starch (Tapioca, Potato)
When using this blend for yeast bread, you would typically add 1 to 1.5 teaspoons of xanthan gum or 1-2 tablespoons of psyllium husk powder (whole or ground, follow recipe directions) per cup of blend. These binders are crucial for providing the necessary elasticity and structure for the dough to rise and hold its shape during baking.
Gluten-Free Flour Blend for Pastries: Working with Delicate Doughs
Pastries, like pie crusts, scones, and tarts, require a delicate balance of tenderness and flakiness, along with enough structure to be workable. A gluten-free flour blend recipe for pastries needs to facilitate the creation of tender doughs that don't become tough or crumbly. This often involves using flours and starches that promote tenderness and minimize toughness.
A gluten-free flour blend recipe for pastries might lean more towards white rice flour and starches, possibly incorporating some almond flour or a small amount of a softer gluten-free flour like sorghum. The key is to avoid overworking the dough, just as in traditional pastry making.
A potential ratio for a pastry-focused gluten-free flour blend recipe:
50% White Rice Flour
30% Starch (Tapioca, Potato, or Cornstarch)
20% Sorghum Flour (or Almond Flour)
When using this blend for pastries, a smaller amount of binder, perhaps 1/4 to 1/2 teaspoon of xanthan or guar gum per cup, is usually sufficient. The focus is less on elasticity and more on achieving a tender, workable dough that bakes up light and flaky. Keeping ingredients very cold is also essential for flaky gluten-free pastries.
Troubleshooting Common Gluten-Free Baking Issues
Even with a great gluten-free flour blend recipe, you might encounter challenges. Gluten-free baking has its own unique set of potential pitfalls, but understanding the common issues and their causes can help you troubleshoot effectively. Many problems stem from the absence of gluten's structural properties and the different absorption rates of gluten-free ingredients. Don't be discouraged by imperfect results initially; it's a learning process!
Common issues include baked goods that are dry, crumbly, dense, gummy, or fail to rise properly. These problems are often related to the balance of flours and starches in your gluten-free flour blend recipe, the amount of liquid used, the effectiveness of your leavening agents, or the mixing technique. Identifying the specific problem is the first step toward fixing it.
Dry and Crumbly Baked Goods: Hydration and Binding Solutions
One of the most frequent complaints about gluten-free baked goods is their tendency to be dry and crumbly. This happens because gluten-free flours often absorb less liquid than wheat flour, or they release moisture more readily during baking. Additionally, without the gluten network to hold everything together, baked goods can simply fall apart.
To combat dryness and crumbling when using your gluten-free flour blend recipe:
- Increase Hydration: Many gluten-free recipes require more liquid (milk, water, eggs, oil) than their wheat counterparts. If a recipe seems dry, try adding a tablespoon or two of extra liquid next time.
- Ensure Proper Binding: Make sure you are using the correct amount of binder (xanthan gum, guar gum, psyllium husk) specified in the recipe or appropriate for the type of baked good. These binders are essential for holding the structure together. For example, if your gluten-free flour blend recipe for cookies is too crumbly, slightly increasing the xanthan gum (e.g., from 1/4 tsp to 1/2 tsp per cup of blend) can help.
- Add Moisture-Retaining Ingredients: Ingredients like yogurt, sour cream, mashed banana, applesauce, or extra egg yolks can add moisture and richness, improving texture and preventing dryness.
Dense and Gummy Textures: Balancing Flours and Starches
On the flip side of the spectrum, gluten-free baked goods can sometimes turn out dense or gummy. A gummy texture is often a result of using too much starch, too much binder (especially tapioca starch or xanthan gum), or not enough liquid. Dense textures can occur if the flour blend is too heavy (too many whole grains, not enough starch) or if the leavening is insufficient.
To avoid dense or gummy results with your gluten-free flour blend recipe:
- Check Starch Ratio: Review your gluten-free flour blend recipe. Is the starch proportion too high? For general baking, starches usually make up 20-30% of the blend. Exceeding this significantly without balancing other ingredients can lead to gumminess.
- Reduce Binder: If your recipe calls for adding gum, ensure you are not using too much. Start with the lower end of the recommended range (e.g., 1/4 tsp per cup for cakes, 1/2 tsp for cookies).
- Adjust Liquid: Sometimes, a gummy texture can paradoxically be a sign that the flours weren't fully hydrated. Ensure all ingredients are at room temperature and mix until just combined to allow starches to absorb liquid properly without overdeveloping viscosity.
- Balance Blend Components: If your baked goods are consistently dense, your gluten-free flour blend recipe might benefit from a higher proportion of lighter flours (like white rice flour) and starches, and a slightly lower proportion of heavier whole-grain flours.
Lack of Rise: Understanding Leavening Agents in Gluten-Free Baking
Achieving a good rise is crucial for light and airy gluten-free baked goods, especially cakes and breads. Without gluten to create a strong structure that traps gases, leavening agents need extra help from binders and the right flour blend composition. If your baked goods are flat or don't rise as expected when using your gluten-free flour blend recipe, consider these factors:
- Freshness of Leavening: Ensure your baking powder and baking soda are fresh. Test baking powder by adding a teaspoon to hot water; it should bubble vigorously. Test baking soda by adding a teaspoon to vinegar; it should fizz immediately.
- Adequate Binder: For yeast breads, sufficient xanthan gum or psyllium husk is vital for the dough to hold the gas produced by the yeast. If your gluten-free flour blend recipe for bread isn't rising, check the binder amount.
- Proper Mixing: Don't overmix batters for cakes and muffins, as this can toughen them (even without gluten) and inhibit rise. For yeast doughs, however, proper mixing is needed to activate the binders.
- Oven Temperature: Ensure your oven is calibrated and preheated properly. An oven that is too cool can prevent leavening agents from working effectively before the structure sets.
Gritty or Sandy Texture: Refining Your Gluten-Free Flour Blend
A gritty or sandy texture is often caused by coarser gluten-free flours, particularly brown rice flour, if they are not finely milled. Some commercial blends can have this issue, and homemade gluten-free flour blend recipes are susceptible if the individual flours aren't fine enough.
To address a gritty texture when using your gluten-free flour blend recipe:
- Source Finer Flours: Look for "superfine" brown rice flour or other flours. The particle size makes a significant difference in the final texture.
- Sift Thoroughly: Always sift your homemade gluten-free flour blend recipe ingredients after mixing. This helps remove any larger particles that might contribute to grittiness.
- Allow Batter/Dough to Rest: For some recipes, allowing the batter or dough to rest for 15-30 minutes before baking can help the flours absorb moisture more fully, potentially reducing perceived grittiness. This is particularly helpful with brown rice flour.
- Adjust Blend Ratio: If using a specific gluten-free flour consistently results in grittiness, consider slightly reducing its proportion in your blend and increasing a finer flour like white rice flour or a starch.
Gluten-Free Flour Blend Recipes
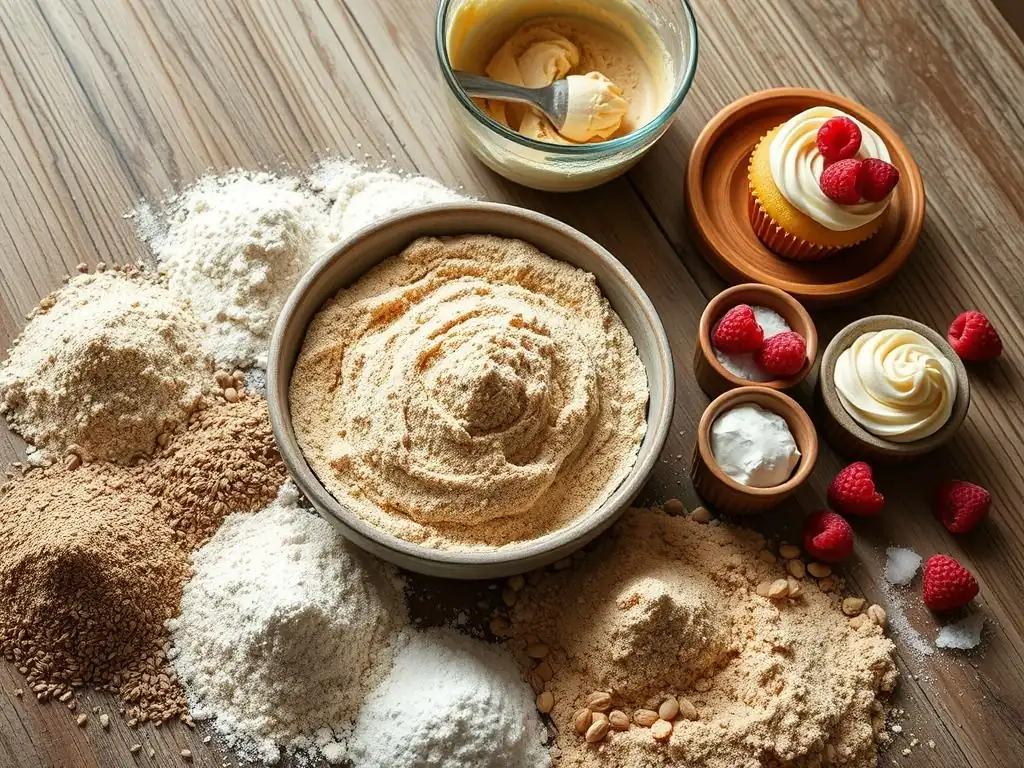
Here are a few classic gluten-free flour blend recipes adapted for use with a homemade or commercial all-purpose gluten-free flour blend. Remember that results can vary slightly depending on the specific blend used and other ingredients.
A beloved classic, made gluten-free using a versatile gluten-free flour blend recipe. These aim for a balance of crisp edges and a chewy center.
Ingredients and Step-by-Step Instructions
Yields approximately 2 dozen cookies
Prep time: 15 minutes
Chill time: 30 minutes (optional, but recommended)
Bake time: 9-12 minutes
Ingredients:
- 1/2 cup (113g) unsalted butter, softened
- 1/2 cup (100g) granulated sugar
- 1/2 cup (100g) packed light brown sugar
- 1 large egg, at room temperature
- 1 tsp vanilla extract
- 1 1/2 cups (210g) all-purpose gluten-free flour blend (ensure it contains starch)
- 1/2 tsp xanthan gum (omit if your blend already contains it)
- 1/2 tsp baking soda
- 1/4 tsp salt
- 1 cup (170g) chocolate chips (dairy-free if needed)
Instructions:
- Preheat oven to 375°F (190°C). Line baking sheets with parchment paper.
- In a large bowl, cream together the softened butter, granulated sugar, and brown sugar until light and fluffy.
- Beat in the egg and vanilla extract until well combined.
- In a separate medium bowl, whisk together the gluten-free flour blend, xanthan gum (if using), baking soda, and salt.
- Task List:
- [ ] Cream butter and sugars.
- [ ] Add egg and vanilla.
- [ ] Whisk dry ingredients.
- Gradually add the dry ingredients to the wet ingredients, mixing on low speed until just combined. Do not overmix.
- Stir in the chocolate chips.
- Optional: For thicker cookies, cover the dough and chill in the refrigerator for at least 30 minutes.
- Drop rounded tablespoons of dough onto the prepared baking sheets, leaving about 2 inches between cookies.
- Bake for 9-12 minutes, or until the edges are golden brown and the centers look slightly soft.
- Let cookies cool on the baking sheet for 5 minutes before transferring to a wire rack to cool completely.
Gluten-Free Vanilla Cake
A simple yet delicious gluten-free vanilla cake using a standard gluten-free flour blend recipe. This recipe aims for a moist and tender crumb.
Ingredients and Step-by-Step Instructions
Yields one 8-inch round cake
Prep time: 20 minutes
Bake time: 30-35 minutes
Ingredients:
- 1 1/2 cups (210g) all-purpose gluten-free flour blend (ensure it contains starch)
- 1/2 tsp xanthan gum (omit if your blend already contains it)
- 1 tsp baking powder
- 1/4 tsp baking soda
- 1/4 tsp salt
- 3/4 cup (150g) granulated sugar
- 1/2 cup (113g) unsalted butter, softened
- 2 large eggs, at room temperature
- 1 tsp vanilla extract
- 1/2 cup (120ml) milk (dairy or non-dairy), at room temperature
- 1/4 cup (60g) plain yogurt or sour cream (dairy or non-dairy), at room temperature
Instructions:
- Preheat oven to 350°F (175°C). Grease and flour an 8-inch round cake pan (use gluten-free flour or cocoa powder).
- In a medium bowl, whisk together the gluten-free flour blend, xanthan gum (if using), baking powder, baking soda, and salt.
- In a large bowl, cream together the softened butter and sugar until light and fluffy.
- Beat in the eggs one at a time, mixing well after each addition. Stir in the vanilla extract.
- Task List:
- [ ] Prepare cake pan.
- [ ] Whisk dry ingredients.
- [ ] Cream butter and sugar.
- [ ] Add eggs and vanilla.
- In a small bowl, whisk together the milk and yogurt/sour cream.
- Alternately add the dry ingredients and the milk mixture to the butter mixture, beginning and ending with the dry ingredients (e.g., 1/3 dry, 1/2 wet, 1/3 dry, 1/2 wet, 1/3 dry). Mix on low speed until just combined after each addition. Do not overmix.
- Pour batter into the prepared cake pan and smooth the top.
- Bake for 30-35 minutes, or until a wooden skewer inserted into the center comes out clean.
- Let the cake cool in the pan for 10-15 minutes before inverting it onto a wire rack to cool completely. Frost once fully cooled.
Gluten-Free Sandwich Bread
A basic gluten-free sandwich bread recipe using a bread-specific or all-purpose gluten-free flour blend recipe with added binder. This aims for a soft, sliceable loaf.
Ingredients and Step-by-Step Instructions
Yields one standard loaf
Prep time: 20 minutes
Rise time: 45-60 minutes
Bake time: 40-50 minutes
Ingredients:
- 2 1/4 cups (315g) gluten-free flour blend for bread (or all-purpose blend + binder)
- 1 tsp salt
- 1 tbsp sugar (or honey/maple syrup)
- 1 tbsp psyllium husk powder (or 1.5 tsp xanthan gum) - adjust based on blend/binder type
- 2 1/4 tsp instant dry yeast (one standard packet)
- 1 1/2 cups (360ml) warm water (105-115°F / 40-46°C)
- 2 tbsp oil (vegetable, olive, etc.)
- 1 large egg, at room temperature
Instructions:
- Lightly grease a standard 9x5 inch loaf pan.
- In a large bowl, whisk together the gluten-free flour blend, salt, sugar, and psyllium husk powder (or xanthan gum).
- In a separate bowl or liquid measuring cup, combine the warm water, oil, and egg. Whisk briefly.
- Add the wet ingredients to the dry ingredients.
- Task List:
- [ ] Grease loaf pan.
- [ ] Whisk dry ingredients.
- [ ] Combine wet ingredients.
- Mix with a stand mixer fitted with a paddle attachment, or with a hand mixer, on medium speed for about 3-5 minutes. The dough will be quite wet and sticky, more like a thick batter than traditional wheat dough.
- Scrape the dough into the prepared loaf pan and smooth the top with a wet spatula.
- Cover the pan loosely with plastic wrap (lightly greased to prevent sticking) and let rise in a warm place for 45-60 minutes, or until it has nearly doubled in size and the top is domed. It should reach just above the rim of the pan.
- Meanwhile, preheat oven to 375°F (190°C).
- Bake for 40-50 minutes, or until the crust is golden brown and the internal temperature reaches 200-210°F (93-99°C) when measured with an instant-read thermometer.
- Remove bread from the pan immediately after baking and let it cool completely on a wire rack before slicing. Slicing warm gluten-free bread often results in a gummy texture.
Tips and Tricks for Successful Gluten-Free Baking with Flour Blends
Mastering gluten-free baking with flour blends involves more than just having a great gluten-free flour blend recipe. Paying attention to technique and details can make a significant difference in the outcome of your baked goods. Small adjustments in how you measure, mix, and bake can turn a good result into a truly great one. These tips are applicable whether you're using a commercial blend or your own homemade gluten-free flour blend recipe.
Consistency is key in gluten-free baking because the margin for error can feel smaller than with wheat flour. Approaching it with patience and a willingness to learn from each bake will help you succeed. Don't be afraid to experiment slightly once you understand the basic principles and how your specific gluten-free flour blend recipe behaves.
Measuring Ingredients Accurately for Gluten-Free Recipes
Accurate measurement is paramount in gluten-free baking, perhaps even more so than in traditional baking. Because gluten-free flours and starches have different densities and absorption rates, inconsistencies in measurement can significantly impact the texture and structure of your baked goods. Using the scoop-and-level method for measuring flour by volume can result in vastly different amounts depending on how compacted the flour is.
The most reliable way to measure gluten-free flour blend recipes and other ingredients is by weight using a digital kitchen scale. If a recipe provides gram measurements, use them! If not, consider looking up approximate gram weights for common ingredients or using a consistent method for volume measurement, such as gently spooning the flour into a measuring cup and leveling it off without packing it down. Consistent measurement ensures consistent results when using your favorite gluten-free flour blend recipe.
The Importance of Room Temperature Ingredients
Many baking recipes, both gluten-free and traditional, specify using room temperature ingredients, especially eggs, butter, and dairy liquids. This is particularly important in gluten-free baking because ingredient temperature affects how they emulsify and how well dry ingredients absorb liquids. Cold ingredients don't combine as smoothly, which can lead to uneven texture and poor rise.
Room temperature butter creams better with sugar, creating air pockets essential for leavening. Room temperature eggs emulsify more easily into batters, contributing to a smoother texture and better binding. Room temperature liquids are crucial for activating yeast effectively in gluten-free bread recipes and ensuring starches in your gluten-free flour blend recipe begin to hydrate properly before baking. Plan ahead and take ingredients out of the refrigerator 30-60 minutes before you start baking.
Mixing Techniques for Optimal Gluten-Free Batter and Dough
Mixing technique plays a vital role in the final texture of gluten-free baked goods. Unlike wheat dough, which benefits from kneading to develop gluten, gluten-free doughs and batters require gentler handling once the dry ingredients are combined with the wet. Overmixing can lead to tough or gummy textures because it can overwork the starches and binders in your gluten-free flour blend recipe.
For cakes, muffins, and quick breads, mix only until the ingredients are just combined and no dry streaks remain. For cookies, mix until the dough comes together. For yeast breads made with a gluten-free flour blend recipe, you do need to mix longer (often with a mixer) to activate the binders and create a cohesive dough-like structure, but you won't be kneading it like wheat bread. Follow recipe instructions carefully regarding mixing times and methods.
Adjusting Baking Times and Temperatures
Gluten-free baked goods can sometimes bake differently than their wheat counterparts. They may brown faster on the outside while the inside is still undercooked, or they might take longer to bake through. It's important to be prepared to make minor adjustments to baking times and temperatures when using a new gluten-free flour blend recipe or trying a new gluten-free recipe.
Start checking for doneness a few minutes earlier than the recipe suggests. Use visual cues (golden brown edges, cake pulling away from the sides of the pan) and tests like inserting a skewer or toothpick (should come out clean or with moist crumbs, not wet batter). If the outside is browning too quickly, you can loosely tent the baked good with foil. Using an oven thermometer can help ensure your oven is heating accurately, eliminating a common variable. Keep notes on how your gluten-free flour blend recipes perform in your oven.
Advanced Gluten-Free Flour Blend Techniques
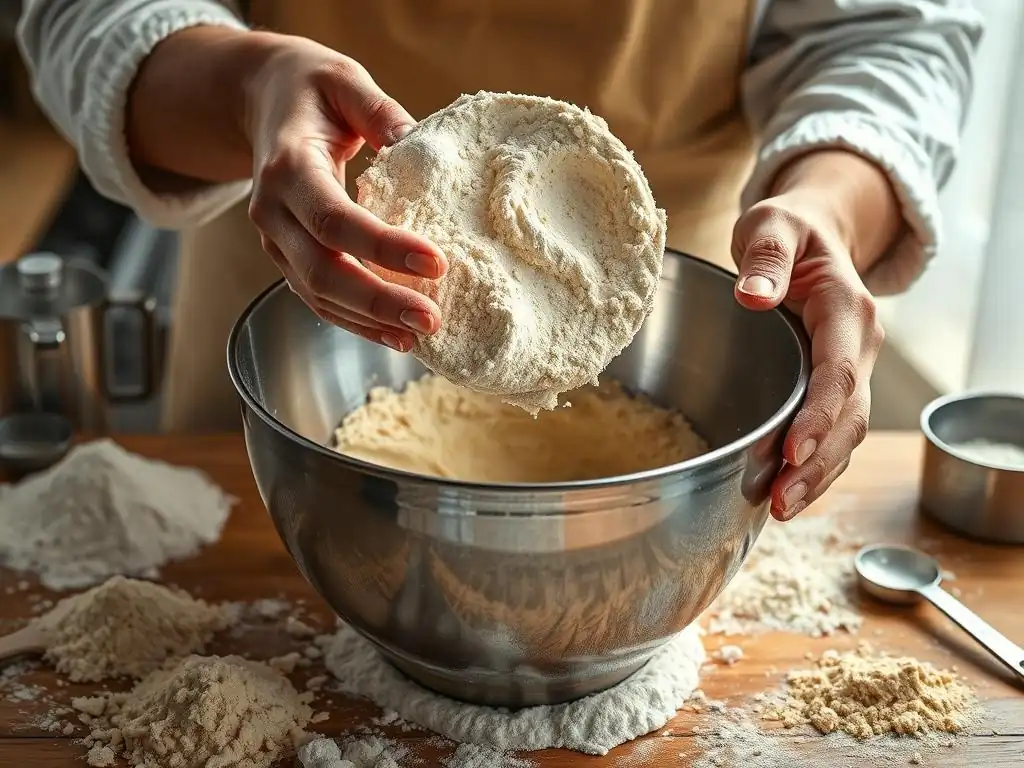
Once you're comfortable with basic gluten-free flour blend recipes and techniques, you might want to explore more advanced methods to further improve the texture and structure of your baked goods. These techniques often involve incorporating additional ingredients or experimenting with different binders and ratios to fine-tune results for specific applications, like creating a higher-protein blend or achieving a specific crumb structure.
These advanced techniques build upon the foundational understanding of how different components in your gluten-free flour blend recipe function. They allow for greater customization and can help solve specific textural challenges you might encounter with certain types of baked goods. Approach these with a willingness to experiment and adjust based on your results.
Using Protein Powders to Improve Texture
Incorporating a small amount of gluten-free protein powder into your gluten-free flour blend recipe can sometimes improve the structure and texture of baked goods, particularly bread. Protein contributes to structure and can help create a softer crumb. Options include whey protein isolate (if dairy is okay), egg white protein powder, or plant-based options like pea or rice protein.
Adding protein powder needs to be done carefully, as too much can lead to dry or tough results. A common approach is to substitute a small percentage (e.g., 5-10%) of the flour blend with protein powder. For example, in a bread gluten-free flour blend recipe, you might replace 2-3 tablespoons of the blend with protein powder. This is an area where experimentation is key to finding the right balance for your specific needs and preferences.
Incorporating Psyllium Husk for Enhanced Binding
While xanthan and guar gums are common binders, psyllium husk (whole or ground powder) is increasingly popular in gluten-free baking, especially for yeast breads. Psyllium husk is a soluble fiber that forms a gel when hydrated, providing significant binding and structure. Many bakers find it produces a more bread-like texture and crumb compared to xanthan gum in loaf breads.
If your gluten-free flour blend recipe doesn't include psyllium, you can add it directly to the dry ingredients of your recipe. The amount needed is typically higher than for xanthan gum, often ranging from 1 to 2 tablespoons of psyllium husk powder (or slightly more whole husks) per cup of gluten-free flour blend, particularly for bread recipes. Psyllium also absorbs a lot of liquid, so you might need to increase the hydration in your recipe slightly when using it.
Experimenting with Different Gluten-Free Gums
While xanthan gum and guar gum are the most common, other gums can be used in gluten-free baking, each with slightly different properties. Agar-agar, a plant-based thickener, can be used, though it functions differently than xanthan or guar and often requires heating to activate its gelling properties. Pectin, another plant-based option, is primarily used in jams and jellies but can sometimes be used in specific baking applications for texture.
Experimenting with different gums or combinations of gums in your gluten-free flour blend recipes allows you to fine-tune the texture of your baked goods. For instance, some bakers prefer a mix of xanthan and guar gum for a specific balance of elasticity and tenderness. Researching the properties of less common gums can open up new possibilities for achieving desired results in your gluten-free baking adventures.
Conclusion: Embrace the World of Gluten-Free Baking with Flour Blends
Embarking on the journey of gluten-free baking using flour blends is an exciting and rewarding experience. By understanding the fundamental components of a gluten-free flour blend recipe – the role of different flours, starches, and binders – you gain the knowledge to tackle a wide variety of baked goods with confidence. Whether you choose to use a carefully formulated commercial blend or create your own versatile gluten-free flour blend recipe at home, you are setting yourself up for success.
Remember that successful gluten-free baking is a combination of a good gluten-free flour blend recipe, accurate measurements, proper technique, and a little patience. Don't be discouraged by initial challenges; troubleshooting is a normal part of the process. With practice and experimentation, you'll learn how different blends behave and how to adjust recipes to achieve the perfect texture and flavor. So grab your ingredients, mix up a batch of your chosen gluten-free flour blend recipe, and start creating delicious, gluten-free treats that everyone can enjoy!
Frequently Asked Questions
What is a gluten-free flour blend, and why is it important?
A gluten-free flour blend is a mixture of different gluten-free flours and starches used to mimic the properties of wheat flour. It's important because it allows individuals with gluten sensitivities or celiac disease to enjoy baked goods.
What are some common ingredients found in gluten-free flour blends?
Common ingredients include rice flour, tapioca starch, potato starch, and cornstarch. Some blends also include xanthan gum to provide structure and elasticity.
Can I substitute a gluten-free flour blend directly for wheat flour in any recipe?
While some blends are designed for 1:1 substitution, it's often not that simple. You may need to adjust liquid amounts or add binding agents for optimal results.
What are some tips for achieving the best results with gluten-free flour blends?
Always measure your ingredients accurately. Experiment with different blends to find one you prefer. Don't overmix the batter, and consider adding extra moisture to prevent dryness.
Where can I find reliable gluten-free flour blend recipes?
Websites like BakeWithEase.com offer a variety of tested gluten-free flour blend recipes. Look for recipes that provide detailed instructions and tips for success.
Final Reflection: Embracing the Art of Gluten-Free Baking
The journey of mastering gluten-free flour blends is not just about creating delicious baked goods; it is a testament to our evolving culinary landscape. As more individuals embrace gluten-free lifestyles, the demand for innovative and versatile flour blends has surged, making it essential to understand their unique properties and applications. In a world where dietary restrictions are becoming increasingly common, the ability to bake perfectly with gluten-free ingredients is a skill that empowers both home bakers and professional chefs alike.
The influence of gluten-free baking extends beyond the kitchen, fostering a sense of community and inclusivity among those with dietary needs. As we share our gluten-free flour blend recipes, we create spaces where everyone can enjoy the pleasures of baking, regardless of their dietary restrictions. Baking is both an art and a science, and gluten-free baking challenges us to innovate and adapt.
This ongoing evolution not only enriches our culinary experiences but also encourages us to explore new flavors and textures, broadening our horizons in the kitchen.
As you reflect on the insights shared in this article, consider how you can incorporate these gluten-free flour blends into your own baking adventures. Embrace the challenge of experimentation, and let your creativity shine as you craft delicious treats that cater to diverse dietary needs. Remember, every bake is an opportunity to learn and grow, so take the plunge and share your gluten-free creations with the world. Together, we can celebrate the joy of baking, one gluten-free recipe at a time.
Unlock Your Gluten-Free Baking Potential!
Thanks for joining us on this gluten-free baking adventure! We hope you’ve gained valuable insights into creating delicious and consistently successful gluten-free treats. Now it's time to put your newfound knowledge into practice!
- Try out your favorite recipe using a new flour blend: Challenge yourself to experiment with a blend you haven’t tried before – the results might surprise you! This is the best way to solidify your understanding and discover your personal go-to blend.
- Share your baking triumphs (and challenges!) on social media: Use #BakeWithEaseGlutenFree to connect with other bakers and inspire the community.
- Consider experimenting with a unique gluten-free ingredient: Think beyond the basics! Try incorporating things like teff flour, tapioca starch or even almond flour into a new recipe.
Ready to bake something amazing? What's your next gluten-free baking challenge?