
The Science of Browning: How Slight Temp Adjustments Transform Your Bread Crust

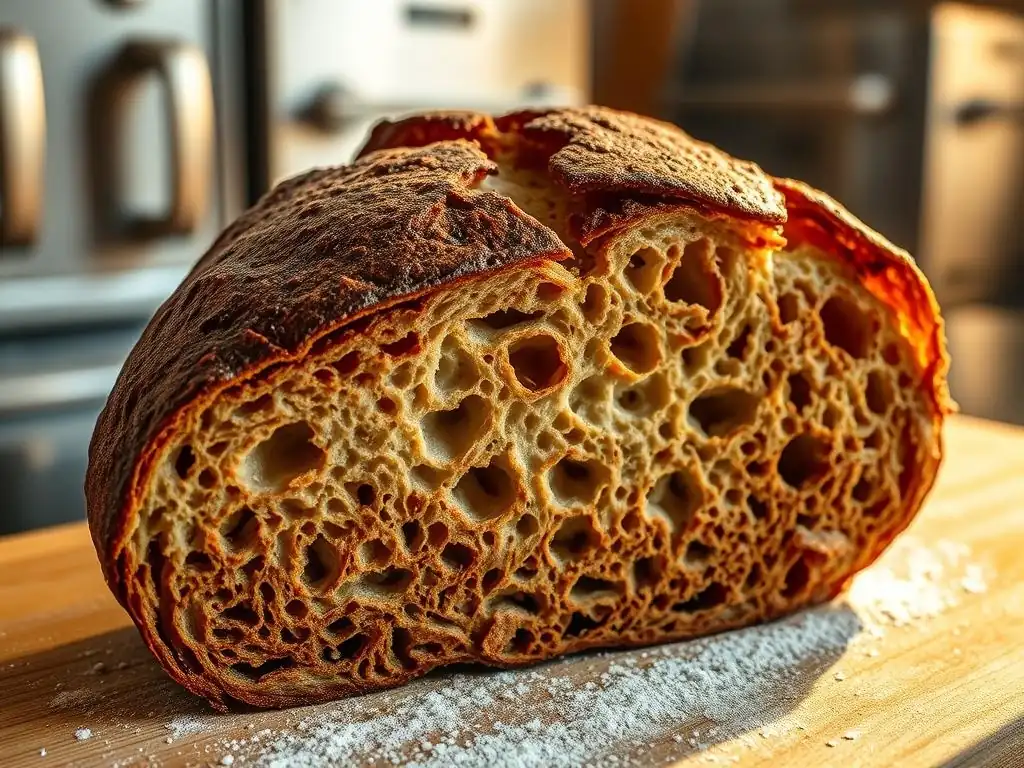
Welcome to BakeWithEase, your partner in creating delicious baked goods! Ever wondered how to achieve that perfect, golden-brown crust on your bread? It's more than just heat – it's a fascinating dance of chemistry and technique. Dive into our latest article to unlock the secrets of how to brown bread crust and discover how even slight temperature adjustments can completely transform your baking. Get ready to elevate your bread-making game!
- The Science of Browning: How Slight Temp Adjustments Transform Your Bread Crust - BakeWithEase
- Understanding Bread Crust Browning: The Maillard Reaction and Caramelization
- Temperature's Crucial Role in Achieving the Ideal Bread Crust Color
- Mastering Bread Crust Browning: Practical Tips and Techniques
- Troubleshooting Bread Crust Browning Issues: Common Problems and Solutions
- Different Bread Types, Different Browning Strategies
- Advanced Techniques for Perfect Bread Crust Browning
- Beyond Color: The Connection Between Bread Crust Browning and Flavor
- Conclusion: Mastering the Art of Bread Crust Browning for Baking Success
-
Frequently Asked Questions
- How does temperature affect the browning of bread crust?
- What is the Maillard reaction and why is it important for bread browning?
- Can I use milk or egg washes to enhance bread crust browning?
- How does the type of flour used impact the browning of bread crust?
- What role does humidity play in achieving the perfect bread crust color?
- Final Reflection: The Golden Crust and the Art of Precision
- Unlock Your Crust's Potential: Master the Art of Browning
The Science of Browning: How Slight Temp Adjustments Transform Your Bread Crust - BakeWithEase
Understanding Bread Crust Browning: The Maillard Reaction and Caramelization
What is the Maillard Reaction in Bread Baking?
The Maillard reaction is a complex chemical dance that occurs when amino acids and reducing sugars in your bread dough are heated. This reaction starts happening at temperatures around 140°C (284°F) and accelerates rapidly as the temperature increases. It's responsible for creating hundreds of different flavor compounds and, crucially, the characteristic golden-brown color on your bread crust. Think of the aroma of freshly baked bread – much of that comes from the Maillard reaction.
This reaction isn't just about color; it significantly contributes to the depth and complexity of the crust's flavor profile. Without it, your bread crust would remain pale and bland. The moisture content of the dough surface also plays a role; the reaction can only occur effectively once the surface moisture has evaporated, allowing the temperature to rise sufficiently. Understanding this reaction is key to mastering how to brown bread crust effectively.
Caramelization's Role in Bread Crust Color and Flavor
Caramelization is another vital process contributing to the beautiful brown crust on your bread, particularly in recipes containing sugars (like enriched doughs). This reaction involves the browning of sugars themselves when heated to high temperatures, typically starting around 160°C (320°F) for sucrose, but varying depending on the specific sugar type present in the dough. As sugars break down under heat, they form new compounds that add nutty, toasty, and slightly bitter notes, alongside the rich brown hues.
While the Maillard reaction involves proteins and sugars, caramelization is purely the browning of sugars. In many bread types, especially those with minimal added sugar, caramelization plays a lesser role than the Maillard reaction. However, in sweet breads or brioche, it contributes significantly to both the dark brown color and the sweet, complex flavors of the crust. Achieving that desirable brown crust often relies on both processes working together.
The Interplay Between Maillard Reaction and Caramelization for Perfect Browning
For most types of bread, the perfect brown crust is a result of the simultaneous occurrence and interaction of both the Maillard reaction and caramelization. As your oven temperature climbs, the surface of the dough dries out, and its temperature rises. First, the Maillard reaction begins around 140°C (284°F), starting to develop those initial golden tones and complex flavors. As the temperature continues to rise above 160°C (320°F), particularly on the driest parts of the crust, caramelization kicks in, adding deeper brown colors and further flavor nuances.
The balance between these two reactions dictates the final color and flavor of your bread crust. A slightly lower temperature might favor Maillard, resulting in a lighter golden-brown. A higher temperature will accelerate both, potentially leading to a darker, more intensely flavored crust where caramelization plays a more prominent role. Understanding this interplay is fundamental to controlling how to brown bread crust to your desired level.
Temperature's Crucial Role in Achieving the Ideal Bread Crust Color
How Oven Temperature Affects the Maillard Reaction in Bread
Oven temperature is arguably the most critical factor in controlling the Maillard reaction in bread baking. As mentioned, the reaction starts at around 140°C (284°F), but it truly gets going and creates significant browning and flavor compounds at higher temperatures, typically above 160°C (320°F). If your oven temperature is too low, the Maillard reaction will be slow and limited, resulting in a pale crust even if baked for a long time. The surface just won't reach the necessary temperature quickly enough.
Conversely, a higher oven temperature rapidly brings the surface of the dough up to and past the optimal temperature range for the Maillard reaction. This accelerates the process, leading to quicker and more intense browning. For instance, baking a standard loaf at 220°C (430°F) will result in a much faster and deeper brown crust development compared to baking the same loaf at 180°C (350°F). The higher heat drives the chemical reactions that create color and flavor more efficiently on the crust surface.
The Impact of High Temperatures on Bread Crust Browning
Baking bread at high temperatures, often starting around 230-250°C (450-480°F), is a common technique for achieving a thick, crispy, and deeply colored crust. The intense initial heat rapidly evaporates surface moisture, allowing the crust temperature to rise quickly. This accelerates both the Maillard reaction and caramelization, leading to rapid browning. This method is frequently used for lean doughs like baguettes or rustic loaves baked in Dutch ovens, where a substantial crust is desired.
However, high temperatures require careful management. While they promote excellent crust development, they can also lead to the crust browning too quickly before the interior of the loaf is fully cooked. This can result in a loaf with a beautiful dark crust but a dense or undercooked crumb. Bakers often start at a high temperature for the first 10-20 minutes to set the crust, then reduce the temperature to allow the interior to finish baking without the crust burning. This temperature adjustment is a key strategy for how to brown bread crust without sacrificing the crumb.
The Effects of Low Temperatures on Bread Crust Development
Baking bread at lower temperatures, typically between 160°C and 180°C (320°F and 350°F), results in a slower, less intense crust development. At these temperatures, the Maillard reaction and caramelization proceed much more gradually. The crust will take longer to brown, and the final color will likely be lighter, ranging from a pale gold to a light tan, even after a long bake. The crust also tends to be thinner and less crisp compared to bread baked at higher temperatures.
While lower temperatures are generally less effective for achieving a dark, robust crust, they can be beneficial for certain types of bread, such as enriched loaves that contain significant amounts of sugar and fat (like challah or brioche). These ingredients promote browning at lower temperatures, and baking too hot can lead to the crust burning before the interior is done.
Lower temperatures also allow for a longer baking time without excessive crust development, which can be useful for large loaves that need extended heat penetration to cook through the center. Understanding this helps tailor your approach for how to brown bread crust depending on the recipe.
Mastering Bread Crust Browning: Practical Tips and Techniques
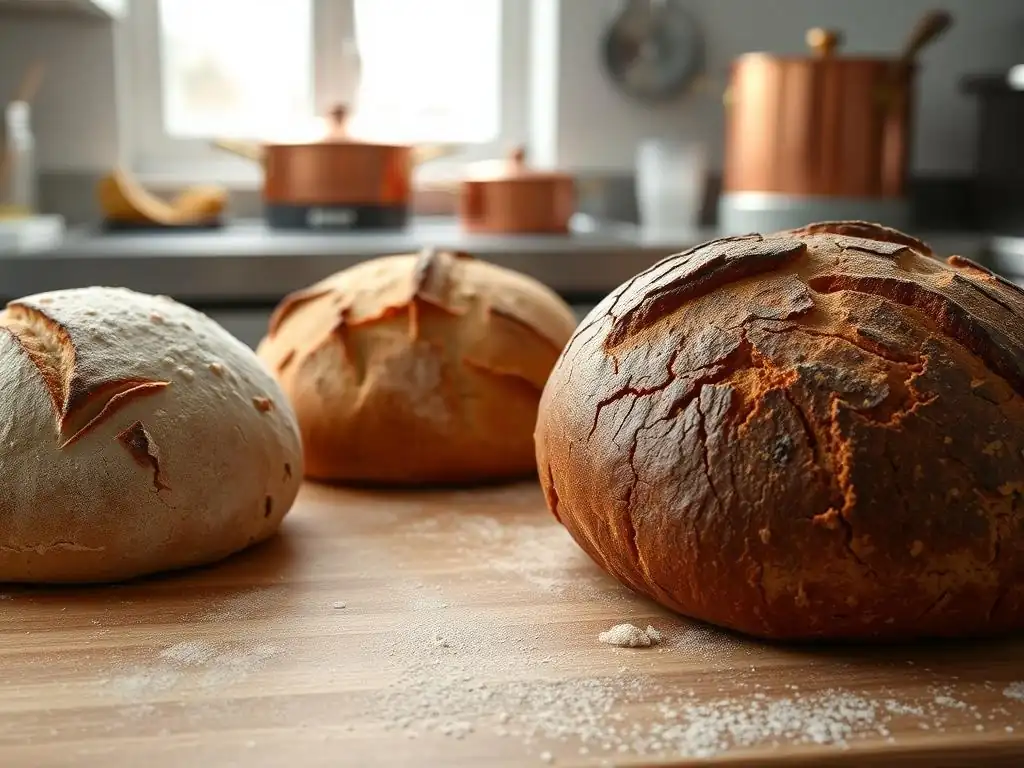
Adjusting Oven Temperature for Optimal Bread Crust Color
Adjusting your oven temperature is one of the most direct ways to control how to brown bread crust. A common technique is the "high-to-low" method:
- Preheat your oven (and baking surface if using one) to a high temperature, like 230-250°C (450-480°F).
- Bake the bread at this high temperature for the initial phase (10-20 minutes). This rapid heat sets the crust and initiates strong browning.
- Reduce the oven temperature to a moderate range, typically 190-210°C (375-410°F), for the remainder of the baking time. This allows the interior to cook through without the crust becoming too dark or burnt.
Conversely, if you're baking a delicate loaf or one rich in sugar, you might start at a moderate temperature and potentially increase it slightly towards the end if the crust isn't browning enough, though this is less common than starting high. Always monitor your bread closely, especially in the last 15-20 minutes, as browning can accelerate quickly.
The Importance of Steam in Bread Crust Formation
Steam plays a crucial, albeit indirect, role in how to brown bread crust effectively. In the initial stages of baking, steam in the oven atmosphere keeps the surface of the dough moist and elastic. This moisture prevents a hard crust from forming too early, allowing the loaf to expand fully (oven spring) before the crust sets. More importantly, the moist surface delays the point at which the crust temperature rises above 100°C (212°F).
By delaying this temperature rise, steam extends the period during which enzymes in the dough are active. These enzymes break down starches into sugars, providing more "fuel" for the Maillard reaction and caramelization once the surface eventually dries and heats up. A steamy environment ensures the crust remains pliable for expansion and promotes a thinner, crispier crust that browns beautifully once the steam dissipates. Methods to create steam include using a Dutch oven, placing a tray of hot water in the oven, or spraying the oven walls.
Using Egg Washes and Milk Washes for Enhanced Bread Crust Browning
Applying a wash to the surface of your bread dough before baking is a simple yet effective technique to influence crust color and texture.
- Egg Wash: A wash made from beaten egg (sometimes mixed with a little water or milk) provides proteins and sugars that significantly enhance the Maillard reaction and caramelization. It results in a glossy, deep golden-brown crust. A whole egg wash gives the richest color, while an egg white wash provides gloss without as much color, and an egg yolk wash gives a deep yellow-orange hue.
- Milk Wash: A wash of milk (or cream) provides lactose (a sugar) and some protein. It encourages browning through both Maillard and caramelization, resulting in a soft, matte, golden-brown crust.
These washes work by providing additional reactants directly on the surface, promoting more intense browning at the temperatures used for baking. They are particularly useful for enriched breads or rolls where a beautiful, even golden finish is desired, making it easier to achieve that perfect brown crust.
The Role of Sugar and Fat in Bread Crust Browning
The composition of your dough also significantly impacts how to brown bread crust.
- Sugar: Doughs with added sugar (like brioche, challah, or cinnamon rolls) brown much more readily than lean doughs (like baguettes or standard sourdough). The added sugar directly participates in caramelization and also provides more reducing sugars for the Maillard reaction. This is why sweet doughs often need to be baked at lower temperatures or covered partway through to prevent the crust from burning before the interior is cooked.
- Fat: Fats (like butter or oil) contribute to a tender crumb but also affect the crust. While not directly participating in Maillard or caramelization, fat can inhibit gluten development, leading to a softer crust. It can also help distribute heat and contribute to a richer color, though its primary effect on browning is less direct than sugar.
Recipes for enriched doughs containing 5-15% sugar by flour weight, for example, will brown significantly faster than a lean dough with 0-2% sugar. Adjusting baking time and temperature based on the sugar and fat content is crucial for achieving the desired brown crust without over-browning.
Troubleshooting Bread Crust Browning Issues: Common Problems and Solutions
My Bread Crust is Too Pale: Causes and Solutions
A pale bread crust is a common issue, indicating that the Maillard reaction and caramelization haven't progressed sufficiently.
- Causes:
- Oven temperature too low.
- Baking time too short.
- Insufficient steam in the initial phase (leading to premature crust set and limited expansion/sugar development).
- Dough surface too wet throughout the bake (steam is good initially, but the surface needs to dry to brown).
- Lack of sugar or fat in a lean dough baked at moderate temperatures.
- Oven not properly preheated.
- Solutions:
- Increase oven temperature, perhaps by 10-20°C (20-40°F). Verify your oven temperature with an oven thermometer.
- Extend baking time, checking for doneness with an internal thermometer (usually 93-99°C / 200-210°F for most breads).
- Ensure adequate steam for the first 15-20 minutes.
- Avoid covering the bread for too long if using steam methods like a Dutch oven; remove the lid to allow the crust to dry and brown.
- For lean doughs, ensure high enough initial temperature. For richer doughs, consider a wash.
- Always preheat your oven for at least 30-60 minutes.
My Bread Crust is Too Dark: Preventing Over-Browning
An overly dark or burnt crust means the browning reactions went too far, often due to excessive heat or time. This can impart bitter, undesirable flavors.
- Causes:
- Oven temperature too high.
- Baking time too long.
- Too much sugar or fat in the dough for the temperature used.
- Bread placed too close to a heating element.
- Egg or milk wash applied too early or too heavily on a high-temperature bake.
- Solutions:
- Reduce oven temperature, perhaps by 10-20°C (20-40°F).
- Reduce baking time; check for doneness sooner.
- If using a high-to-low temperature method, reduce the initial high-temp phase duration or lower the initial temperature slightly.
- If the crust is browning too quickly, cover the bread loosely with aluminum foil for the remainder of the bake.
- Avoid placing bread on the very top or bottom rack if your oven has hot spots near elements.
- Adjust wash usage or omit it on very rich doughs baked hot.
Achieving Even Browning: Addressing Uneven Oven Temperatures
Sometimes, your bread browns perfectly on one side but remains pale on the other, or the top browns faster than the bottom. This is usually due to uneven heat distribution in your oven.
- Causes:
- Oven hot spots (most ovens have them).
- Crowding the oven with too many loaves or trays.
- Bread placed too close to oven walls or heating elements.
- Fan in a convection oven blowing unevenly.
- Solutions:
- Rotate the bread halfway through the baking time (e.g., turn the loaf 180 degrees). Do this carefully to avoid losing oven heat.
- Use an oven thermometer to identify hot spots and avoid placing bread there.
- Ensure adequate space around the loaf for heat circulation.
- If using a convection oven, try baking without the fan if unevenness is a persistent issue, or adjust baking time and temperature accordingly.
- Using a baking stone or steel can help provide more even and intense heat from the bottom, promoting better sole browning.
Different Bread Types, Different Browning Strategies
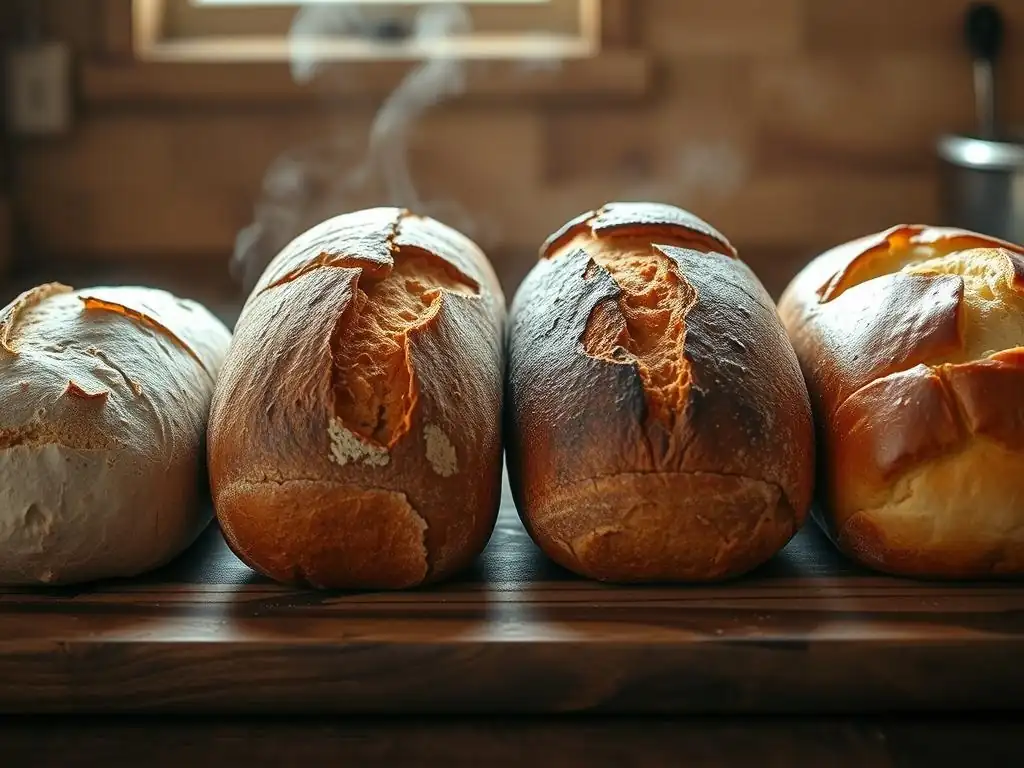
Browning Sourdough Crust: Specific Temperature Considerations
Achieving that signature crackly, deeply browned sourdough crust often relies on high heat and steam. Sourdough is typically a lean dough (flour, water, salt, starter), meaning it lacks added sugars and fats that promote easy browning. Therefore, higher temperatures are necessary to drive the Maillard reaction sufficiently.
A common strategy for how to brown sourdough crust involves baking in a preheated Dutch oven.
- Preheat oven and Dutch oven to 230-250°C (450-480°F).
- Bake with the lid on for the first 20-30 minutes. The trapped steam creates a perfect environment for oven spring and delays crust setting.
- Remove the lid and continue baking at a slightly reduced temperature, perhaps 220°C (425°F), for another 20-30 minutes. This allows the crust to dry out and the high heat promotes rapid browning and crisping.
This two-stage temperature approach, combined with initial steam, is ideal for developing the desired texture and color on sourdough.
Achieving a Golden-Brown Crust on Enriched Breads
Enriched breads, like brioche, challah, or dinner rolls, contain significant amounts of sugar, fat (butter, oil), and often eggs and milk. These ingredients dramatically change how the crust browns. Due to the higher sugar content, these doughs brown much more readily and at lower temperatures than lean doughs.
- Typically, enriched breads are baked at moderate temperatures, ranging from 170-190°C (340-375°F). Baking too hot will cause the crust to burn before the interior is cooked.
- Washes (egg or milk) are frequently used to enhance the golden color and provide a beautiful finish.
- Baking time is crucial; these breads can go from perfectly golden to burnt very quickly once browning starts.
The strategy here is lower heat, potentially shorter bake times, and often the use of washes to control and enhance the browning process without overdoing it. Mastering how to brown bread crust on enriched doughs is about managing their inherent tendency to brown quickly.
Browning Crusts on Gluten-Free Breads: Unique Challenges and Solutions
Gluten-free breads present unique challenges for crust development and browning. Without gluten, the structure is different, and the dough often contains alternative flours and starches that may not react in the same way as wheat flour during baking. Achieving a satisfying brown crust can be more difficult.
- Gluten-free doughs often retain more moisture on the surface, which can inhibit browning.
- The types of proteins and starches available for Maillard and caramelization reactions differ from wheat.
- The crumb structure might be denser, requiring longer bake times at potentially lower temperatures to cook through, which can conflict with crust development.
To improve browning in gluten-free breads:
- Ensure the surface is not excessively wet before baking.
- Consider adding a small amount of sugar or a liquid sweetener to the dough if the recipe allows, as this aids caramelization.
- Using an egg or milk wash can significantly help achieve a better color.
- Baking in a loaf pan can help support the structure while focusing heat on the top crust.
- Experiment with slightly higher temperatures towards the end of the bake if the interior is cooked but the crust is pale, but watch carefully to prevent burning.
Advanced Techniques for Perfect Bread Crust Browning
Using a Baking Stone or Dutch Oven for Superior Crust
Using a baking stone, steel, or Dutch oven are excellent methods for achieving a professional-quality brown crust, especially for lean, rustic loaves.
- Baking Stone/Steel: These surfaces are preheated in the oven and provide intense, even heat transfer to the bottom of the loaf. This results in rapid oven spring and a well-developed, crisp bottom crust (the 'sole'). The radiant heat also contributes to overall browning. A baking steel heats up faster and retains more heat than a stone, often yielding an even better crust.
- Dutch Oven: As mentioned for sourdough, a preheated Dutch oven creates a steamy micro-environment around the loaf for the first part of the bake. This promotes maximum oven spring and delays premature crust setting. When the lid is removed, the high heat of the pot walls and the oven rapidly brown the crust. This method is particularly effective for mimicking professional deck ovens at home and consistently produces a beautiful, brown crust.
Both techniques help maintain a more stable and higher temperature around the bread, crucial for driving the browning reactions effectively.
The Benefits of Preheating Your Oven Properly
Properly preheating your oven is non-negotiable for achieving a good brown crust. Simply waiting for the oven's indicator light or beep doesn't mean the oven (or your baking surface/Dutch oven) has reached the target temperature and, critically, absorbed enough heat energy.
- A properly preheated oven, often requiring 30-60 minutes after reaching the set temperature, ensures that there is enough thermal mass (heat stored in the oven walls, racks, and any baking surface) to immediately transfer intense heat to the dough.
- This initial burst of heat is vital for rapid oven spring and quickly bringing the crust surface temperature up to where the Maillard reaction and caramelization can occur efficiently.
- Baking bread in an oven that hasn't fully preheated will result in slower oven spring, a thicker, less desirable crust, and often a paler color because the browning reactions don't kick off quickly enough.
Always allow ample time for your oven and equipment to preheat fully before loading your bread. This simple step significantly impacts how to brown bread crust successfully.
Experimenting with Different Baking Times for Desired Crust Color
While temperature sets the rate of browning, baking time determines how long those reactions have to occur. Once the internal temperature of your bread reaches the desired doneness (typically 93-99°C / 200-210°F for most non-enriched loaves), you can continue baking for a few extra minutes solely to deepen the crust color, if the crust is still pale.
Conversely, if your crust is browning too quickly but the interior isn't done, you must reduce the temperature or cover the loaf, extending the time at a lower heat rather than simply continuing at the problematic temperature. Experimentation is key. Keep notes on your baking times, temperatures, and the resulting crust color and internal doneness. This will help you fine-tune your approach for your specific oven and recipes, allowing you to control how to brown bread crust precisely to your preference.
Beyond Color: The Connection Between Bread Crust Browning and Flavor
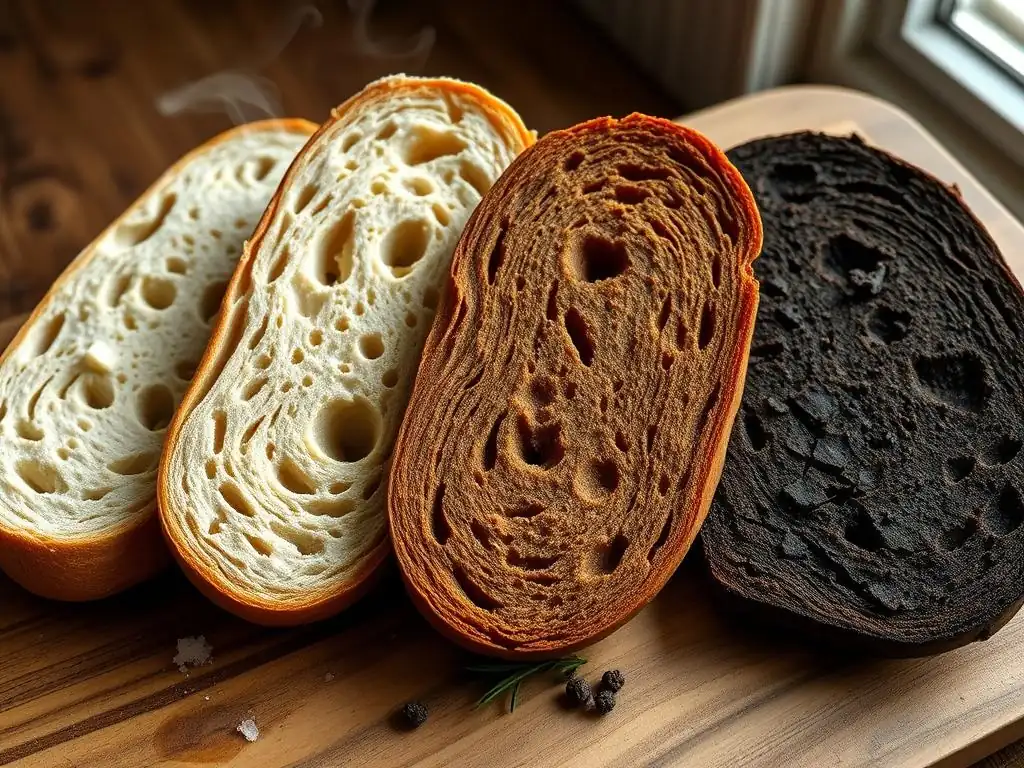
How Browning Enhances Bread Flavor
The Maillard reaction and caramelization do more than just create color; they are powerhouses of flavor development in bread crust. The hundreds of new compounds formed during these reactions contribute toasted, nutty, roasted, and sometimes slightly sweet or bitter notes that are absent in the pale, unbrowned interior crumb. These complex flavors are what make a well-baked crust so appealing.
Think of the difference between a raw potato and a roasted one. The roasting process, which involves Maillard reactions and caramelization on the surface, unlocks a whole new dimension of flavor. The same principle applies to bread. The brown crust provides a significant portion of the overall flavor experience of a loaf, complementing the milder taste of the crumb. Achieving a good brown crust is essential for a flavorful loaf, not just an aesthetically pleasing one.
The Importance of Balancing Color and Flavor Development
While a dark brown crust often indicates significant flavor development, there's a critical balance to strike. Over-browning can lead to burnt flavors that are harsh and bitter, overpowering the delicate flavors of the crumb. The goal is to achieve a rich, appealing brown color that corresponds to the peak of desirable flavor compounds, just before the off-flavors of burning take over.
This balance is achieved through careful control of temperature and time. A high initial temperature sets the crust and initiates browning rapidly, locking in potential for flavor. Then, a lower temperature finishes the bake, allowing the interior to cook through while the crust continues to develop flavor and color at a more controlled pace. This staged approach helps ensure the crust is flavorful and not burnt by the time the loaf is fully baked. Mastering how to brown bread crust perfectly means mastering this delicate balance.
Sourdough, Baguettes, Brioche: Crust Color and Flavor Profiles
Different types of bread aim for distinct crust color and flavor profiles, reflecting their composition and baking methods:
- Sourdough/Lean Doughs: Typically baked at high temperatures with steam, aiming for a robust, crackly, deeply browned crust. The flavor is complex, with toasted, slightly bitter notes from intense Maillard reactions, complementing the tang of the sourdough. A dark brown crust is often indicative of proper development.
- Baguettes: Also lean and baked hot, but often for a shorter time than a large sourdough loaf. The ideal is a thin, very crisp, golden to medium-brown crust with nutty, toasted flavors. Over-browning can make the thin crust too hard and bitter.
- Brioche/Enriched Doughs: Baked at lower temperatures due to sugar/fat content. The crust is softer, often a rich, even golden-brown, sometimes with a high gloss from a wash. The flavor is sweeter, with caramel notes from sugar browning, complementing the rich, tender crumb. A dark brown crust would indicate burning.
Understanding the expected outcome for different bread types helps guide your temperature adjustments and baking time to achieve the appropriate brown crust color and corresponding flavor profile.
Conclusion: Mastering the Art of Bread Crust Browning for Baking Success
Achieving the perfect brown crust is a hallmark of successful bread baking, transforming a simple loaf into a sensory delight. It's a process governed by the fascinating chemical reactions of Maillard and caramelization, both profoundly influenced by temperature. By understanding how to brown bread crust through careful control of oven temperature, baking time, and incorporating techniques like steam, washes, and appropriate baking surfaces, you gain the power to dictate the color, texture, and flavor of your crust.
Whether you're aiming for a deep, crackly brown on a rustic sourdough or a soft, golden hue on a tender brioche, slight adjustments in temperature can yield dramatic results. Don't be afraid to experiment, observe, and learn from each bake. With practice, you'll develop an intuitive feel for how temperature and time interact to create that ideal brown crust, elevating your baking from good to truly exceptional.
Frequently Asked Questions
How does temperature affect the browning of bread crust?
Increasing the oven temperature generally leads to a faster and darker browning of the bread crust due to accelerated Maillard reaction and caramelization. However, excessive heat can cause burning before the interior is cooked.
What is the Maillard reaction and why is it important for bread browning?
The Maillard reaction is a chemical reaction between amino acids and reducing sugars that occurs when heated. This reaction is crucial for developing the complex flavors and brown color characteristic of a well-baked bread crust.
Can I use milk or egg washes to enhance bread crust browning?
Yes, brushing the bread dough with milk or egg washes adds protein and sugar to the surface. This boosts the Maillard reaction and results in a richer, deeper brown color and a slightly glossy sheen.
How does the type of flour used impact the browning of bread crust?
Flours with higher protein content tend to brown more readily. The presence of more sugars in certain flours also contributes to a faster and more pronounced browning effect.
What role does humidity play in achieving the perfect bread crust color?
Introducing steam into the oven initially can help create a crisp, shiny crust. The steam prevents the surface from drying out too quickly, allowing for a more even and controlled browning process.
Final Reflection: The Golden Crust and the Art of Precision
The perfect bread crust, a seemingly simple thing, reveals a universe of scientific precision. A few degrees difference in oven temperature, a subtle shift in baking time – these seemingly minor adjustments hold the key to unlocking a deeply satisfying, beautifully browned exterior. This exploration into the science of browning has shown us just how much control we have over this crucial aspect of bread baking, transforming a potentially frustrating experience into a rewarding journey of culinary exploration.
The pursuit of the ideal crust has captivated bakers for centuries, a testament to the profound connection between food, craft, and the sensory experience. The subtle nuances of color, texture, and aroma – from the deep mahogany of a perfectly caramelized crust to the delicate hints of nutty sweetness – speak to a timeless pursuit of perfection. Bread is the staff of life,
they say, and I believe that the crust is its crown jewel, reflecting the care and attention poured into its creation. This journey into the science behind browning has deepened my own appreciation for this often-overlooked element, highlighting the artistry inherent in even the most fundamental of baking techniques.
Consider the power you now hold in your hands. You understand the Maillard reaction, the role of moisture, and the impact of temperature. Armed with this knowledge, you are no longer simply baking bread; you are crafting a masterpiece. Experiment with the techniques discussed, explore the subtle variations, and discover the unique magic that lies within your own oven. Embrace the journey, savor the process, and let the golden perfection of your bread crust be a testament to your newfound mastery.
Unlock Your Crust's Potential: Master the Art of Browning
Thanks for diving into the science of bread crusts! You now possess the knowledge to bake loaves with perfectly browned, flavorful exteriors. Ready to put your newfound expertise to the test?
- Bake a test loaf today: Experiment with the temperature adjustments discussed, noting the results for future bakes. This hands-on approach is the best way to master this skill.
- Share your crusty creations: Post a picture of your perfectly browned bread on social media and tag #BakeWithEaseCrust – let's see those golden beauties!
- Explore our advanced baking techniques: Dive deeper into our blog for more tips and tricks on creating exceptional bread.
What small temperature adjustment will you try first to perfect your bread's crust?